Would you like to try to print on twill tape? Okay, I say “try” because there are quite a few variables. Before I get into them, I will say that the printing that Twill Tape Guy has done for us has been great, and we’ve ironed it to be sure that it’s heat-set before washing, then washed in cold water and it’s turned out well. It loses a little color, but still looks good in my opinion. He’d be happy to help you. (And he can print in 40″ lengths. No way am I trying that myself. I’d have to explain my sudden random bald patches to people with that level of frustration.)
If you’d rather give it a go yourself, and I had to try it too, here’re some tips that I gathered while DIYing.
Materials:
– card stock
– lightweight twill tape
– adhesive tape
– computer/inkjet printer
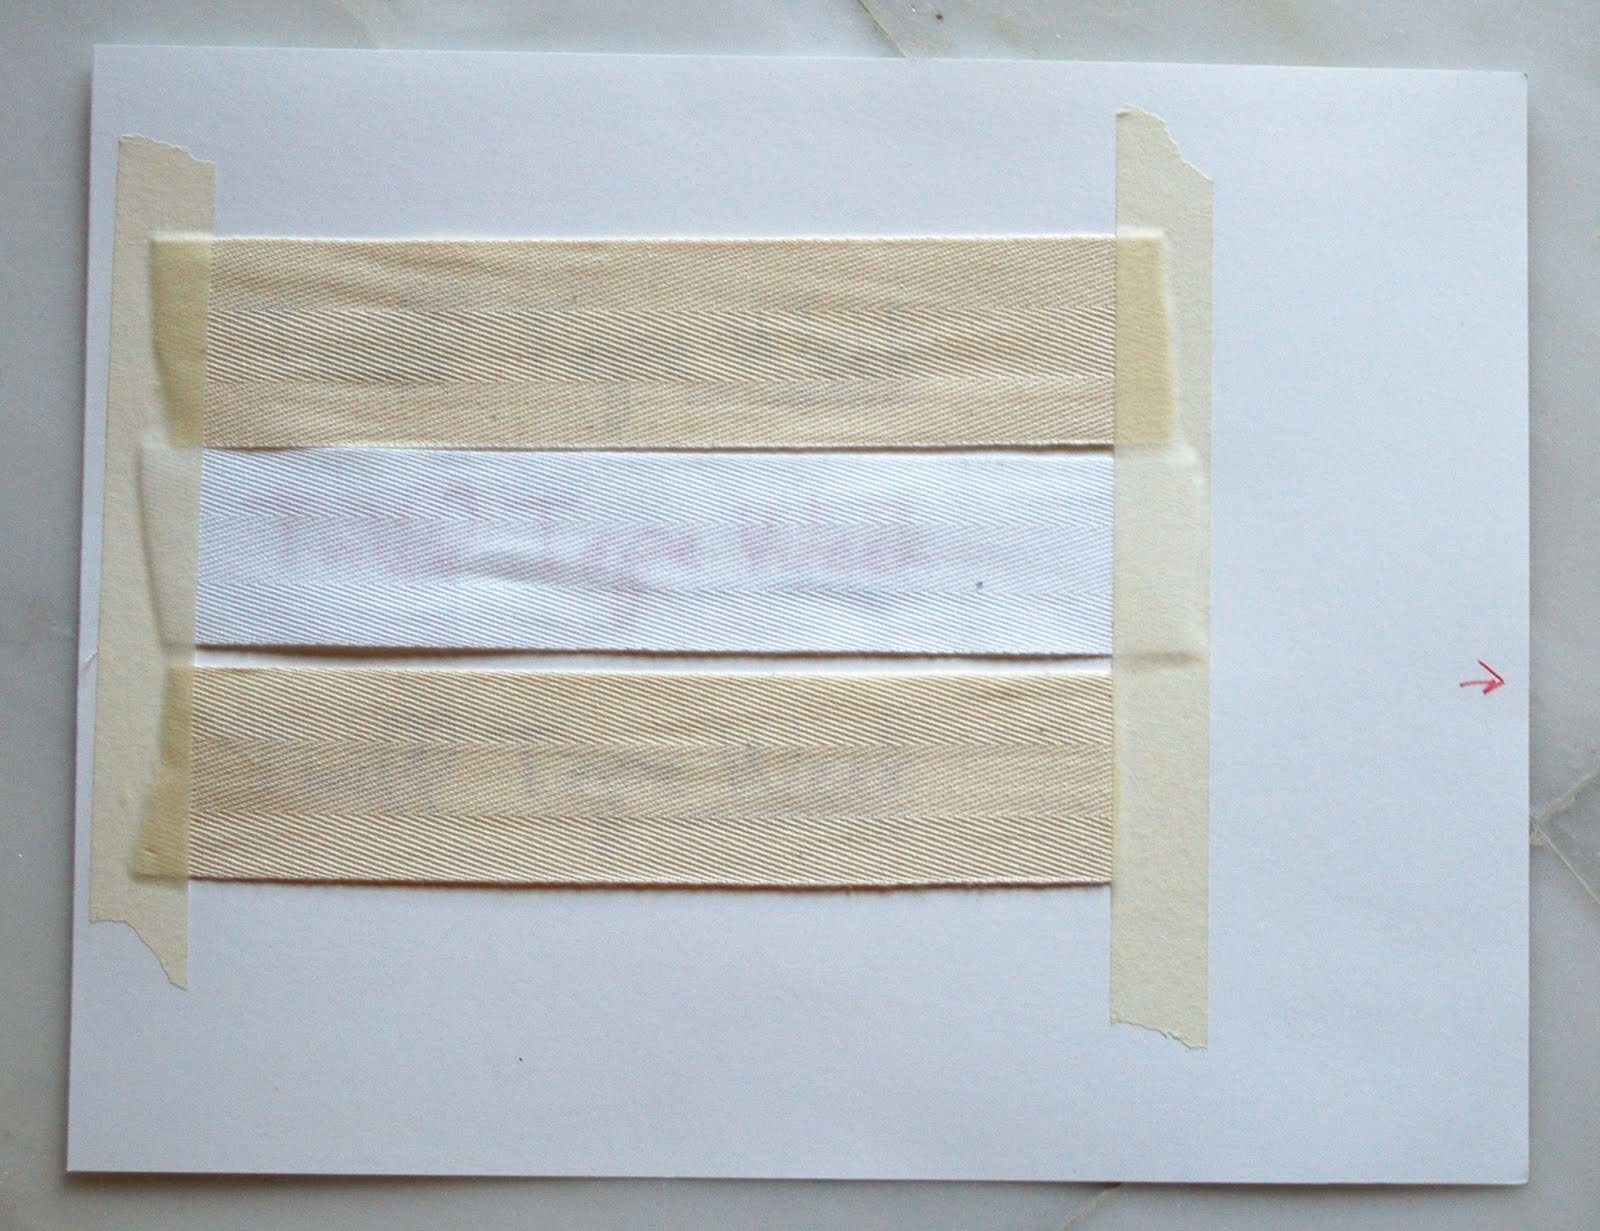
Use your fancy dancy computer to lay out what you’d like to print and print once onto card stock. I suggest leaving a healthy bit of room on the side where your paper will feed into the printer from the manual-feed tray. Depending on your printer (I have a Canon) the parts that move to grab the paper and feed it through can catch on the edges of your twill tape which can result in a paper/twill tape jam. That’s sad, sad, sad. Lots of room helps avoid that. And I suggest marking the side that feeds into your printer with an arrow. Because I always forget and do it the wrong way. And then I get super cranky. Almost tantrum cranky.

Now that you’ve got a template, carefully lay your smooth twill tape on top. If it has wrinkles, iron it first. You want this to be as smooth and flat as superhumanly possible. Carefully tape the edges down, keeping an eye on how your twill tape is lined up with your template. And be prepared to do this repeatedly, because depending on how your particular printer handles paper, it will likely line up horizontally but not necessarily vertically.
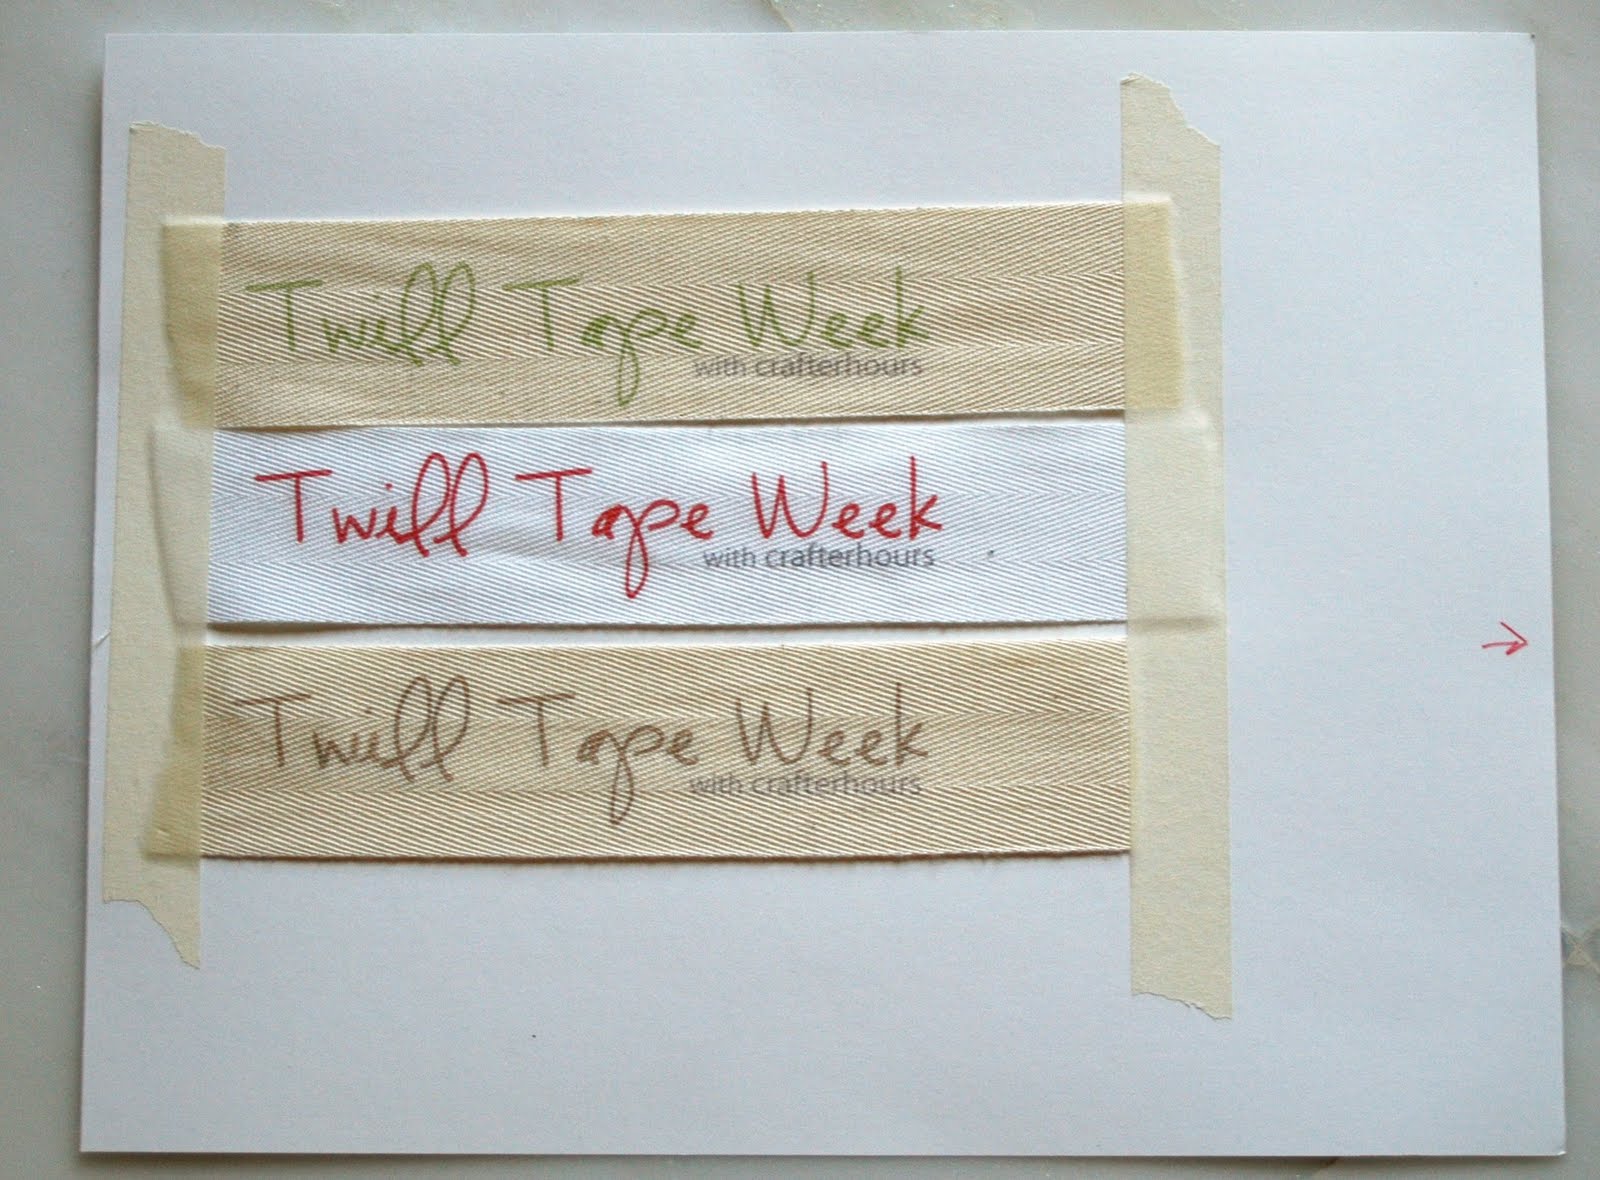
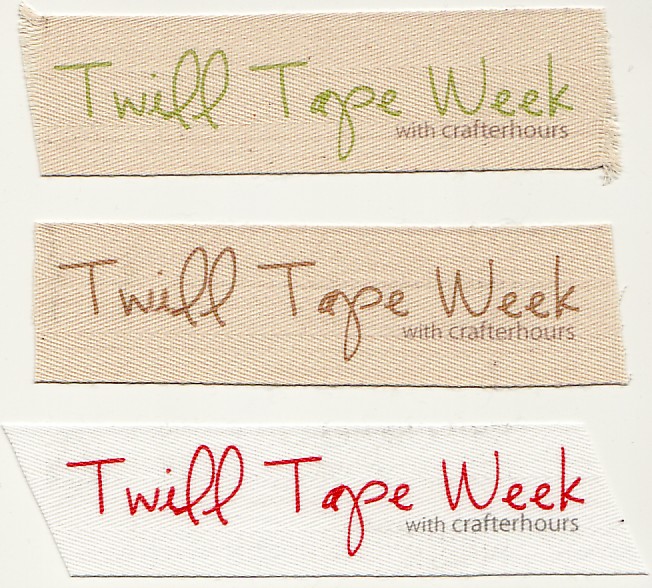
Print. Peel the tape off. Iron to heat-set. For projects that don’t require washability, you’re golden. If it needs to be washable, you’ll need to do some testing. Different printers and inks and washing machines and detergents and water will all affect the outcome.

P.S. The giveaway is still open at Everything Etsy. You can have your own stash! And make Twill Tape Guy do the printing for you!
nope I like the green, you can’t see the twill tape as well in the red, good choice!!
Oh, how cool!!! I’m totally kicking myself for dumping the inkjet printer in favor of the laser…
I linked to your tutorial on Craft Gossip Sewing:
http://sewing.craftgossip.com/tutorial-diy-printed-twill-tape/2010/04/17/
–Anne
I have had trouble finding this type of twill tape. The stuff I find is more like polyester binding tape. Where did you find yours?
Great tute! Thank you. Will be giving this a try.
This is brilliant!
I am definitely not the first person to do this. But I felt like Twill Tape Week was incomplete without a post from us about it. Susan
hmm, and here I am gluing mine down to the paper, waiting for that glue to dry, and then printing. Sometimes before the glue was all dry, maybe, which could, possibly, be why my printer sometimes has trouble picking up paper. maybe not?
but this is an awesome thing to be able to do, when you want that special ribbon or tag or something wordy to sew on to something.
guess I’ll try taping it on next time. I tend to overthink stuff.
Love the tutorial! I just was bought some twill tape at Hobby Lobby and was going to try stamping it with my small rubber stamps, but I think I’d rather print on it so I can use all my cute fonts and dingbats. Thanks so much for sharing with us!
If you want it to be washable you need to soak in vinegar
http://www.tapuz.co.il/blog/ViewEntry.asp?EntryId=1335360
Love this tutorial going to use it on my reusable sandwich and snack sacs
http://www.ecousac.com
Thanks so much!
Jo Anna
Great idea it was just what I need !
Thanks a lot…
Very nice result ! Which font did you use ? I cannot find it and really like it…
It’s CK Becky — it’s here for free: http://www.creatingkeepsakes.com/articles/CK_free_fonts
Thanks a lot, that’s wonderful for my little gift and création.
MERCI
Ha! And 6 years later, your post still rocks! Totally just ordered from the Twill Tape Guy, too, can’t wait to see how my labels come out! :)
So do you run the paper with the twill taped to it through your printer?
And this doesn’t jam the printer?
And where did you find the lightweight twill tape?
From the Twill Tape Guy! Printer was a-ok. Just taped securely onto cardstock. Definitely has to be a lightweight twill to keep the low profile though. Most of what I’ve seen in notions sections at big box stores has been lightweight though.