crafterhours

sleeping babes. crafting moms.

  • Tutorials
  • Patterns
  • Shop
  • Contact
  • Follow

Kid-Friendly Patriotic Table Runner: A Tutorial

June 30, 2010 By crafterhours 5 Comments


Do you like how I called this “Kid Friendly” as a euphemism for “embarrassingly simple”?  This is how it goes folks – when I sew, I don’t mind complicated and technical, when I no-sew, it’s going to look like a 3rd grade project, at best.

I also don’t know whether this is a true “runner”, as it only sits in the center of the table, but let’s not quibble over the name and get onto the tutorial!

(I apologize in advance for the flash photography.  This was a true “crafterhours” project.  In fact, it was “crafter” my bedtime too.)

Grab your supplies:

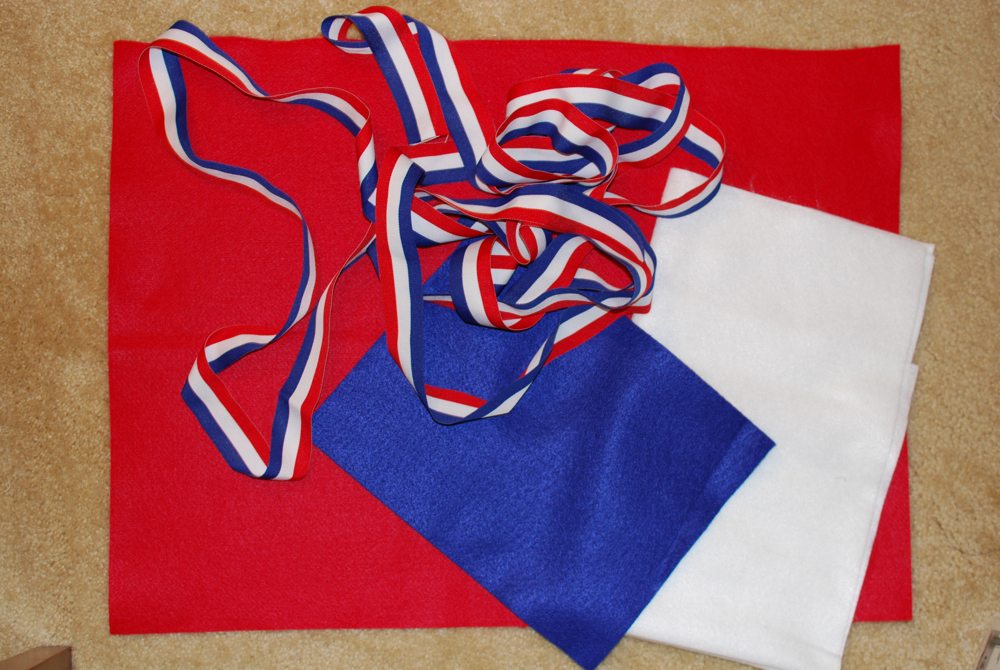
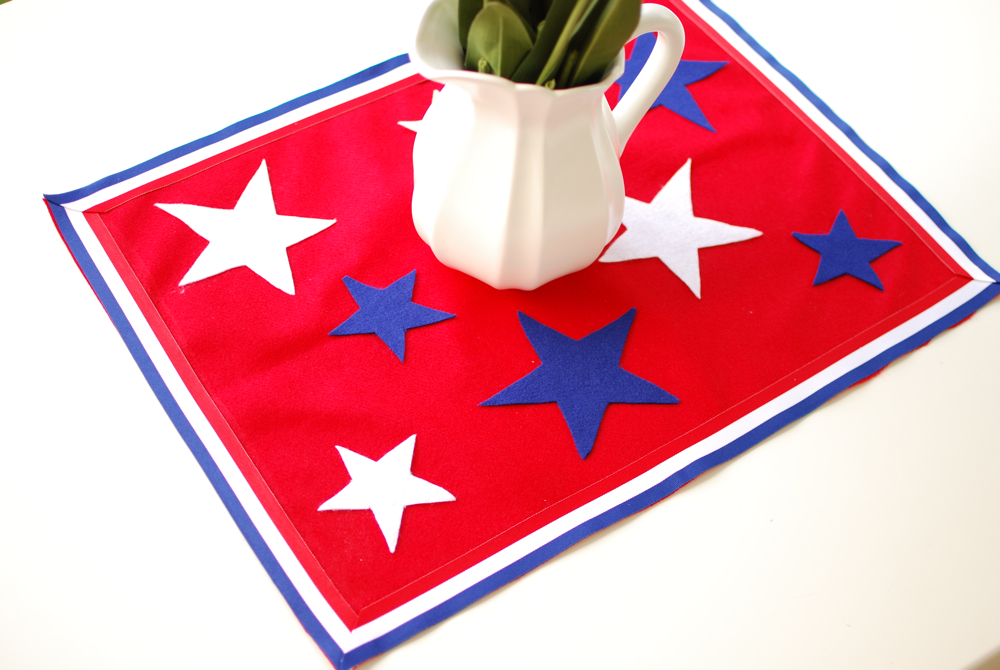
A few yards of patriotic ribbon
A large rectangle of red felt (or make it a full runner size)
Dark blue and white felt scraps
fusible tape
double-sided fusible, embroidery floss & needle, glue gun, or sewing machine, depending on how you want to affix your stars
a star template  (I just printed one out from google images after googling “star template” :)

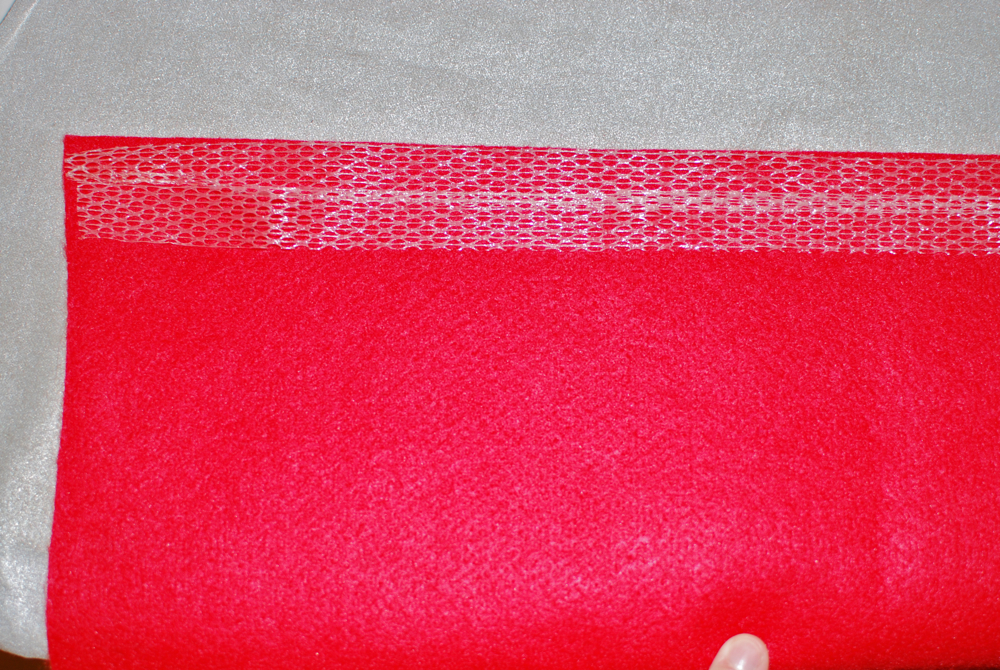
Step 1: Frame the red felt with the patriotic ribbon.  I laid down two strips of fusible tape on one side of my rectangle, you may need more or less depending on the width of your ribbon.  Then I carefully laid a length of ribbon over it and pressed it down with my iron.

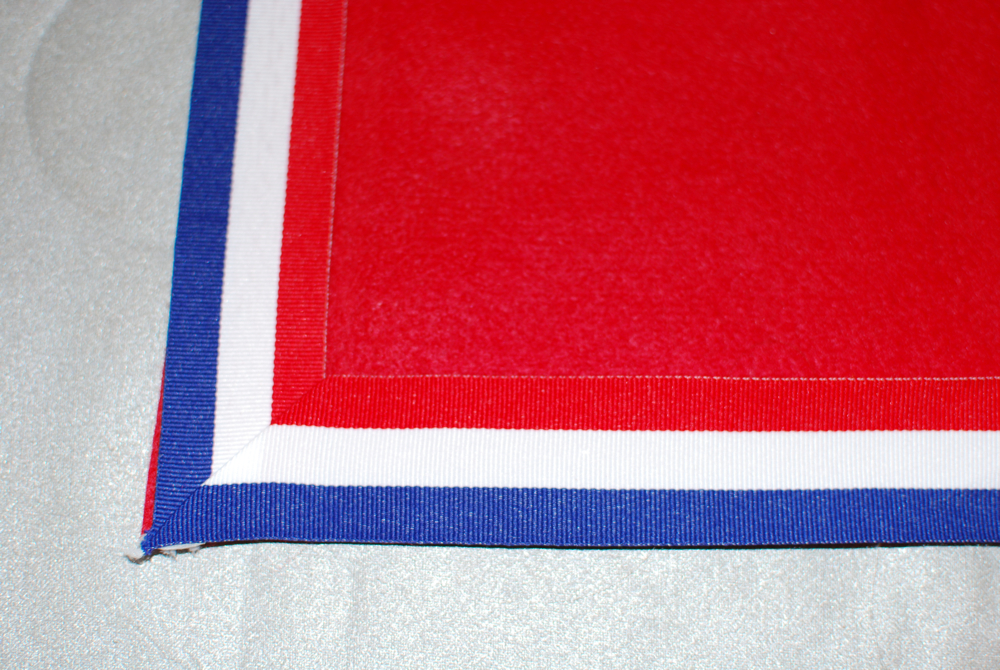
Step 2: Before you cover another side of the rectangle with ribbon, create a mitered corner in your ribbon by fusing it to itself with a small scrap of fusible tape.

Step 3: Fuse the mitered corner down over the first ribbon to make a nice neat edge.  As you see, there is a little bit of felt sticking out beyond my ribbon.  That’s fine, you can trim it later, and it’s better than having a little bit of fusible tape sticking out.  For, as Abraham Lincoln once said, “Tis better to leave a little felt to trim than to fuse one’s iron to the ironing board.”  Or something.
Continue until all 4 sides are covered.  Your last piece will have a mitered corner on each side.  At this point, I observed what I had, observed the clock, and thought that maybe I should call it finished.  But then a tiny voice in my head (who sounded suspiciously like Susan), argued that I needed to add some decoration.
This is the part where the kids can help.  Print out a star template, and cut two or three different sized stars from white and blue felt.  If you’re planning on fusing them to the runner, make sure you lay the felt over a piece of double-sided fusible before cutting out the template.  Otherwise you can hot glue them, or  hand or machine stitch them on.  Mine are just fused right now, but I plan to go over them with my machine to secure them.  On a day when I’m not expecting 8 visitors from America, perhaps.

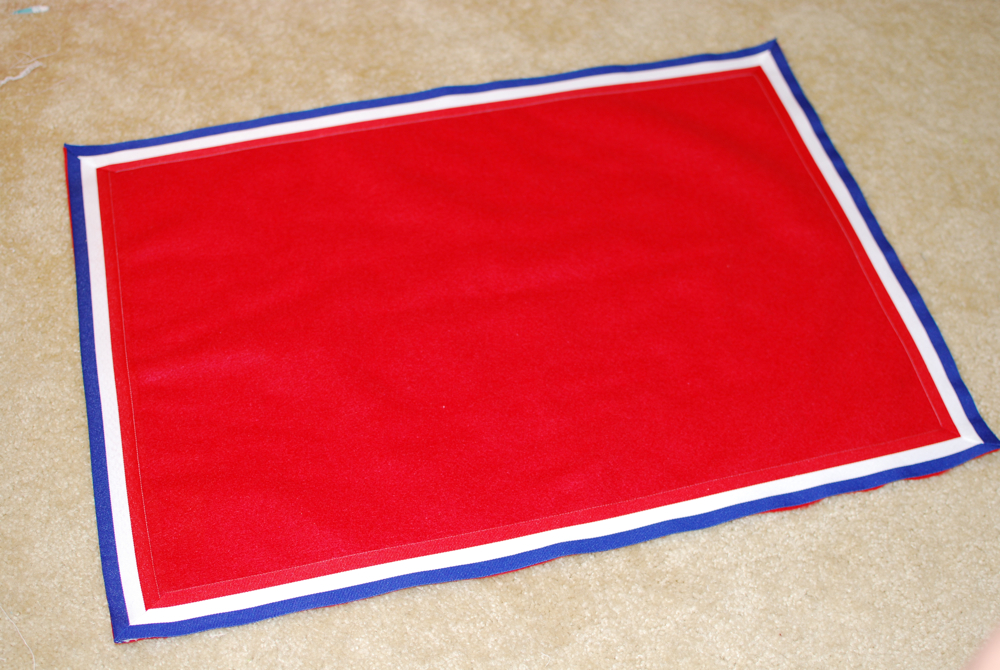
And that’s it!  Down and dirty easy last minute table decor!

Related

Filed Under: holiday, tutorial Tagged With: holiday, home decor, kid craft, no-sew, ribbon, tutorial

« Snow White: A New Take on an Old Favorite
We Trashed the Dress »

Comments

  1. Stacey says

    June 30, 2010 at 4:29 am

    Cute. It will look even cuter once you go back and do some stitching on the stars. Love the ribbon! Do you have a favorite on-line ribbon supplier. I tend to lose interest when looking at the big fabric websites and obviously don’t have affordable access here.

    Reply
  2. ificould says

    June 30, 2010 at 9:46 am

    Very cute!! Featured this post today http://ificould-ificould.blogspot.com/2010/06/patriotic-table-runner.html

    Reply
  3. corinnea says

    June 30, 2010 at 10:43 am

    Very cute!

    Reply
  4. Tanyia says

    June 30, 2010 at 12:06 pm

    very cute idea! love it!

    Reply
  5. Melissa Stramel says

    June 30, 2010 at 1:48 pm

    Hello girls. I nominated you for some blog awards. If you want to accept, check out my new post. http://melissaslilaclane.blogspot.com

    Reply

Leave a Reply Cancel reply

Search This Blog

Archives

Popular posts

  • Side Panel Shirt Refashion: A Tutorial
  • FREE Pattern: Monkey Bar Skirt
  • T-Shirt to Tank: A Tutorial by Jen from Upcycled Education
  • Racerback Dress: A Tutorial + PDF Pattern
  • A Note on Sewing Skirts for Girls
Visit Susan Yates's profile on Pinterest.

Want our posts in your inbox?

Enter your email address to subscribe to crafterhours and receive notifications of new posts by email!

Our Privacy Policy

Copyright © 2023 ·Foodie Child Theme · Genesis Framework by StudioPress · WordPress · Log in


Creative Commons License
This work is licensed under a Creative Commons Attribution-NonCommercial-ShareAlike 3.0 United States License.
»
«