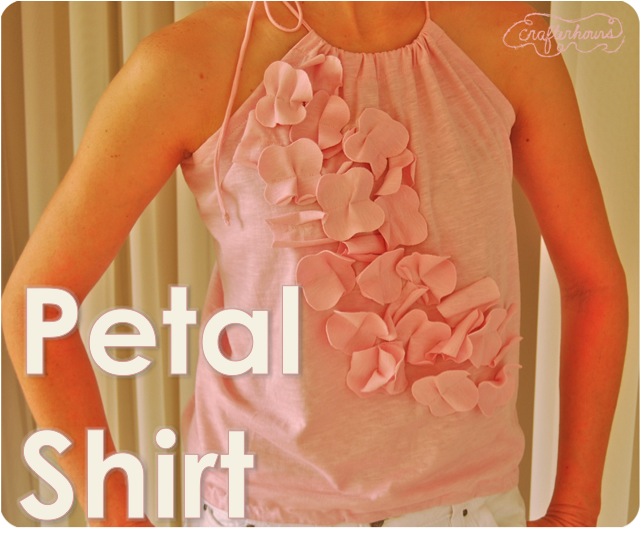
So, last time I made this shirt, I didn’t call it anything. I’m officially naming it the “Petal Shirt”. I know, creative, right? I didn’t inherit my mom’s ability to come up with funny pun-y titles.
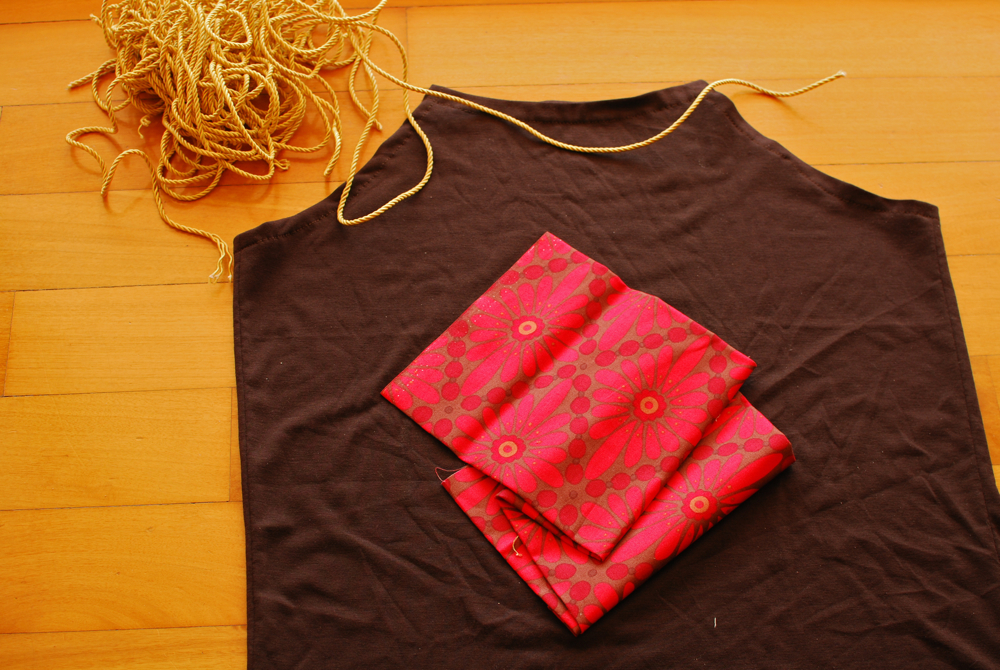
You’ll need a yard of nice soft knit, coordinating thread, some fusible interfacing, and 1/4 inch elastic. Make sure you use a ballpoint needle.
Step 1:
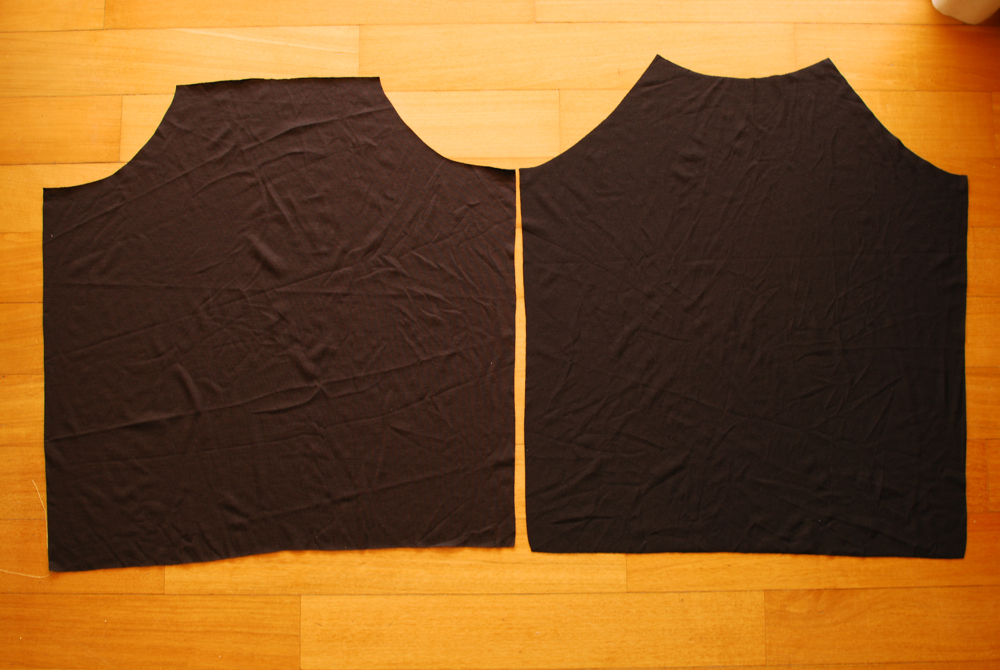
Cut out back and front shirt pieces. The width should be a few inches wider than your person on either side to allow for the drapey bottom. The length needs to allow for a casing at the neckline and hem. The back is on the left and the front is on the right below:
Step 2: Sew the back and the front together at the side seams. Press the arm curves down a half inch to the wrong side and stitch them down.

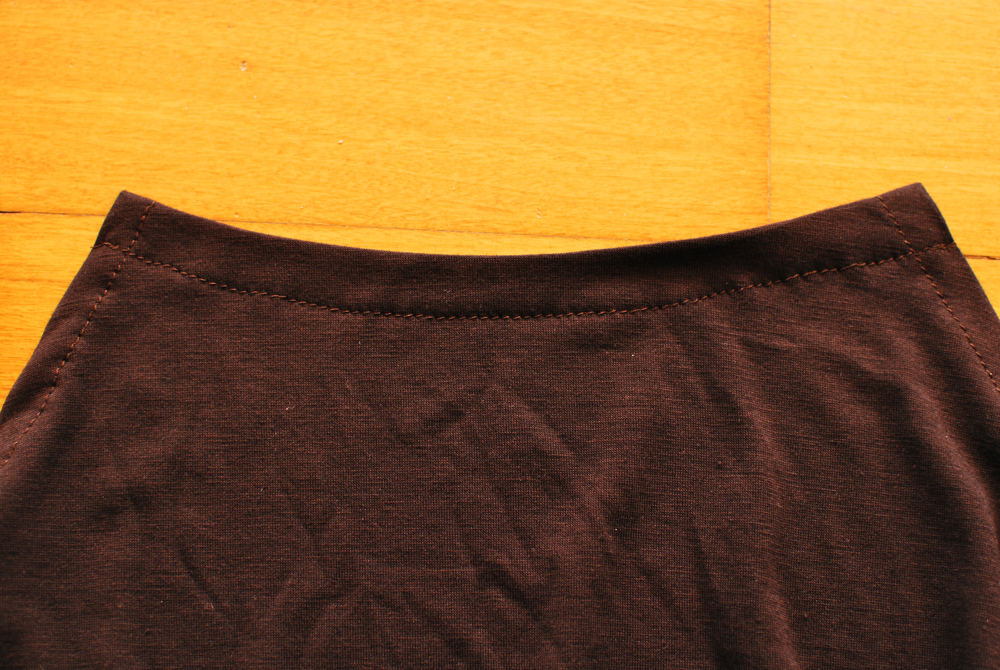
Step 3: Press the neckline of the front and back down a 1/2 inch and sew it down, creating a casing.
Step 4: Hem the bottom using a 1/2 inch seam allowance but leave an opening to thread your elastic through.

And now you’ll have this:

At this point you pretty much have a blank slate for whatever kind of embellishment you want to do. You could use colorful cording for the straps and applique coordinating fabric on the shirt:
Or you could go for a natural look with crocheted details:

But for this tutorial we’re going to stick to the petals, which brings us to…
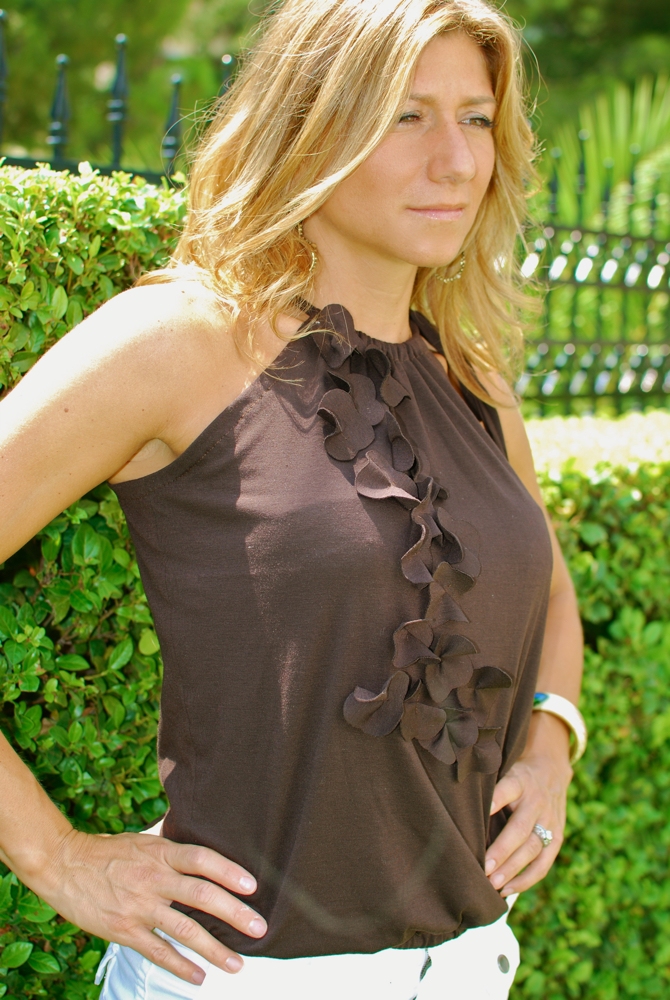
Step 5: Make petals. Fuse together two pieces of knit, wrong sides together. A fat quarter would be more than plenty, an eighth of a yard would probably be enough. From that fused knit sandwich, start cutting out petals. I cut them out in this four-leaf clover type shape. Cut as many as you like, I used 18 for this brown shirt and more for the pink one. For more “movement” on the shirt, you could cut some petals out of non-fused knit and intersperse them among the fused ones. They will tend to flutter and curl up more.

Step 6: Pin them to the shirt in a pleasing manner.
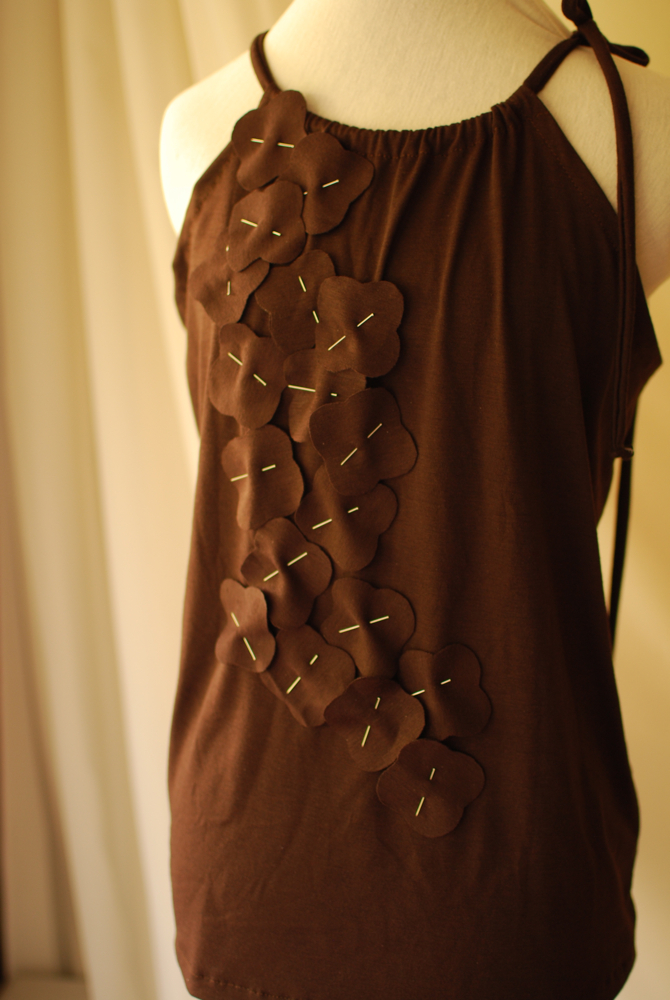
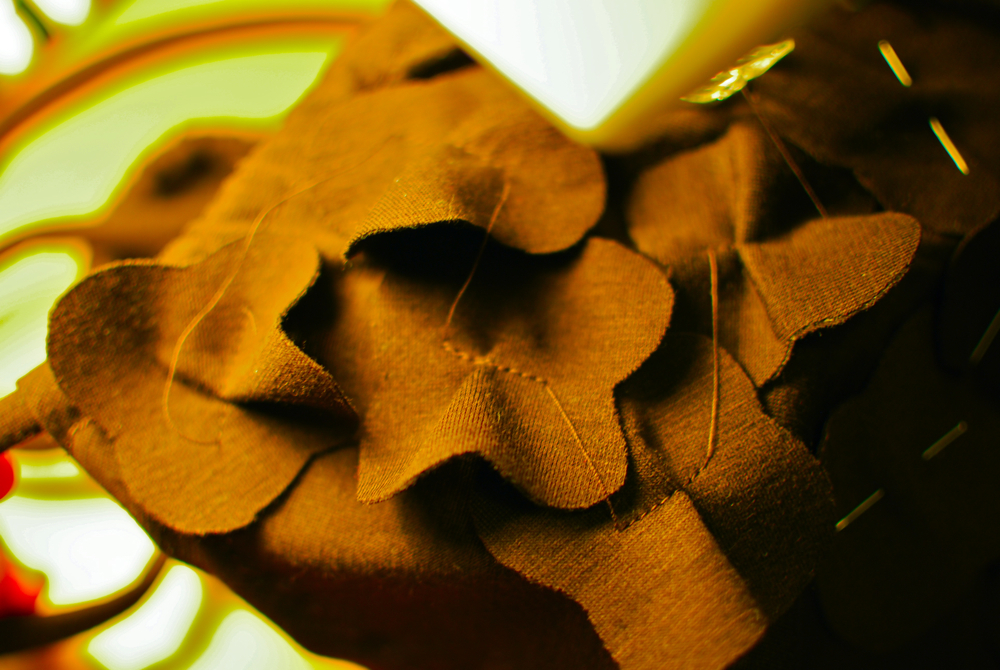
Step 7: Sew them on. As you can see, I just went from one petal to the next without cutting my thread. Make sure you backstitch at the beginning and end of each seam though. I also created a little crease in the middle of each petal before sewing them down so they wouldn’t be flat.
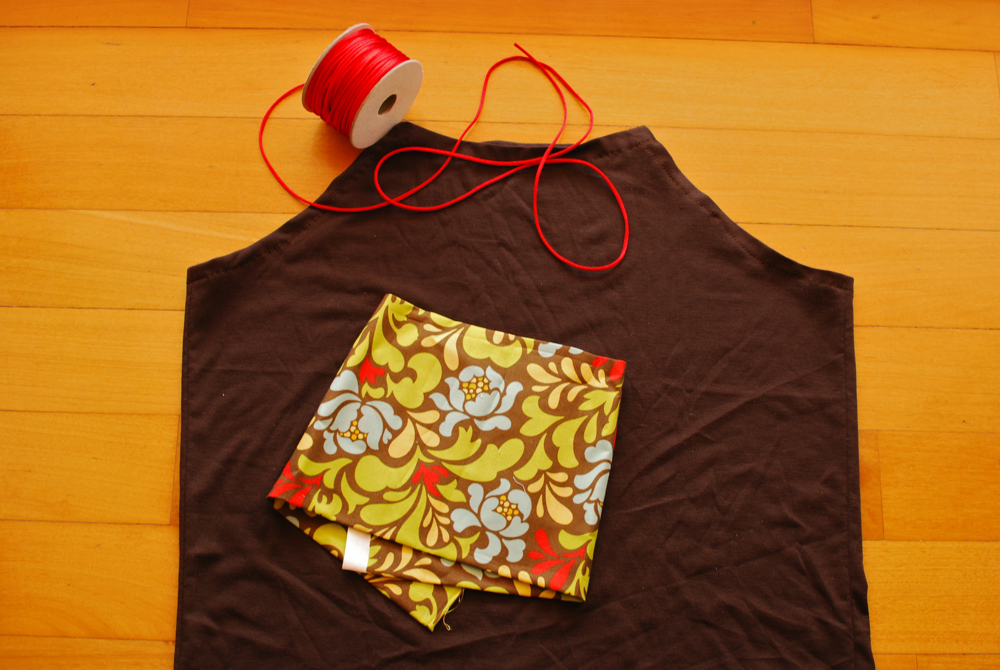
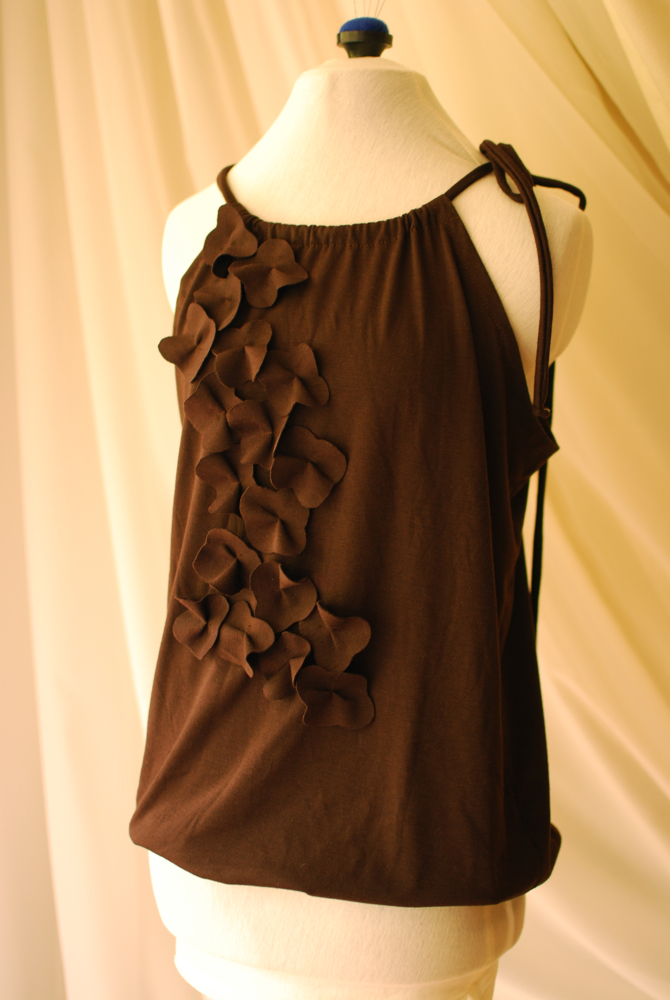
Step 8: Make your halter cord by taking a long 1 inch strip of fabric and serging or sewing the long ends right sides together. This will give you a long 1/2 inch tube. Turn the tube right-side-out, thread it through both the back and front casings, tie at the shoulder, and knot the ends.
Thread elastic through the hem casing to fit your hips.
You’re done!
This shirt was a gift for my Jennifer Aniston look-a-like friend.
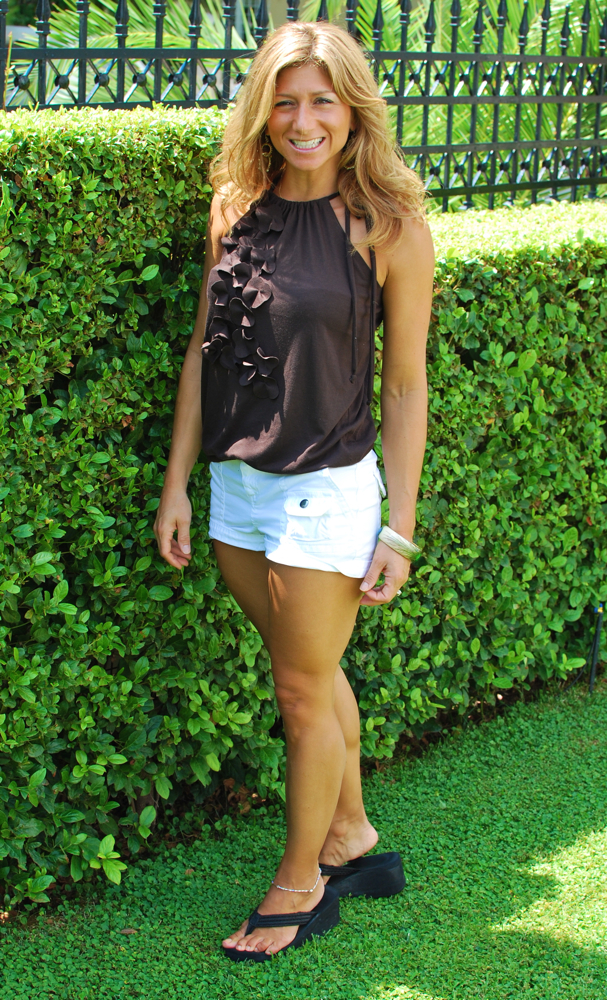
I think this shirt would be a great gift in general as it is pretty much one size fits most. The halter ties allow you to adjust the length, and by gathering the front and back casings you can make the shirt looser or tighter.
Happy Petal Shirt making!

Thanks for the tute. I think I could actually make this and have some great knit to use if the bahimouth (sp?) nursing boobs ever deflate.
Cute tutorial! I always have ideas for skirts and pants but not many shirts.
That looks simple enough…my problem is finding knits that I like. Those petals are def. easier than they look–when you first showed this I thought ‘HOW did she do that?’
Thanks for sharing!
That is SO pretty!!! I linked to your tutorial over at Craft Gossip Sewing:
http://sewing.craftgossip.com/tutorial-sleeveless-knit-top-with-appliqued-petal/2010/08/16/
–Anne
My 19 year old fashionista would love this! Thanks for the tutorial. I am off to purchase fabric!!
So cute! I’m adding this one to my “to do” list.
This comment has been removed by the author.
I now will have something to wear for my first day back to school! Thanks!
So cute!! Thanks for the tutorial!
Great! Thanks for this tutorial!
This looks great! Thank you for the tutorial. Might give this one a go.
I love it! The shirt is so darling. And she really does look like Jennifer Anniston doesn’t she?!
So cute! I wish I could sew.
great tutorial, it’s just beauitful. :)
Jennifer Aniston…so funny. Can’t believe you can create so many things. You’re making me feel lazy! Another great project. Thanks adrianna.
I love this!! It is adorable and looks to be fairly easy. Think I’ll have to try this one out!
WOW… She REALLY does look like jennifer aniston!! Love the shirt, and thanks for the tute!
This top is sew beautiful, pardon the pun but it really is pretty! xx
Cute! I bet it would make a great toddler dress too! Might even be able to make it out of an over-sized t-shirt and save some hemming!
its darling…love the comment on making it for a child dress..you clever ladies.
I was so thankful you shared this with us… I made this petal shirt and I love it. Thank you again. Mary
I think this would be super cute as like a knee-length dress with a belt. I just might have to try it!
I love your petal shirt; so cute! I was inspired to try something very similar and love the way it came out. I have some pictures (and a link to your tutorial) on my blog.
http://ailidhdaisy.blogspot.com/2011/08/petal-maternity-shirt.html
Saw this tutorial today on Pinterest and really like it. My question is how the edges of the petals hold up after washing. Do they fray or ball up? Does it require pressing after washing? I love how the petals seem to be floating to the ground.
I LOVE this tutorial! I think I can use some old knit shirts and upcycle with your fabulous step by step! thank you very much. I too am curious how the petals hold up after washing, I would hate to try and fluff each individually with an iron.
I tried this tonight! Love it! I made mine from a 2XL women’s 3/4 sleeve shirt. I used the sleeves for petals. I’m really proud at how pretty it is on me! Thanks for the inspiration!
I love this! Thanks for the tutorial! I can’t wait to try it!
I made this shirt in orange over the last couple of evenings…. It turned out great! I love it! Thanks for the tutorial
Very nice! I’m horrid at sewing …. I wish I knew what the finished back looks like. Cheers!
Que hermosa camiseta… :)
Love the top. I’m making it into a maxi dress! Thanks for the idea.