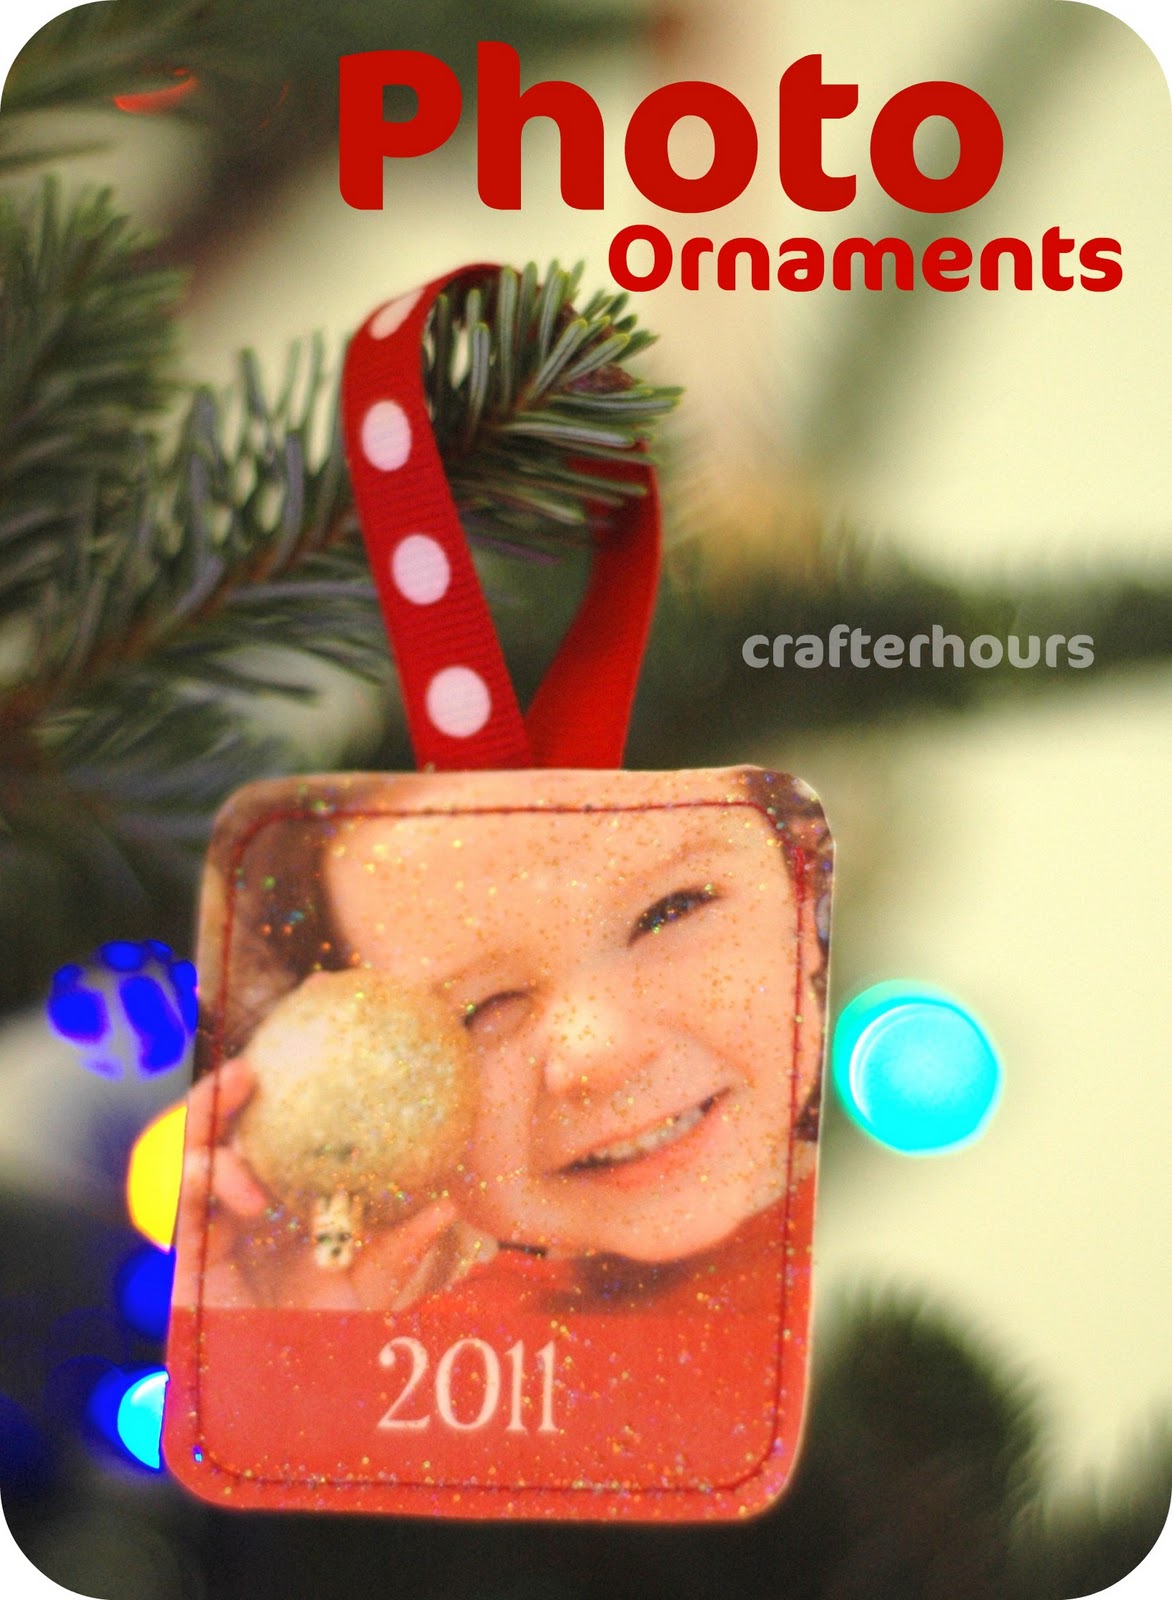
I’ve taken on a fundraising task for K’s school. We’re making ornaments to sell at the upcoming Holiday Bazaar. I’ve spent a while trying to come up with a recipe for ornament-making that required little financial investment and a reasonable amount of time with awesome results. That’s the goal, anyway.
And while thinking about making ornaments of my kids for the year, I realized that the way I’m making ornaments for the school would work just as well for my personal project. I’ve gotten a trillion e-mails since Thanksgiving offering 50% off of ornaments, but even at half-price they feel expensive to me. And this is super, super inexpensive if you already have a few supplies on hand.
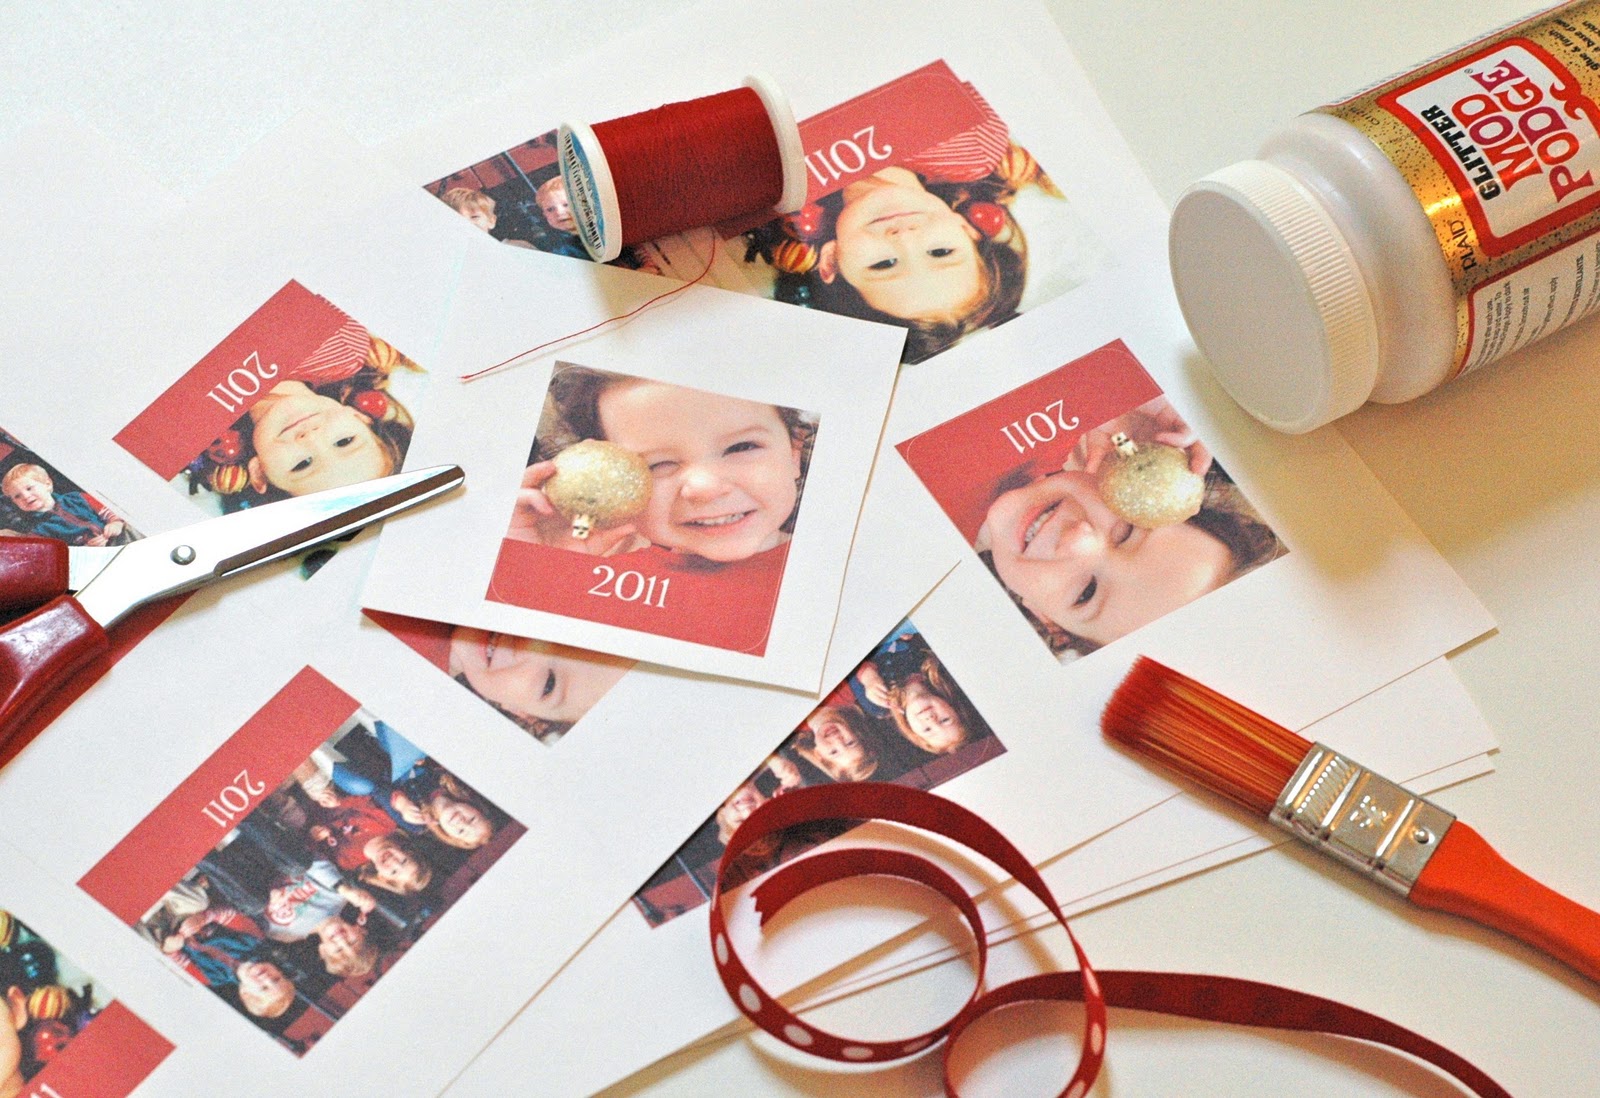
I did the layout with the Silhouette software. I’ve posted this before, but it’s worth repeating– the software is free and can be downloaded from the Silhouette site. You don’t have to buy anything to get it. You can print to your regular printer. Whether you’re planning to get a cutting machine or not, I think the software makes layout simple. You could also use PowerPoint, Gimp, Photoshop, Picnik… lots of ways to do it.
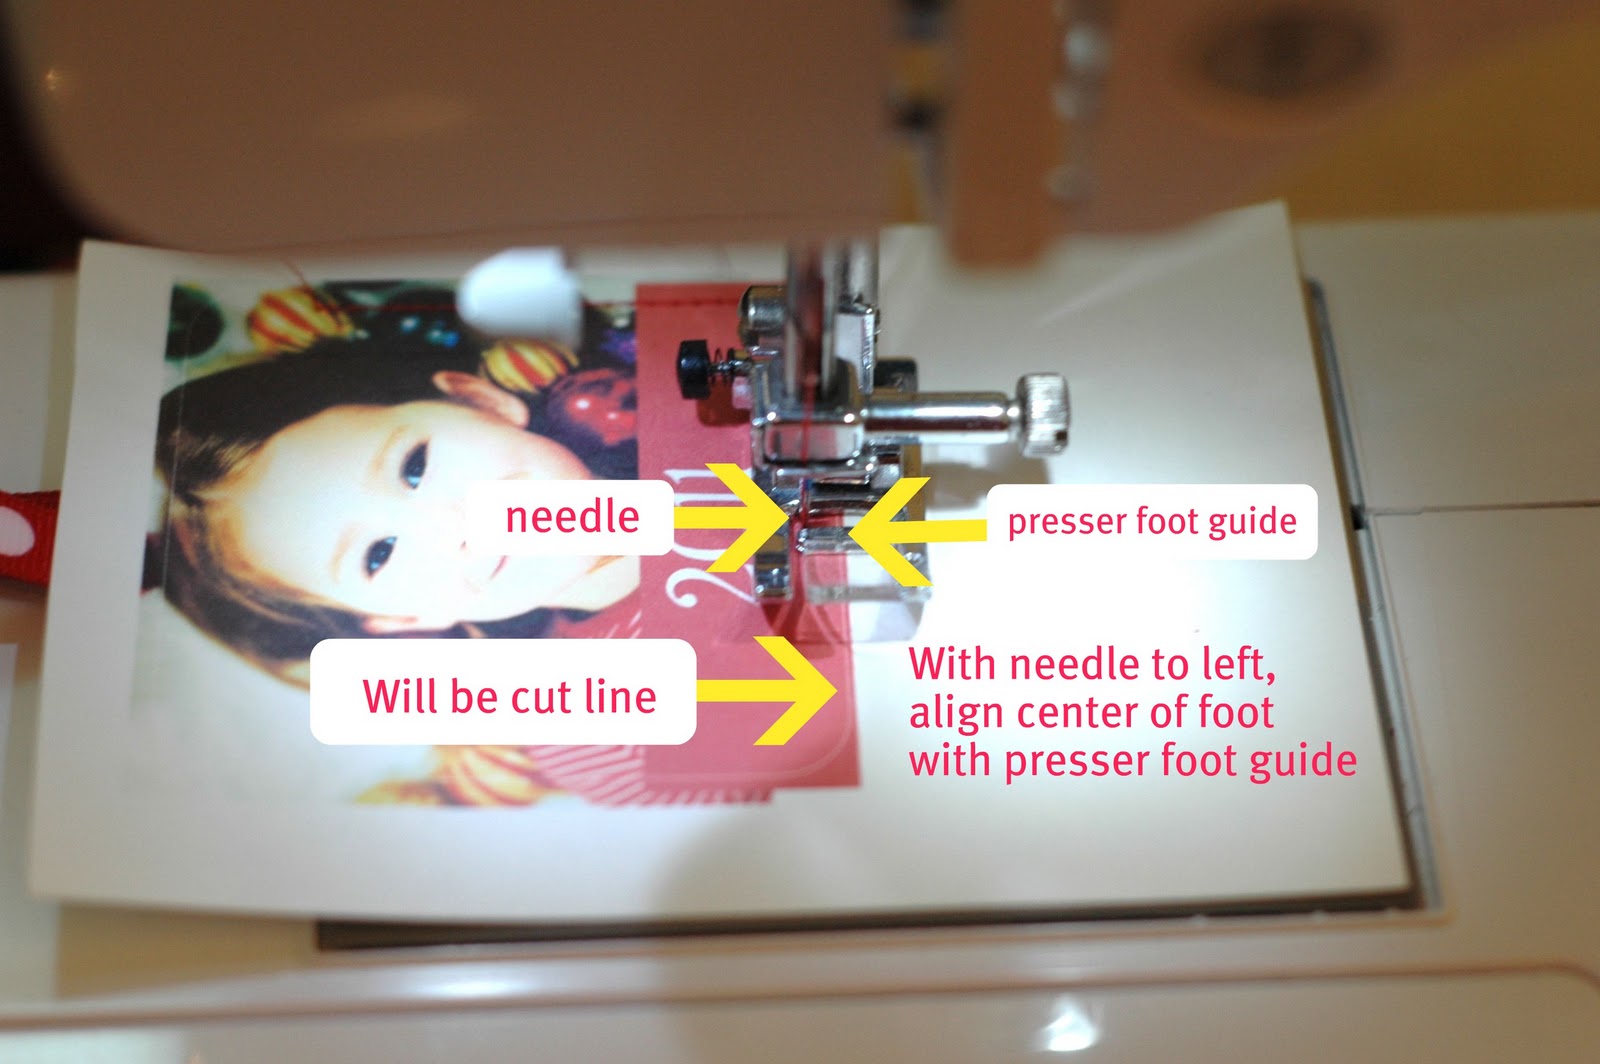
At the edge of each ornament I added a very thin grey line to use as a cutting guide at the end of the process. This line will help guide you to keep your stitched line straight and even.

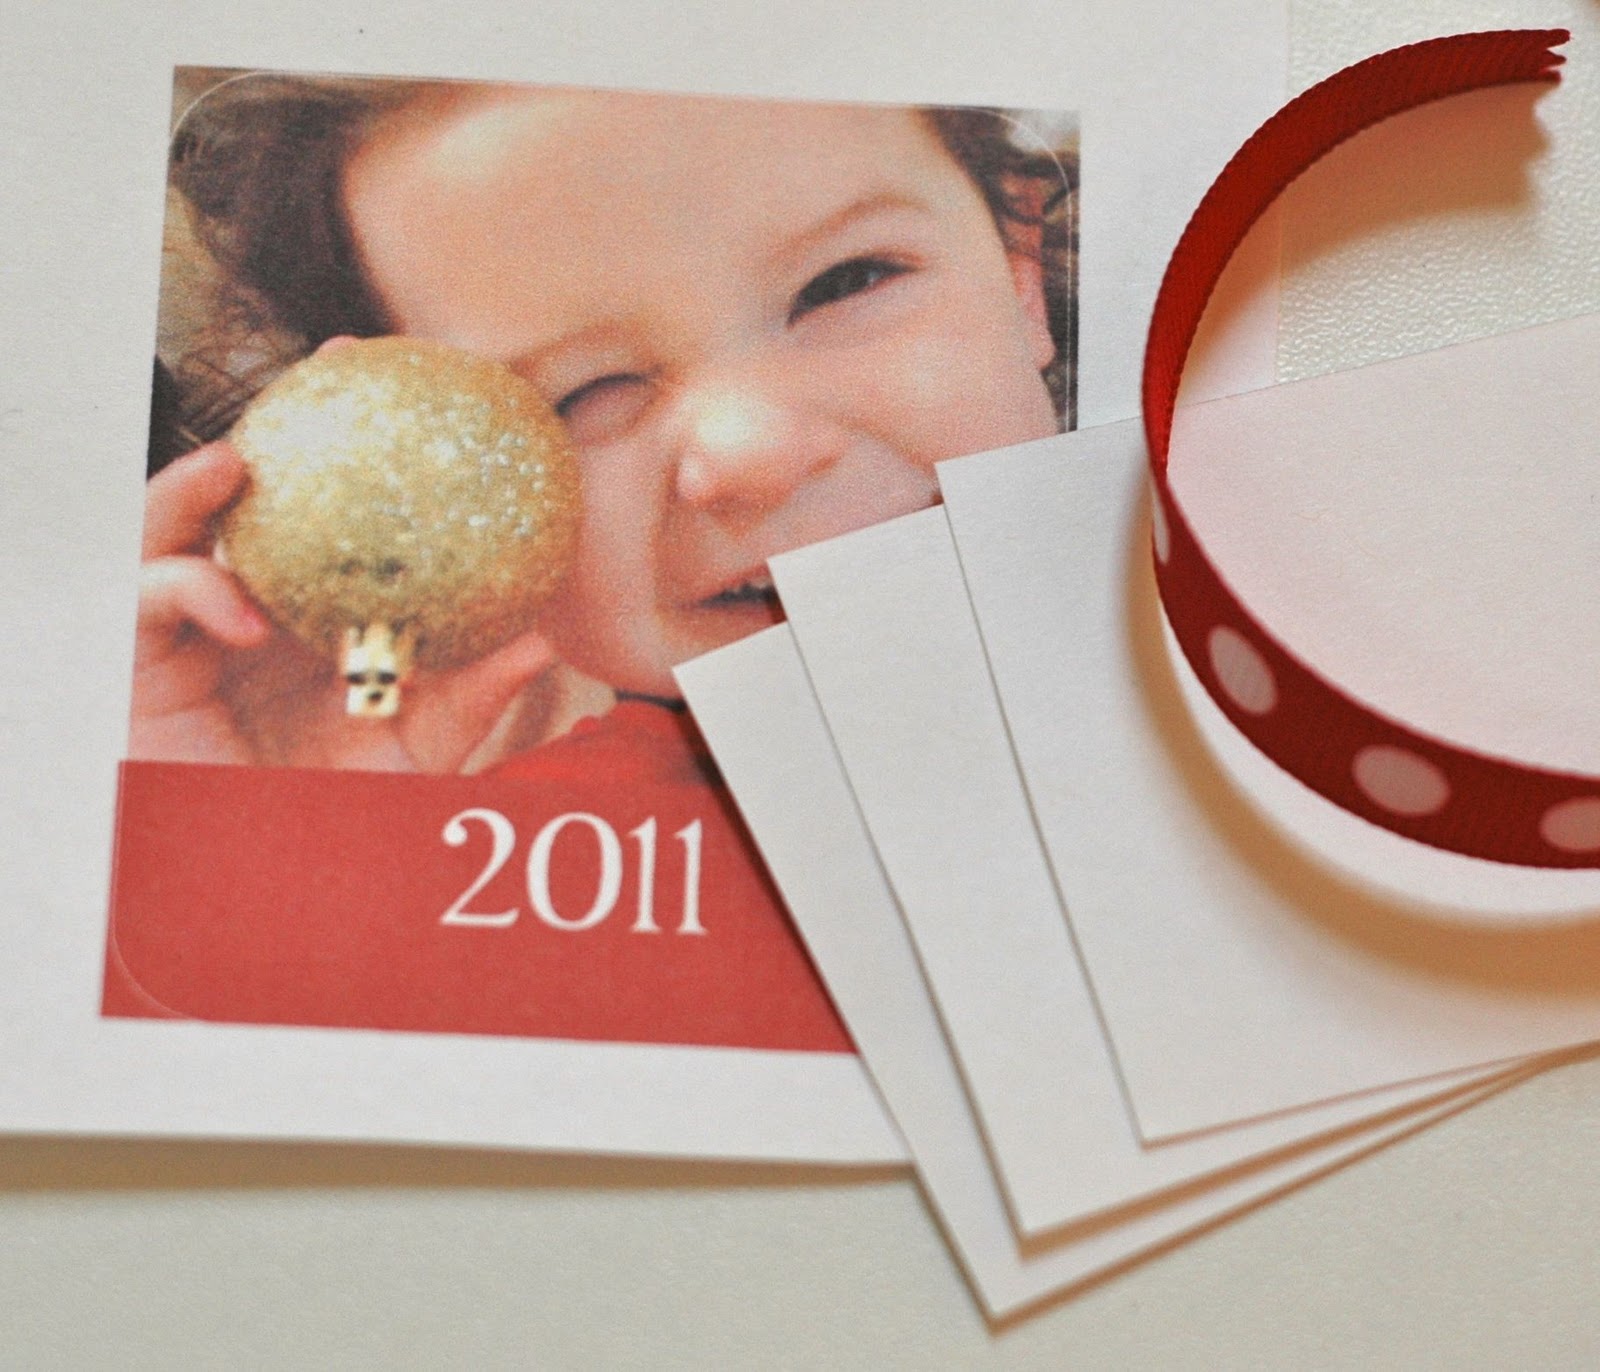
Use double-sided tape or scrapbook adhesive to stick your 3 smaller card stock shapes together. Stick the ribbon in there too to make a hanging loop.
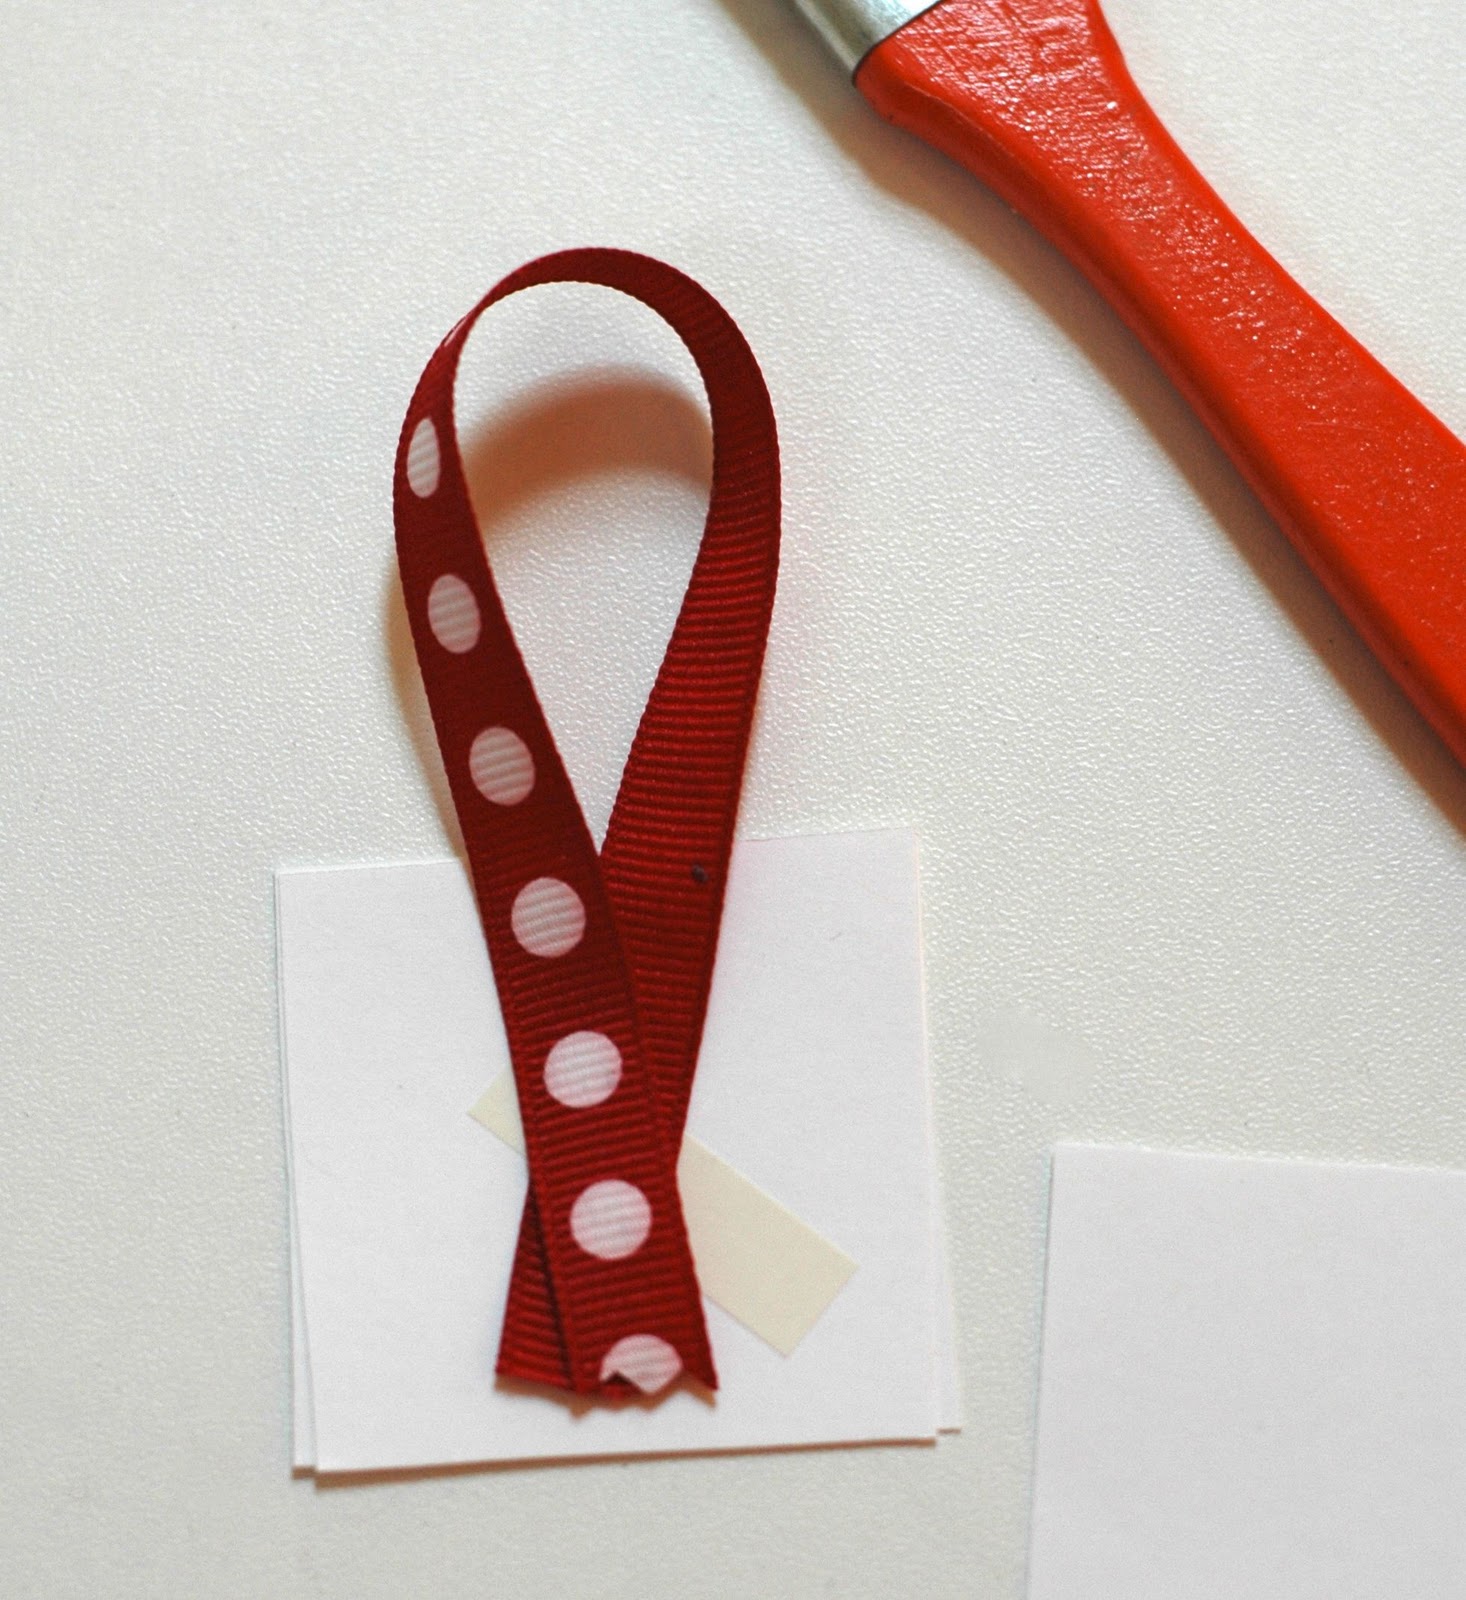
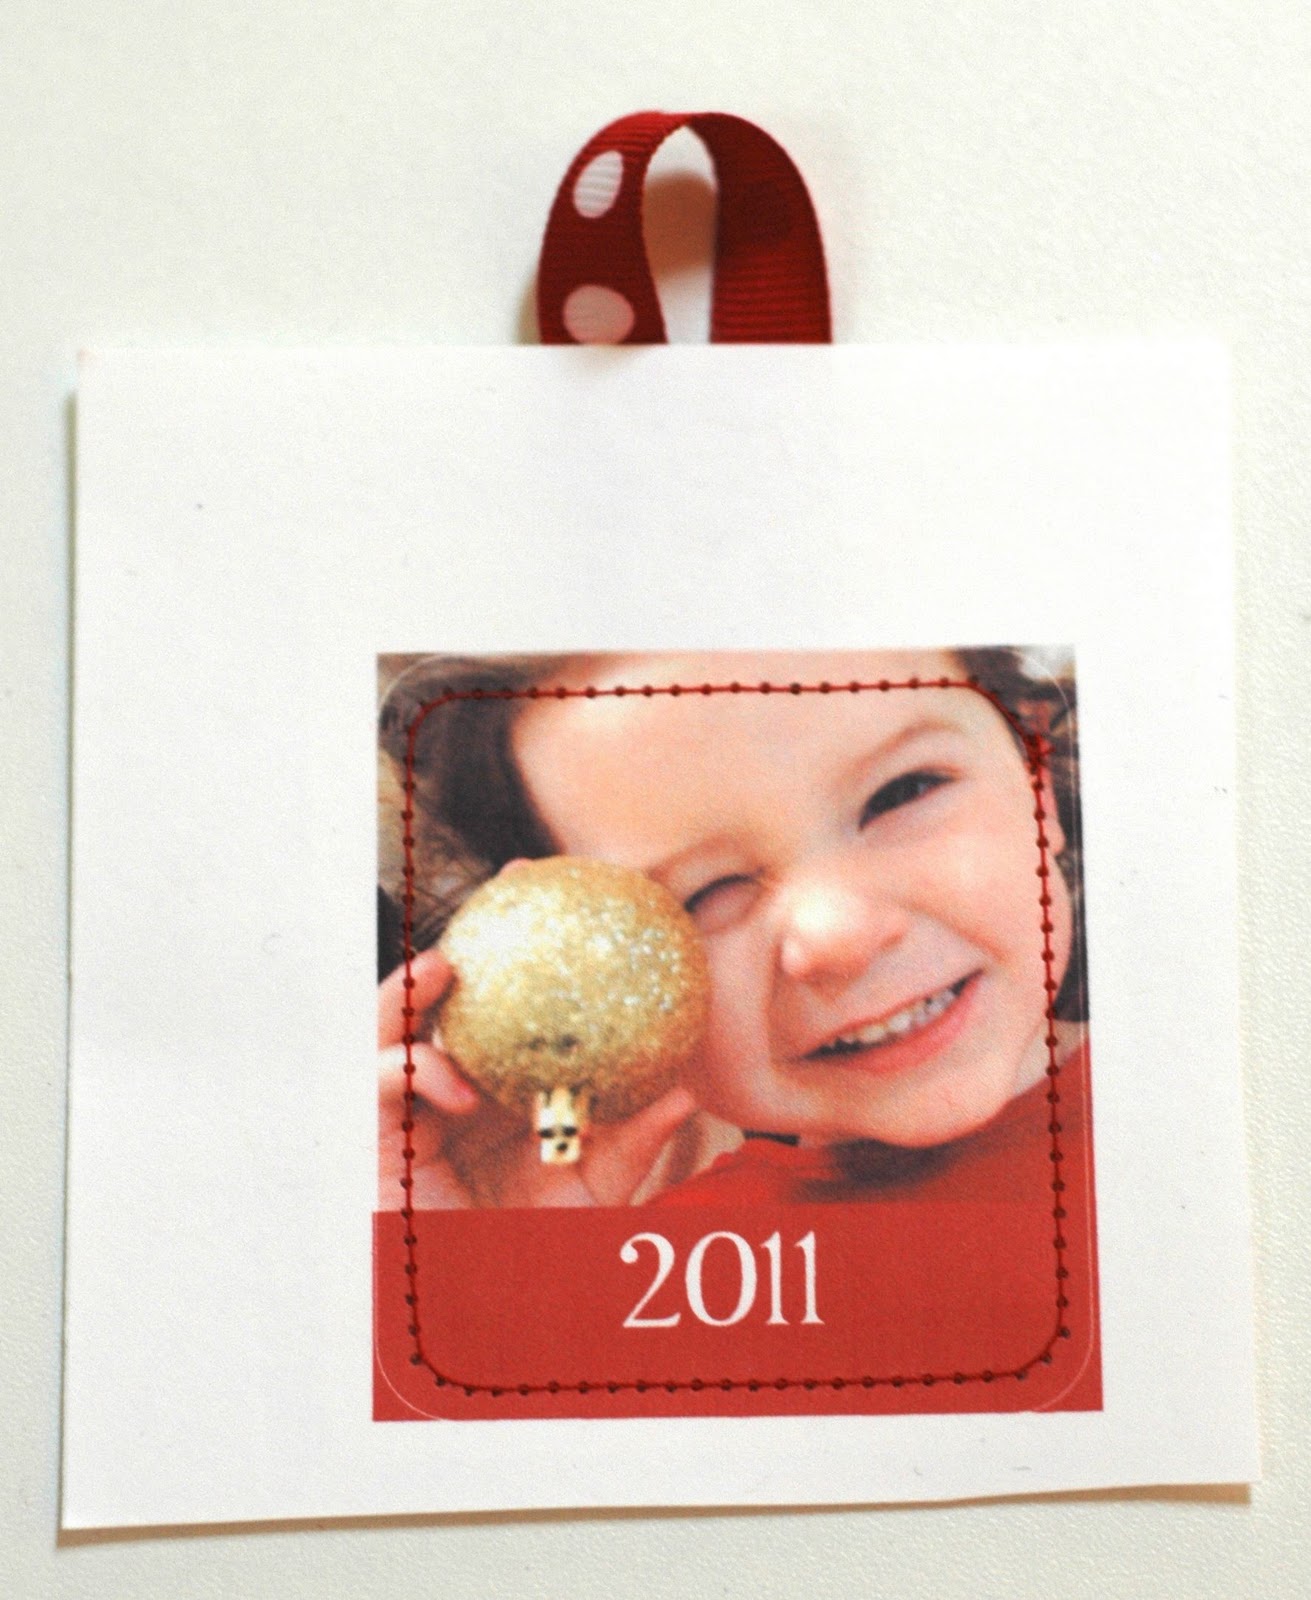
Put your back-side shape on. You’ve got a sandwich with a front and back, three pieces of card stock and a ribbon in the middle.

Put your ornament under the presser foot. On my machine, the general purpose foot has marks that make it easy to choose a guideline to follow. I haven’t studied other machine’s feet, but I’m guessing they’re similar. Or you could mark your foot with a bit of tape or something. You just want the distance between your stitch line and cut line to be consistent.
Now it looks like this.
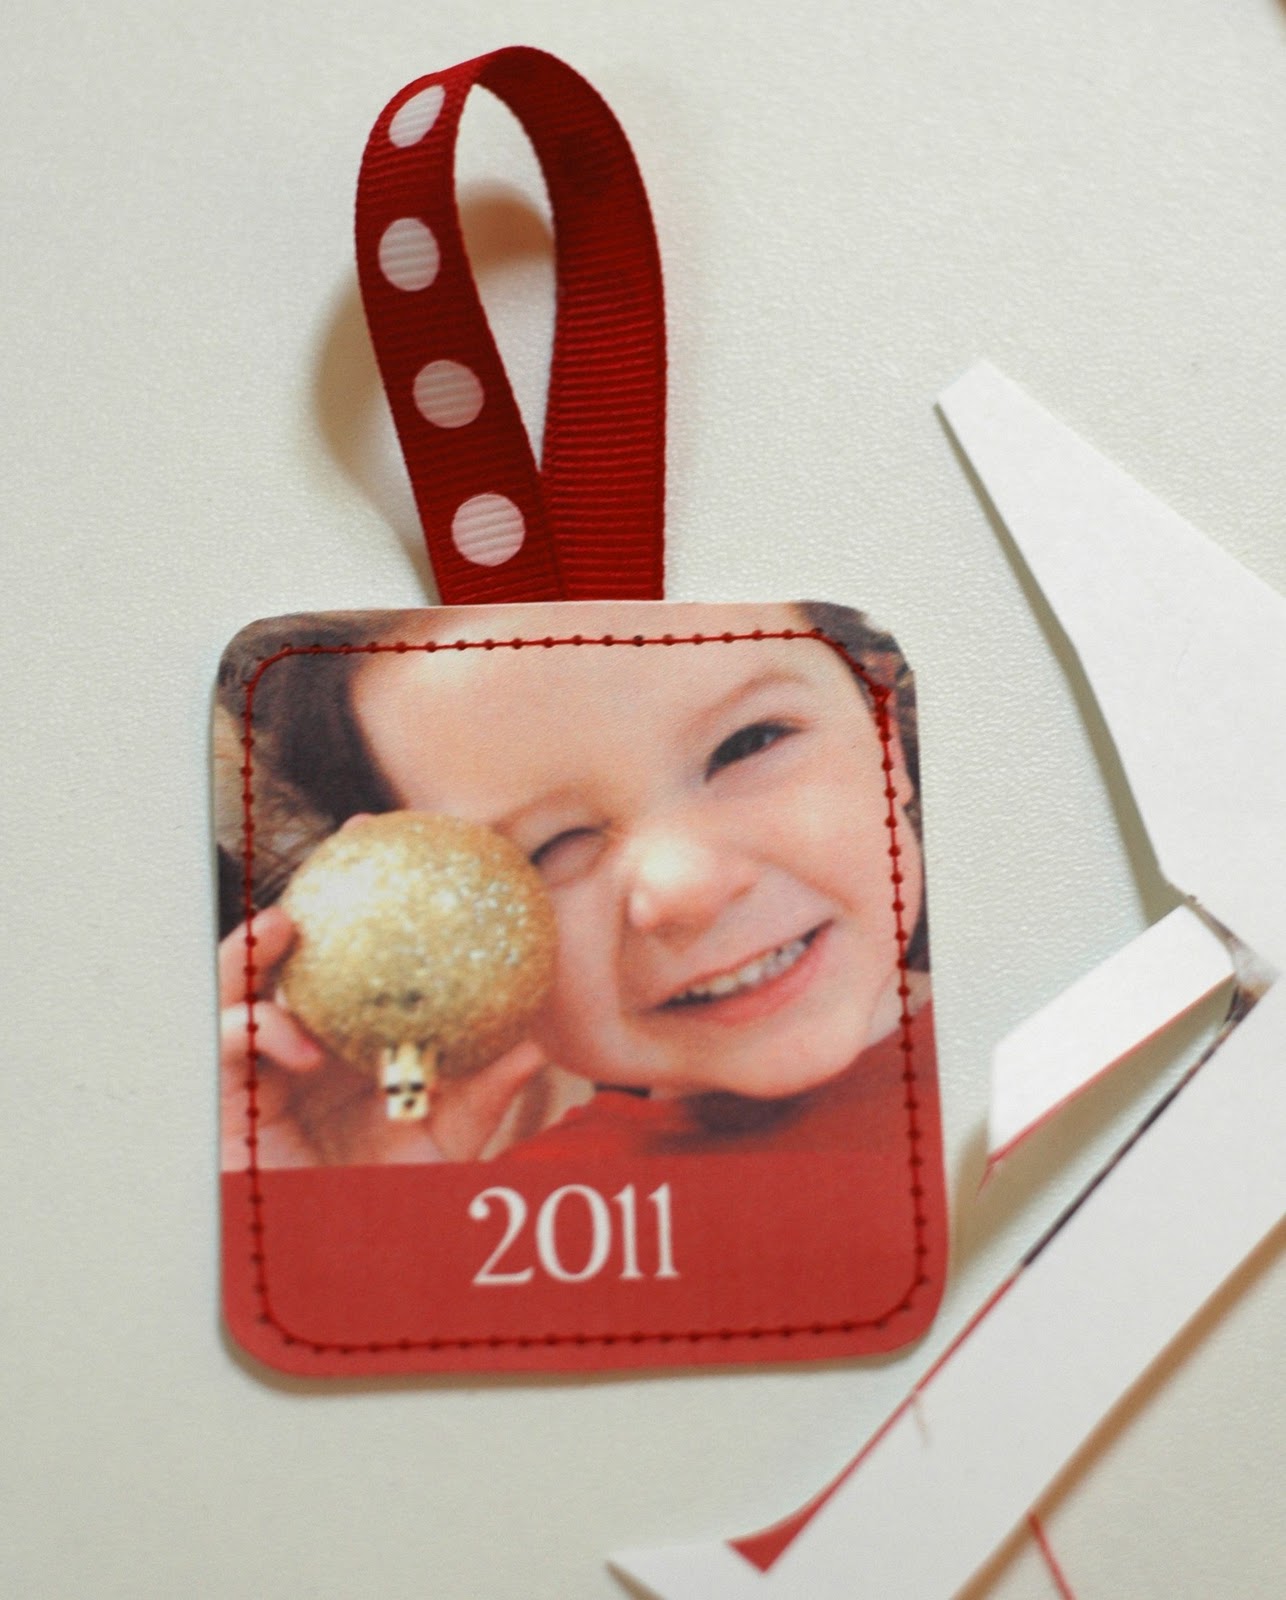
Cut! Just be careful as you approach the ribbon. Don’t want to cut that. You’ll have to peel back the sides and cut them separately.
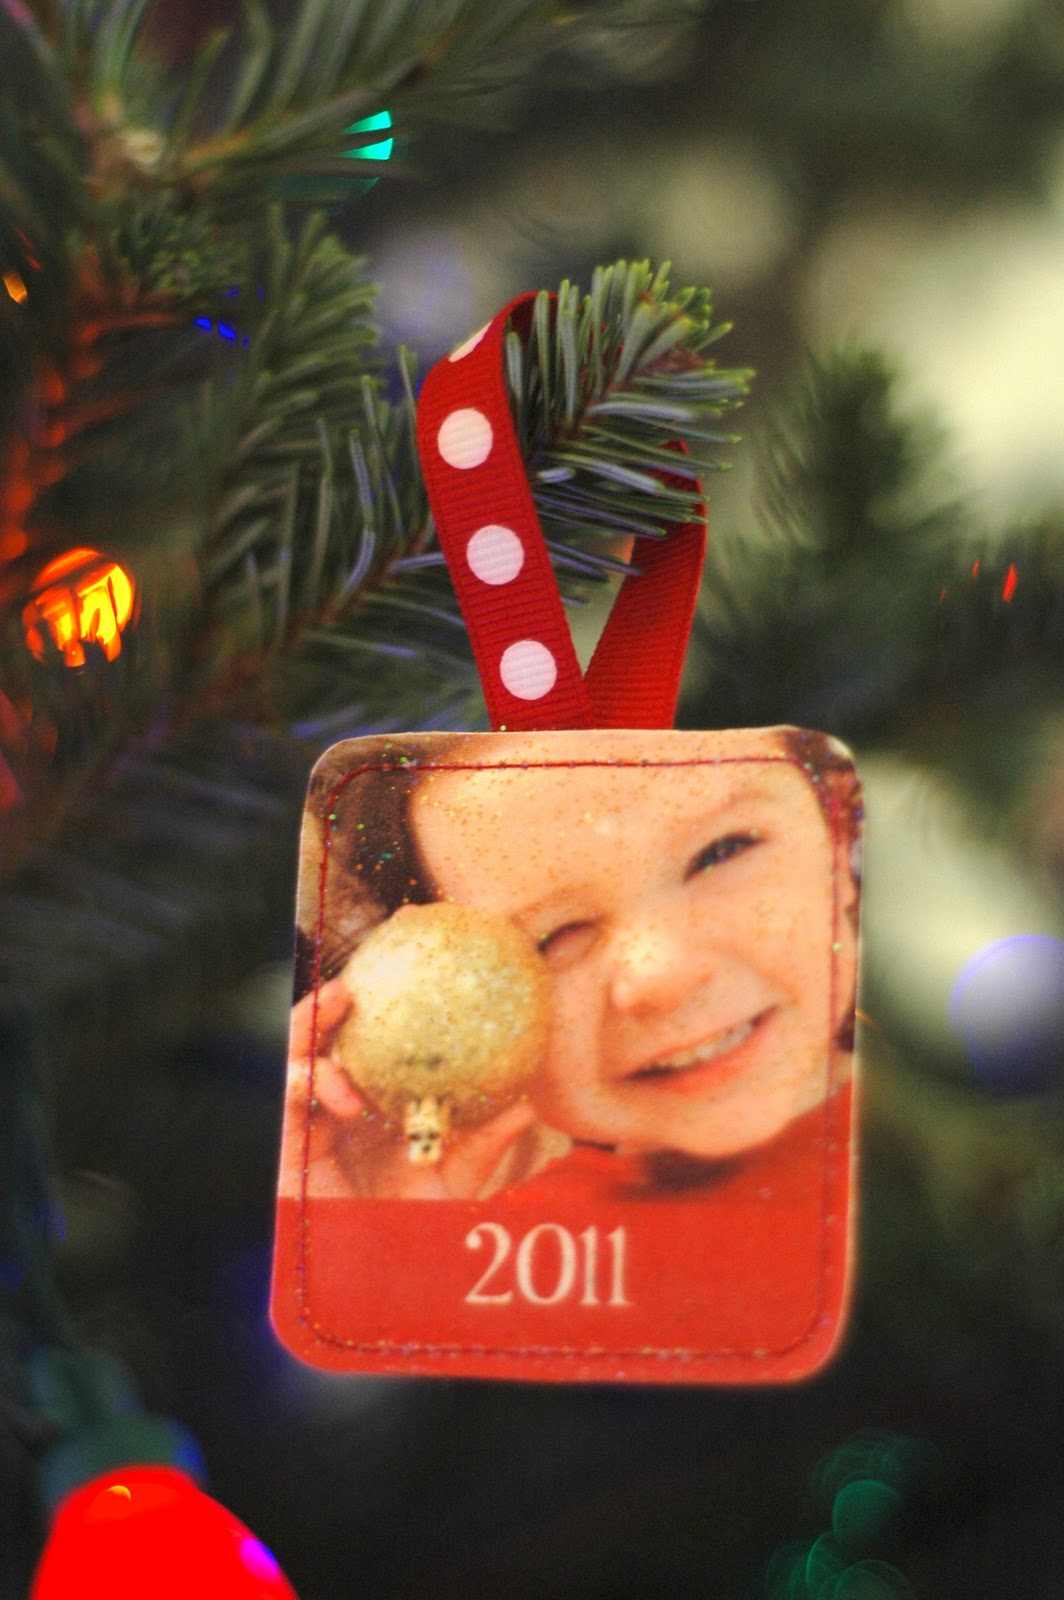
Mod Podge it! I thought glitter podge was appropriate here. But really, when is it not?

Not sure where to hang it to dry? How about on the tree! Once they’re dry they’re surprisingly rigid and sturdy.


Such a great idea! Thanks for sharing! :)
i love this!!! one day i want to have a tree that is all photos, i think this is a great way to do some of them. i especially love the glitter!!
Thanks Susan! I did some digital silhouettes of my kids that I’ve been trying to decide what to do with. Now I know! :)
What a cute idea :o)
Great idea thanks for sharing! Grandparent gift :)
Susan, the possibilities are endless with this tutorial – my mind is spinning now!
Love!
This is awesome, and I think I have everything -‘cept ribbon- to make these!
I’m feeling quite ashamed that I didn’t know Glitter Podge existed. How have I missed this wonderful stuff?!
These are fantastic! Definitely worth a virtual high-five! :-)
I love this thoughtful idea, this would work for me as a gma, I put pics on my tree every year and great tags too
This is absolutely fabulous!!! I can’t wait to do it! Thank you for sharing it with us so we can create such great keepsakes!
These ornaments are really nice. i am going to try some for my many kids and grand kids, Thanks.
Thanks, June! :)
Thank you and I love this!! Great to give along with Christmas cards. I also love the fact it’s combining my fav things, Christmas, sewing, Silhouette and Mod Podge!!! Thank you for the idea of painting printed craft paper with Mod Podge, the ink didn’t smudge? Must try this soon!
Nope, no smudge!