This might be my favorite time of year. So much newness everywhere. A blank canvas all around. Fresh air and lots of sunshine. All of a sudden anything feels possible.
Simple things like travel feel easier. Less to pack, less to worry about in transit. We always have a springtime run of guests and each year I give our guest area a little sprucing up as I’m doing the rest of our spring cleaning. Our guest bath always has a basket of trial and travel size goodies at the ready, those things that are easily forgotten in the rush to puck but are important to have. A few spa goodies too like body wash and lotion.
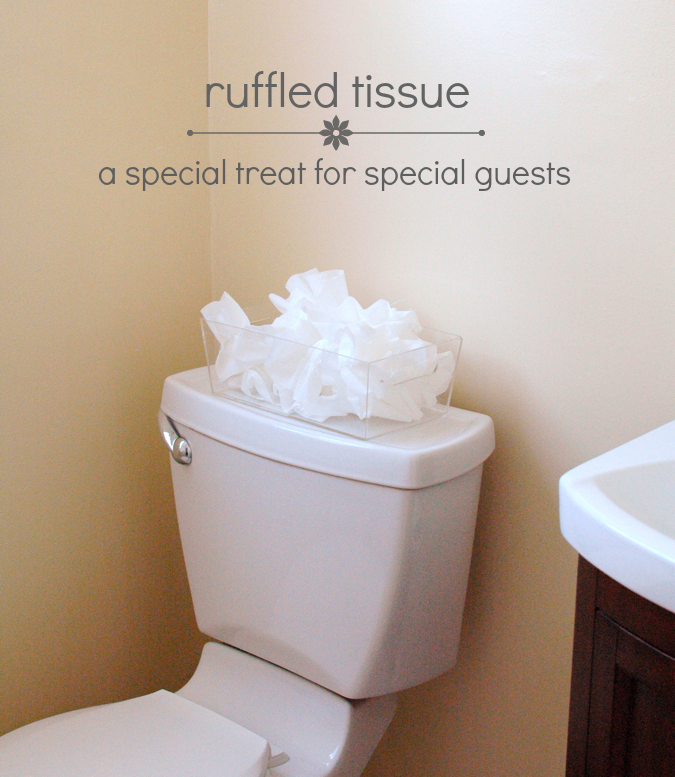
This year I decided that we could make the guest bath that much nicer for our travelers by making soft, ruffley bath tissue! Really, doesn’t it sound luxurious? Ruffles can go aaaaanywhere. Even there.
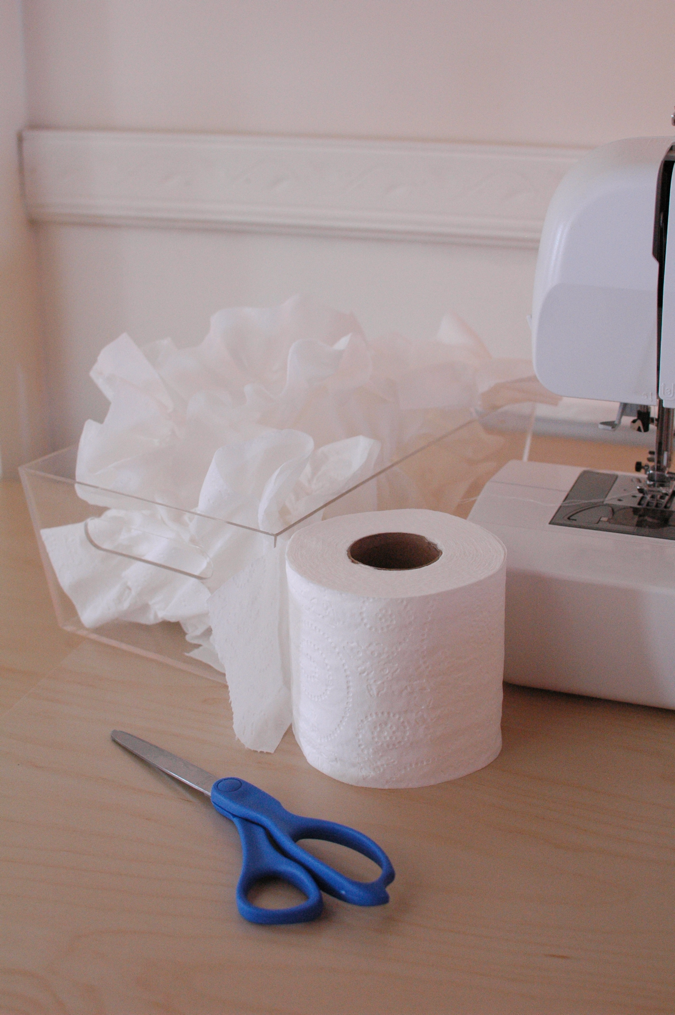
All you need to make your own are:
- Rolled tissue
- Scissors
- Sewing machine (links to mine are here)
- Coordinating or contrasting all-cotton thread of your choice
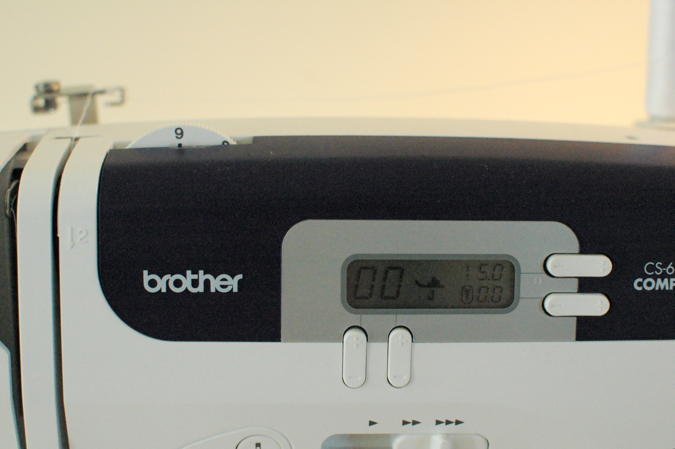
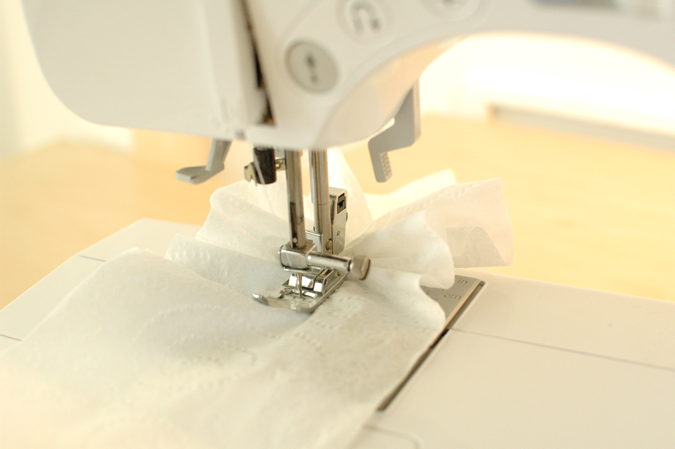
Rolled tissue makes this a quick and easy project. Much like ruffling streamers or creating gathers in fabric, you’ll use a straight stitch and set your tension as high as it will go and lengthen your stitch length. On my machine that’s a 9 for tension and somewhere between a 4-5 for stitch length.
Place your tissue under the presser foot and let it go!
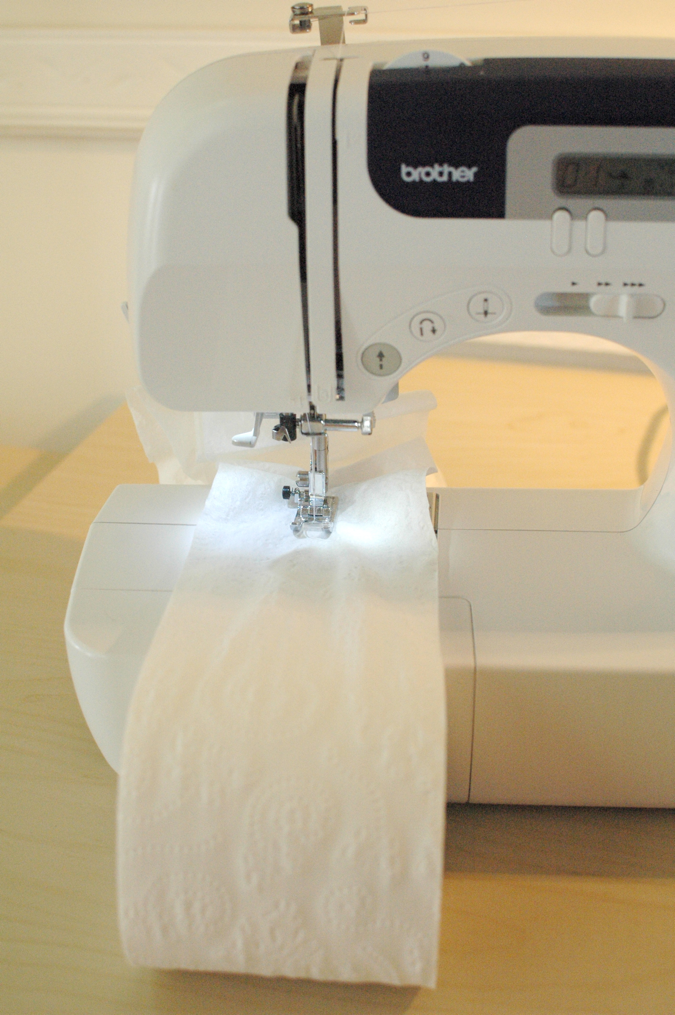
Always fun to watch ruffles almost make themselves.
I like to create a variety of lengths for a variety of uses. I’d say anywhere between ten and twenty squares in a length is good– the thicker your tissue the fewer squares required.
And now your guests have another little luxury to enjoy! It’s something they won’t forget.

For more fresh ideas from crafterhours’ years past, you might enjoy this.
And for fresh ideas from other crafty bloggers this year, you might enjoy this, this, this, this, and this.
Enjoy the day!

Ha ha, you put far too much effort into your 1st of April post :) Me, I stick a moustache on the mirror and that’s it. Next year I’ll have to pick up my game!
I just saw you put it on pinterest too and it’s been repinned 3 times…..Now I’m questioning whether this is serious lol!
Hilarious :-)
LOL, that’s hilarious! Unless you were serious. Then it’s just a little….strange :)
Oh dear god I am so happy it is April 1st, cause DAYUM, you STRANGE girl!
Hee, hee, hee!
You’re awesome, Susan!
OMG it was only in the end I realized what day it is….I thought you had gone nuts…..LOL! I am going to laugh about it all day. Thank you for that!
you’re too funny. i love that you have a variety of lengths at the ready. ruffled tissue is a must for any diplomatic home.
I love when the april fools posts are all technical and serious….LOL
OMG, I love it! So funny! I love april fools day. :)
Thanks for the laugh!
Laughing so hard at this!!!!
Really great!
Ok, I actually like how technical you got because my daughter just got this machine as a gift and now I know the settings to ruffle =)
OMG, so funny !
You got me! Very funny indeed!
I was all….”whaaaa??” then I realized…duh April Fools. :D Got me.
I’ve waiting for this post! I bet you I could convince my step-mom this is “in” or would look good in her uber feminine bathroom.
No, really, I love this post. I need to find the fancy tissue in other colors to do some layered ruffles. ;) Susan
I’m reading this on April 8th. For a moment I seriously considered who had dropped you on your head recently ;)
LOL! I read this on April 14, so it took me a minute. Good one!!! :) Rachel