In Twill Tape World so far this week we’ve featured an accessory for carrying in hand and one for wearing on your head and now one for wearing on your body. Specifically, on your body while in the kitchen. Preferably, on your body while in the kitchen and making something that looks at least half as fun as today’s blogger – Melissa of A Happy Stitch. She’s sharing her recipe for a twill tape apron!
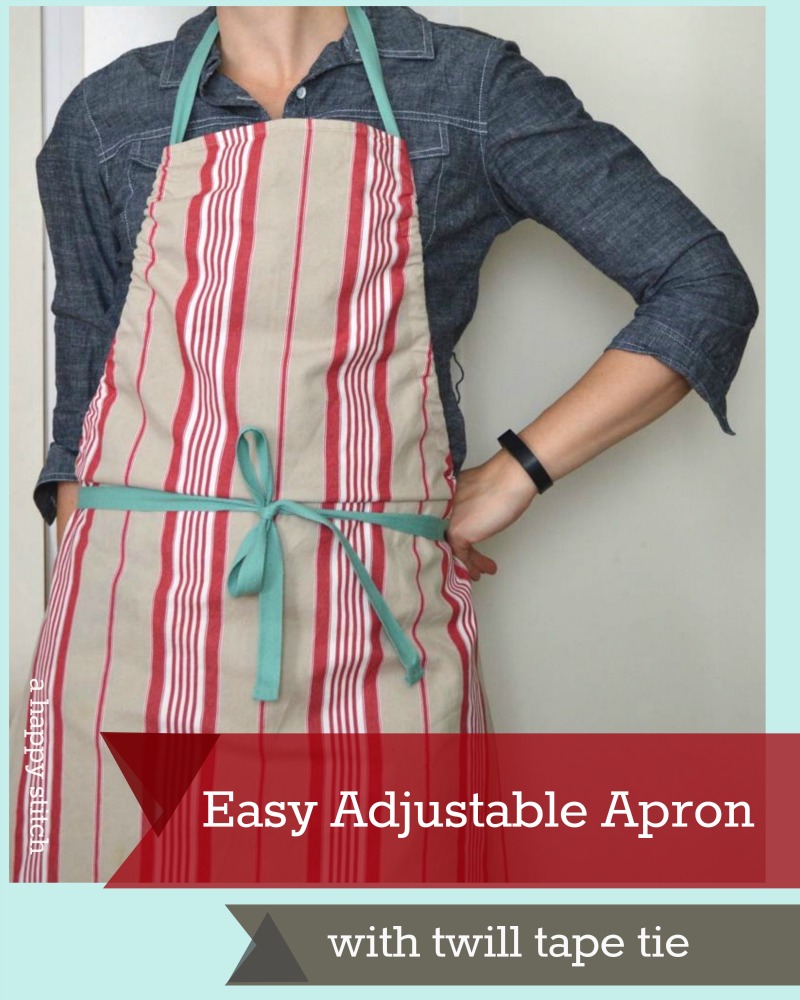
Nothing beats a good, sturdy apron. I was in need of an apron I could spill on, wipe my hands on and wash like a beast without worrying it would fall apart. So I grabbed some heavy-duty fabric, twill tape and made myself an easy apron pattern.
I use twill tape for lots of things but I am fond of using it to make apron strings because it’s pretty in that hip, industrial-kitchen way. The twill tape in the project is from The Twill Tape Guy and I was so excited because they offer 100% cotton colored twill tape. It’s hard to find good cotton twill tape, period. I’ve ended up with flimsy, cheap-o, plastic-y stuff so many times and it doesn’t tie well or wash well. Argh! To find the good stuff in amazing colors is like hitting the jackpot. I used their seafoam green. Ooh-la-la.
Here is how to sew an easy & adjustable apron for yourself.
Gather the following supplies:
+ one yard of sturdy cotton fabric such as canvas
+ 3.5 yards of 3/4″ thick twill tape
+ one spool of thread matching your fabric
+ pattern making supplies: long piece of paper, pencil, a long ruler or yard stick.
+ standard sewing supplies: a sewing machine, sewing shears, and measuring tape.
First, we’ll make a pattern. This is a simple pattern so don’t be intimidated if you’ve never made a pattern before. It’s simple and you can do it!
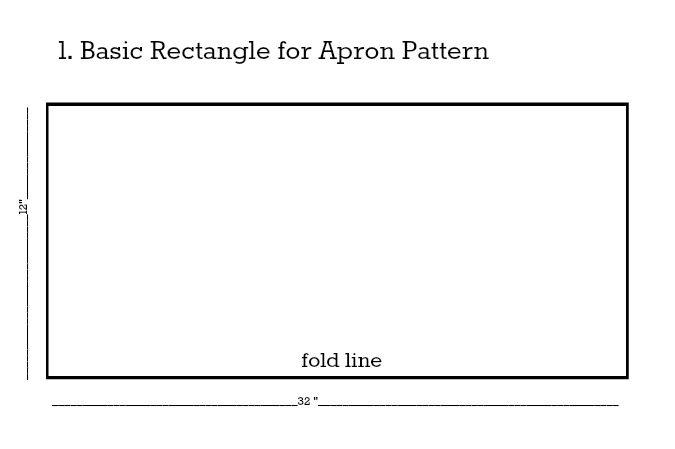
1. Take your big piece of paper and your ruler. Begin by drawing a rectangle that is 32″ long by 12″ wide. Along one of the 32″ lines write FOLD LINE. This is what we will refer to as the bottom of your pattern.
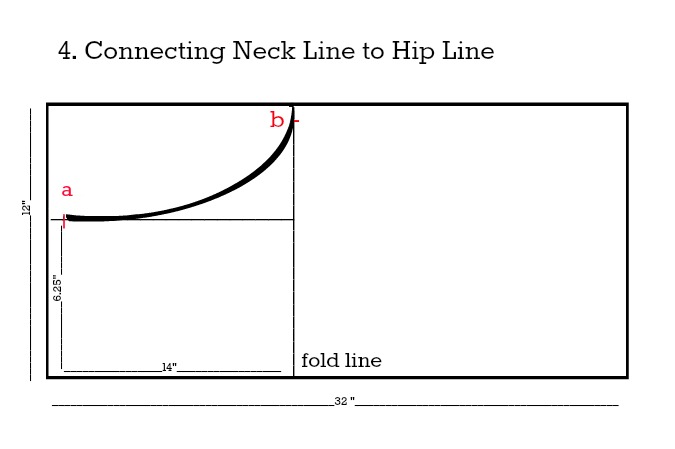
2. Move to the line on the left side of the rectangle. Mark a point 14″ from there along the bottom (your fold line) of the pattern and draw a vertical line out from that mark dissecting your rectangle. This line designates your hip line. Look at you rocking the pattern-making!

3. Move back to the left-hand side of your rectangle and mark a point 6 1/4″ along the vertical line. Use that mark to draw a straight line parallel to your bottom line (the fold line). This is your neck line. It should look like this:

4. Our final pattern making step is a little more creative. At the left-hand side of your pattern make a mark an inch or two down the line you have just drawn and connect from that mark, drawing a sloping curve to the just an inch away from the top of the rectangle to the hip line. To state it more simply: draw a sloping curve from point A to point B as seen in the drawing below. Just free-hand draw it…a little slope connecting your neck line to your hip line.
5. Wahoo! All the drawing is done and your pattern is drawn. Next you will be cutting out your piece of paper along the hem, neck, slope and side lines as illustrated in this image. Cut on all the visible lines you see below and ignore any extra lines on your paper.

It’s time to cut your fabric! Prepare your fabric by folding it in half such that the selvedges meet. Place the fold line of your pattern on the folded edge of your fabric and cut.
Making the Apron:
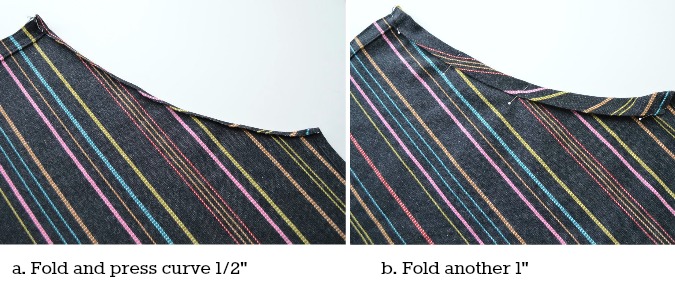
1. Begin by opening up and unfolding your fabric. It should have the standard apron shape we know and love. We will start with hemming the neck and bottom hem of the apron. Fold them both over by 1/2″ and then another 1/2″ and stitch those lines.
2. Repeat the same style of hem with both sides of the apron from the hip line to the bottom hem. Fold over half an inch and the another half-inch and stitch.
3. Creating a casing for the twill tape by folding the sloping curve area over one half an inch and then another one inch. Folding the curve can be a little tricky so be sure to press after each fold and pin the final fold in place.
4. Stitch along the edge of the double fold creating a curved tube. Repeat on the other side of the apron. This will create two sloping casings that will be used to work the twill tape through to create the neck and side ties.
5. Attach a safety pin to one end of your 3.5 yards of twill tape. Insert the safety pin into fabric beginning at the bottom (the hip area) of the casing of one of your curves. Feeling as you go, use your fingers to wind the safety pin throughout the whole casing to the neck.
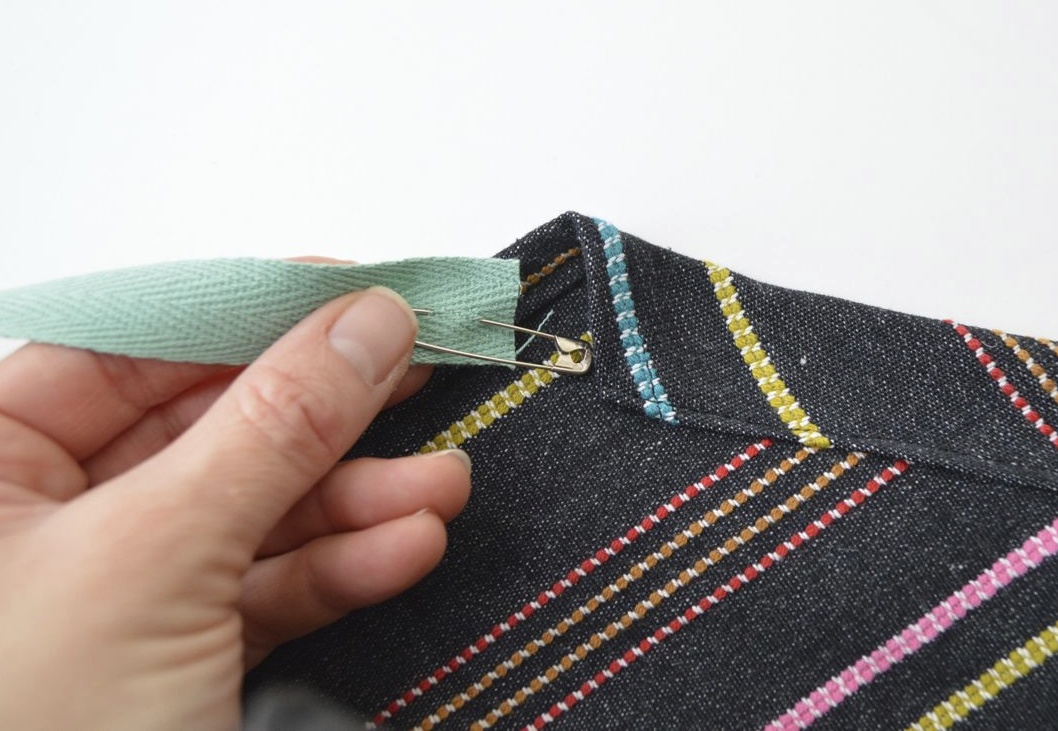
6. Once you reach the end of that casing, insert the safety pin into the neck casing on the other side of the apron.
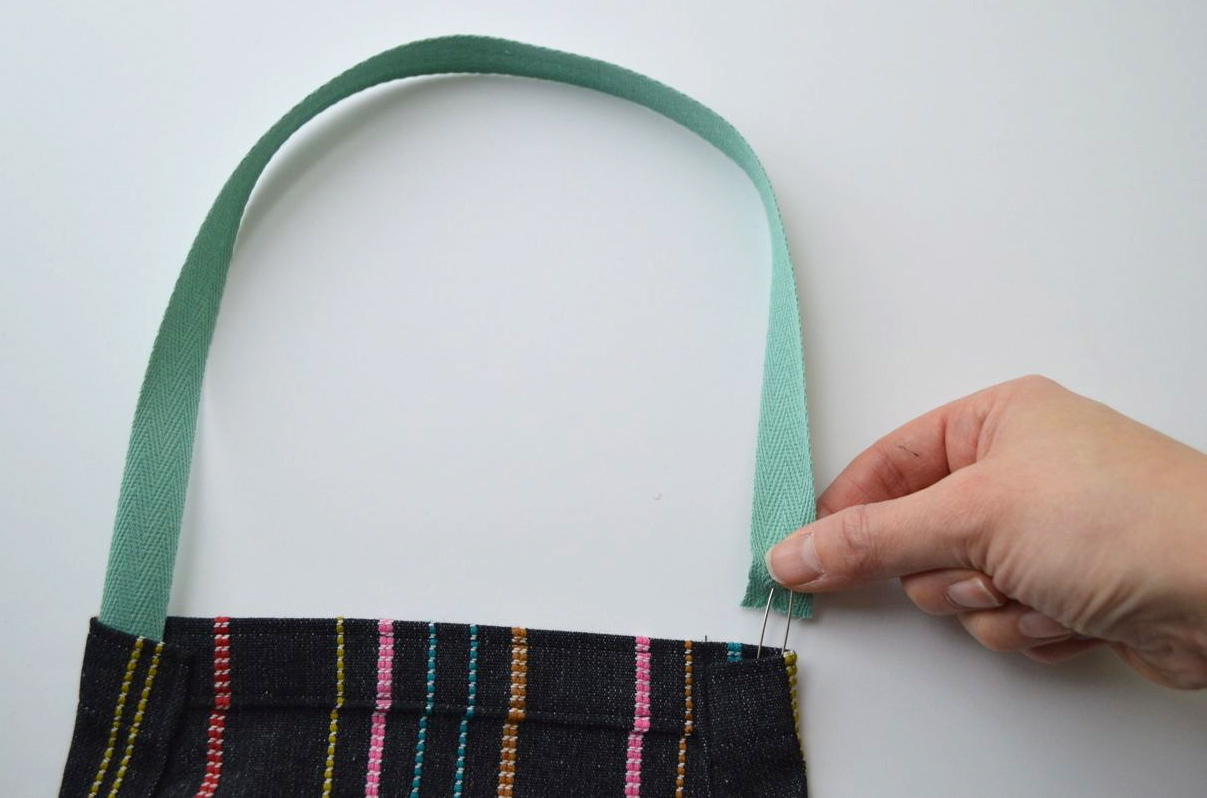 7. Wind the twill tape all the way through the final casing and out at the hip area. Now you should be able to loop this sucker around your neck and tie it across your hips! It’s an apron!
If you want to finish the ends of the twill tape to keep them from unraveling in the wash you can do one of two things. First, you can simply tie the ends of the twill tape in a strong knot. Or you can fold the ends over twice and stitch them closed.
Viola! Done. You even have your own pattern so you could make a dozen aprons! Unless, of course, you feel compelled to cook with abandon. In fact, you should probably make some Rice Crispy treats soon. After all your hard work, you deserve it.

This post was sponsored by TwillTape.com – each blogger was compensated and supplied with their choice of twill tapes. Opinions are their own!
Great post, Melissa! I need to make one, or two or ten of them!
Thanks so much for having me, Susan!