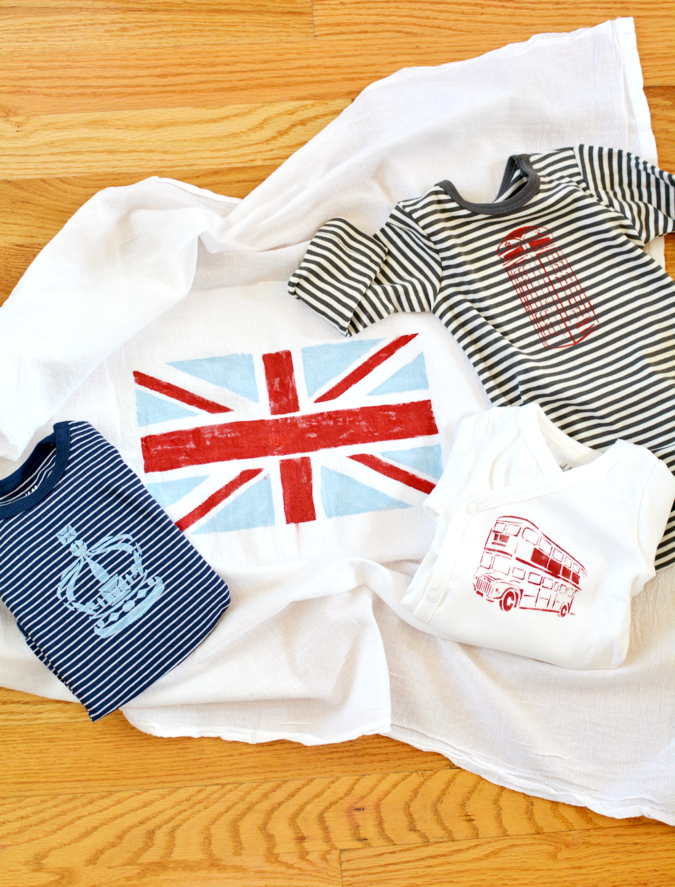
TODAY was the day! It’s like my newest little friend knew. Kinnon was born THIS MORNING! (Good timing, little guy!) I’m sharing a little set of gifts I made for him with a stencil set from Stencil1 by Plaid who sponsored this post– and I’m sharing 4 tips for stencil success!
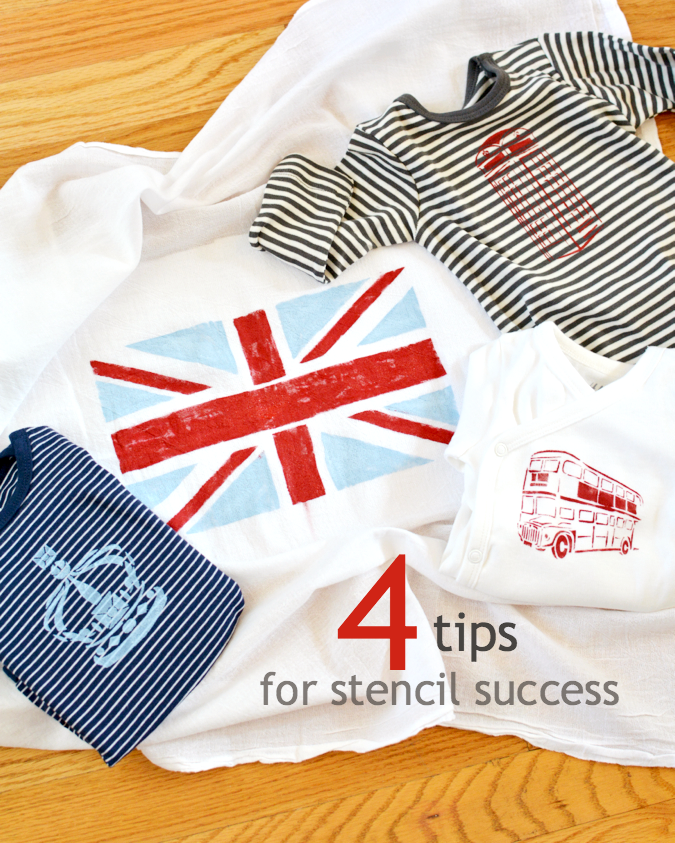
The large formats of these are perfect for walls or floors and furniture – or in this case, a bold graphic baby onesie trio and a fabric gift wrap!
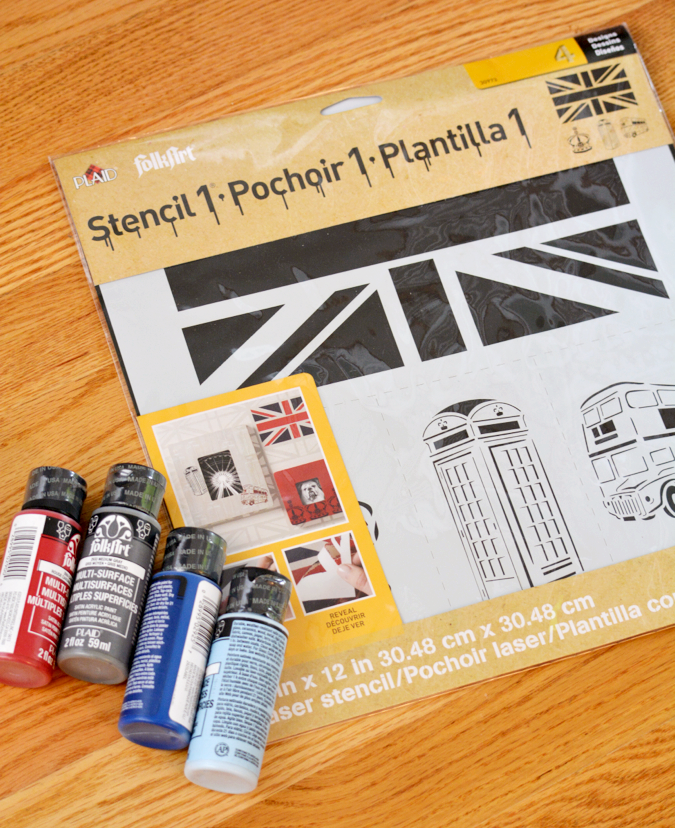
The durable, reusable mylar is easy to clean. If you’re looking for them you’ll find them at Jo-Ann Fabric & Craft stores. I used FolkArt Multi-Surface paint that works on fabric but are great on any surface – indoor or outdoor. They’re safe to use in the dishwasher too.
Before I got started stenciling I did a few things to make an easy project even more fail proof. First, I cut freezer paper to fit each piece – just a little larger than the stencil area. You can always use a piece of scrap cardboard under your stencil area, but when your backing can’t budge, you remove the possibility of a bleed-through that smudges an area of the fabric where it’ll then show from the front. I ironed the freezer paper onto the reverse side of the fabric I planned to stencil.
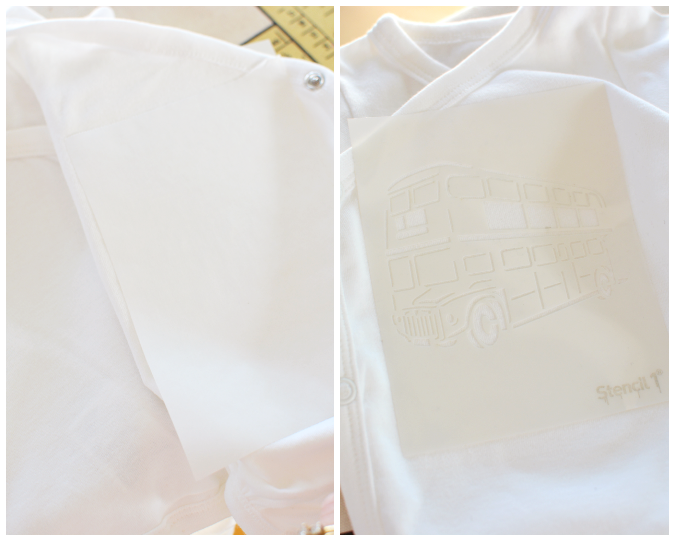
Second – I dropped each stencil into a cardboard box (a quick, easy and free spray booth) and sprayed the back with repositionable adhesive. It just needs 15 minutes or so to dry before you can use it. As with ironing freezer paper on to the back side of the fabric, if your stencil is stuck in place you remove some wiggly uncertainty. (I have enough wiggly uncertainty in my life. You too?)

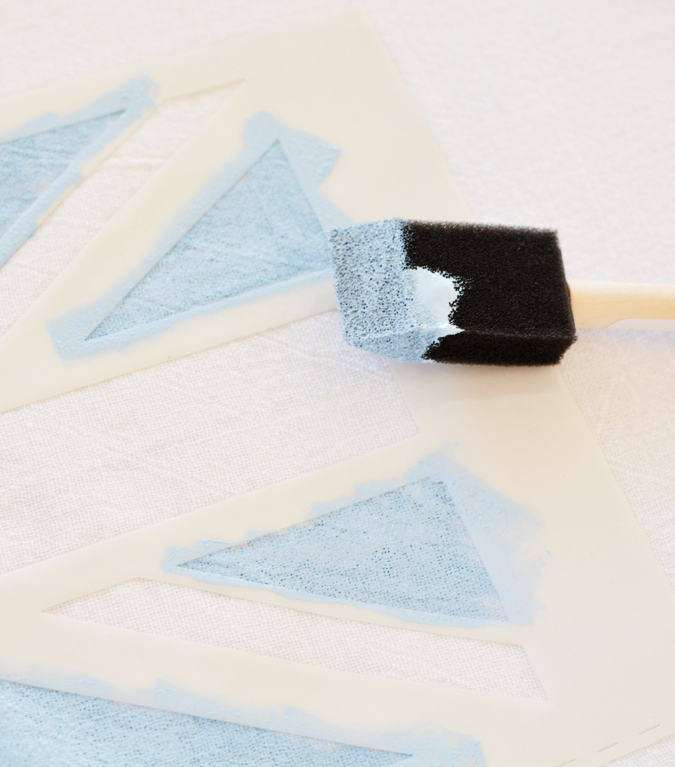
Third, given that all of these stencils are pretty linear, I used a sponge brush with sharp edge points to help fill all of the sharp edges in.
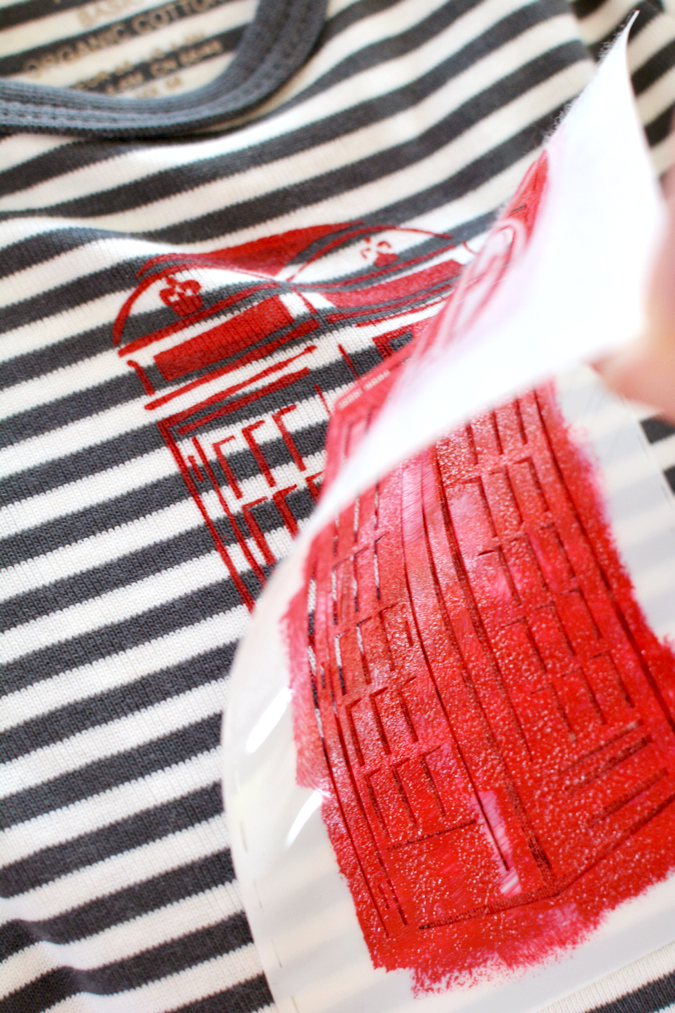
The best part of any stencil project is peeling the stencil away to see what you’ve got! You can see that between the stable backing provided by the freezer paper and the stable stuck-on stencil that was adhered temporarily the resulting lines are clean and lovely. One last tip – after you rinse the stencil and pat it dry with a paper towel, put it sticky side down onto the shiny side of a piece of freezer paper to store it until you’re ready to use it again.
NOW – I’m so excited to take these to go and meet him!
Looking for more Plaid products and projects? Look here—> on The Plaid Palette blog, Pinterest, Facebook, Twitter, YouTube, Instagram
I created this post as part of a sponsored campaign by Plaid and Blueprint Social. The opinions, as always, are mine.
I can hardly wait to get at least one of these stencils, hmmm which one will I choose? Hard to decide but think I want the British one first then stencil with the birds and then the bees. So much fun stuff. Might try some of the paint also. Good thing I got some coupons from Jo-Ann’s in the mail. Our Jo-Ann’s is in the mall in Grand Junction and they usually have coupons out in mall at the entrance. I might need to have hubs buy something for me with a coupon in addition to my purchase. .
Love the baby clothes stenciled, they look so cute. I did that for my oldest son’s first baby, stenciled onesies, blankets and the wrap I made for the gifts. Can’t believe that was 18 yrs. ago already. It’s so fun to personalize gifts in any kind of theme. You did wonderful stenciling job. Lucky baby you gifted with those cute articles. Happy Spring days
Good tips! Definitely gave me some new ideas!
Super awesome!!! Great projects – these are adorable. Love the use of stripes!