
It’s KCW day 4 and I have one of my favorite versions of the Kensington for you! The button placket is an optional feature, but it’s adorable, especially in a contrast fabric.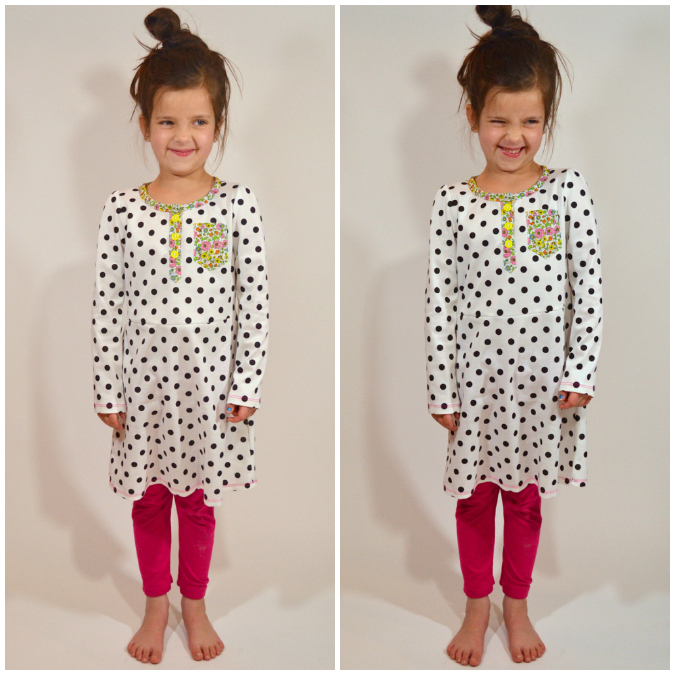
If you’ve never done a placket before, I would humbly suggest that this is a great one to start with. I started with three different placket insertion methods and combined them to produce the easiest possible technique. I also recommend making your first placket with woven fabric like I’ve done here. It’ll make pressing and precision a bit easier. My floral fabric is upcycled from a Liberty for Target scarf that Susan sent me!
The Kensington also comes with optional pleated chest pockets and pocket flaps. I opted to just do one pocket and left off the flap for this one.
I really wanted to do floral sleeve tabs, but this is a ponte knit and it was just not stretchy enough to roll up the sleeve and fit around her upper arm. If you opt to do sleeve tabs, make sure you’re using a sleeve fabric with at least 30% stretch.
My only alteration to the original pattern this time was to make an a-line skirt instead of a gathered skirt. Here’s how it’s done:
1. Fold your fabric and use a pen to mark directly on it. First measure down the fold the desired finished length of the skirt. Then measure out 1/4 of your lower bodice waist circumference perpendicular to the fold, at the top of the skirt. Do not mark this point with a pen, use a pin. 2. From the end of your waist measurement, measure straight up 1 inch. This will be your new side seam point, mark it with your pen. Draw in a curve from this point to the top center of your skirt. Make sure you come to the fold at a 90 degree angle.
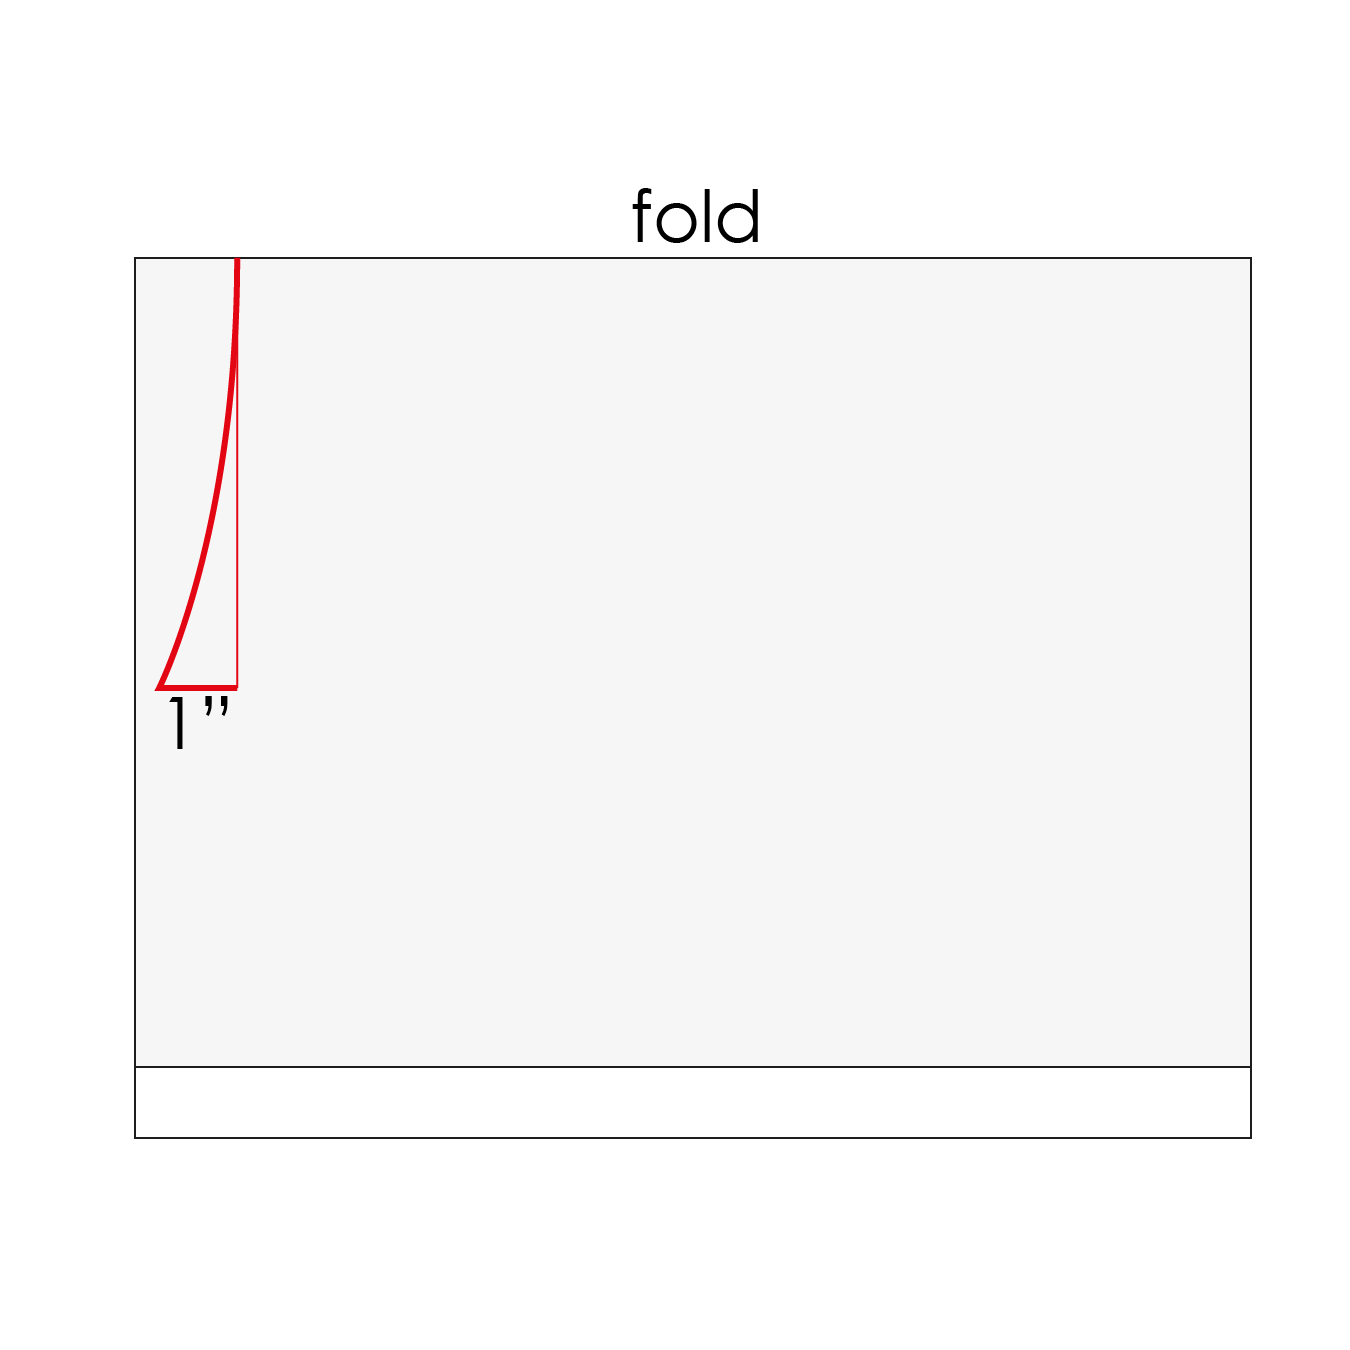 3. From your new side seam point, measure at an angle your finished skirt length. The angle is up to you, but the wider the angle, the more voluminous the skirt. Err on the side of too wide and you can always take it in if desired.
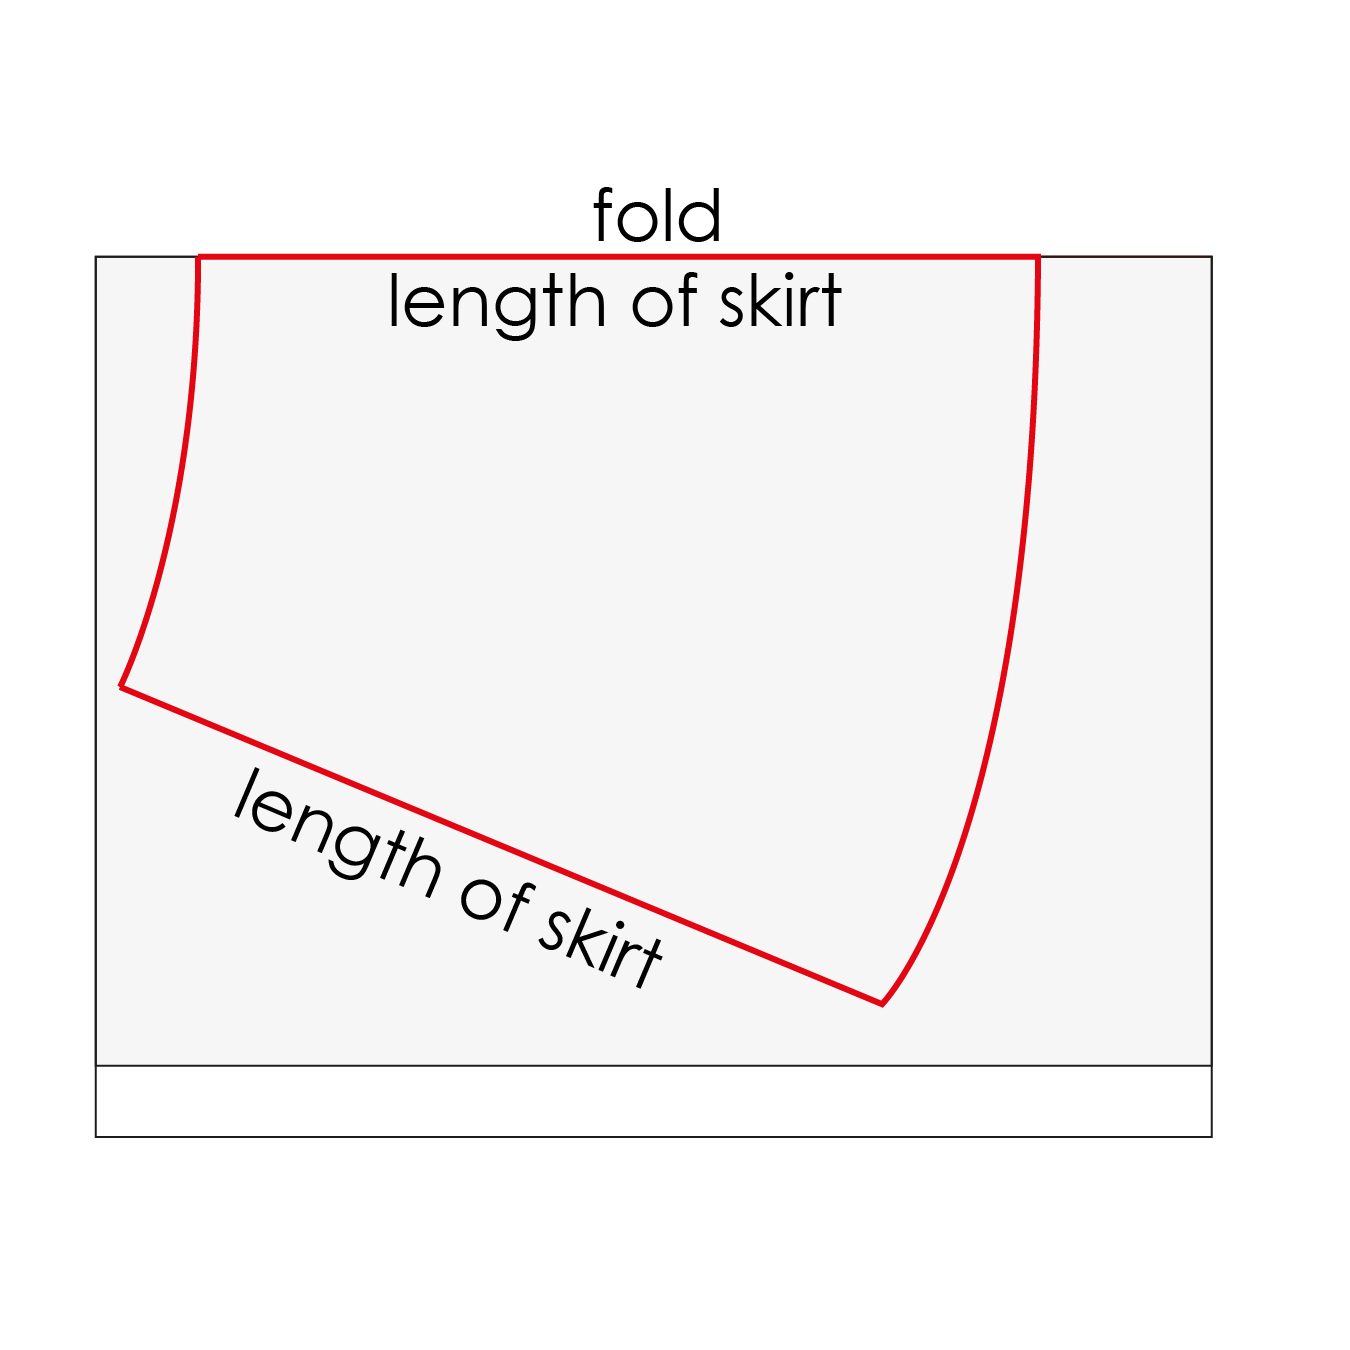 That’s your a-line skirt pattern! Cut two of these, sew them together at the side seam, and then attach them to your bodice and hem.
If you follow me on Instagram, you saw my poll for button color. I was going to go with white, but I got a nearly unanimous vote for yellow so I thought I’d respect the process and go with the majority. I think I needed to take a step back from it, because I really love the yellow in these pictures. Thanks Instagram peeps! The hems are pink because of a design decision and not because my coverhem was loaded with pink thread. Not at all.
Tomorrow or Saturday: My last Kensington and a bonus pattern! The Kensington is still 20% off using code “KCW” through Saturday!
This is so cute! LOVE the polkas and the floral. I want that dress for me.
Gah…this dress is too cute. I love the combo of polka dots and flowers!
So cute!
WAY cute! Love dem yellow buttons! ;)
Awww, so adorable. I’ve never sewn a placket, and I had no idea how to change the skirt from gathered to a-line, so thanks! The go one up inch thing, yeah…I wouldn’t have done that. Love her hair :)