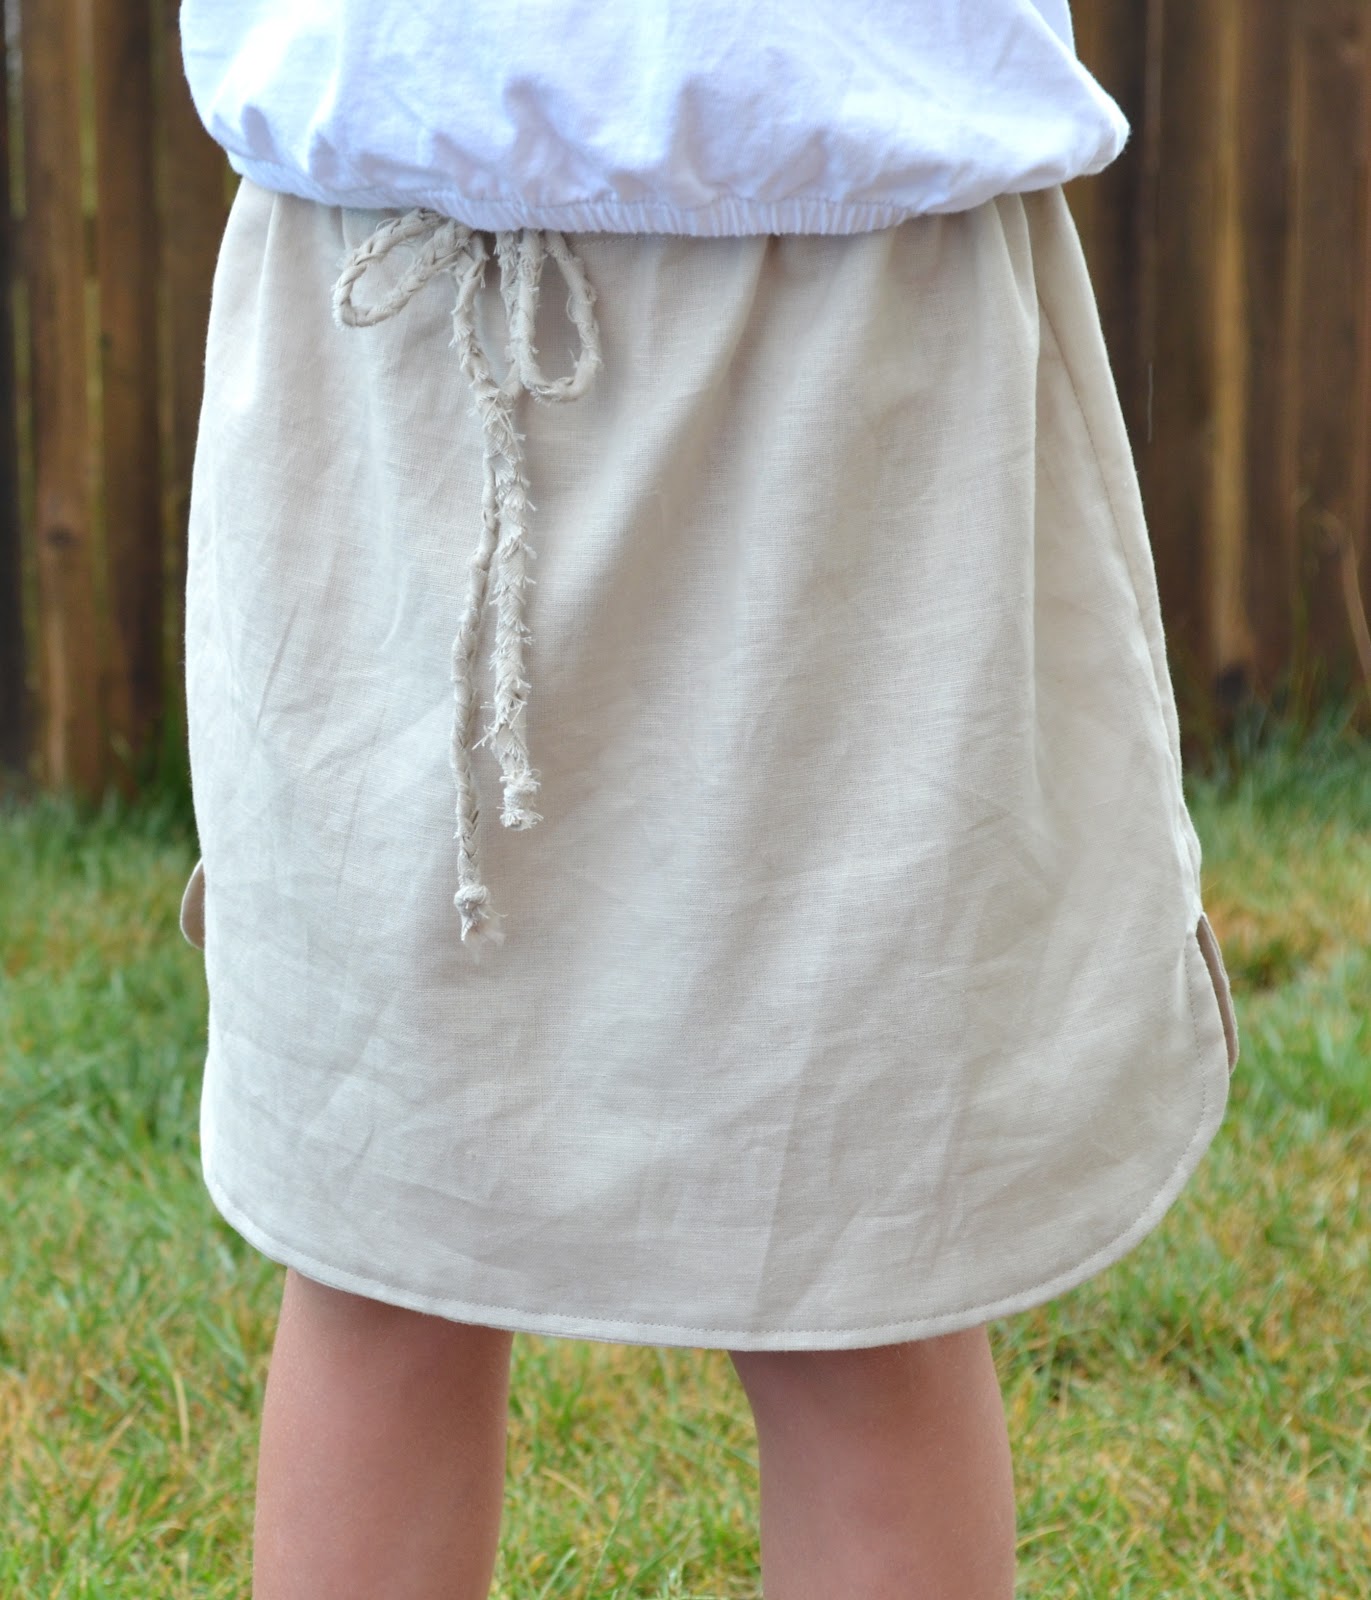
Today I’d like to share a fun and easy summer staple, the Breezy Linen Skirt!
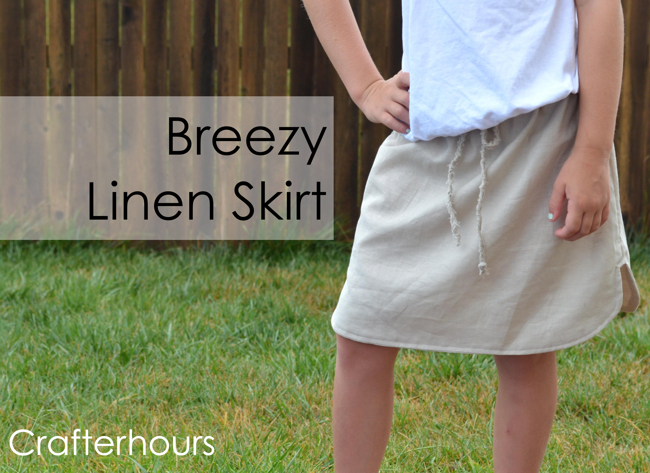
I made this skirt as part of Simple Simon & Co and Project Run and Play‘s Skirting the Issue Event, where they are collecting skirts to donate to girls living in foster care.

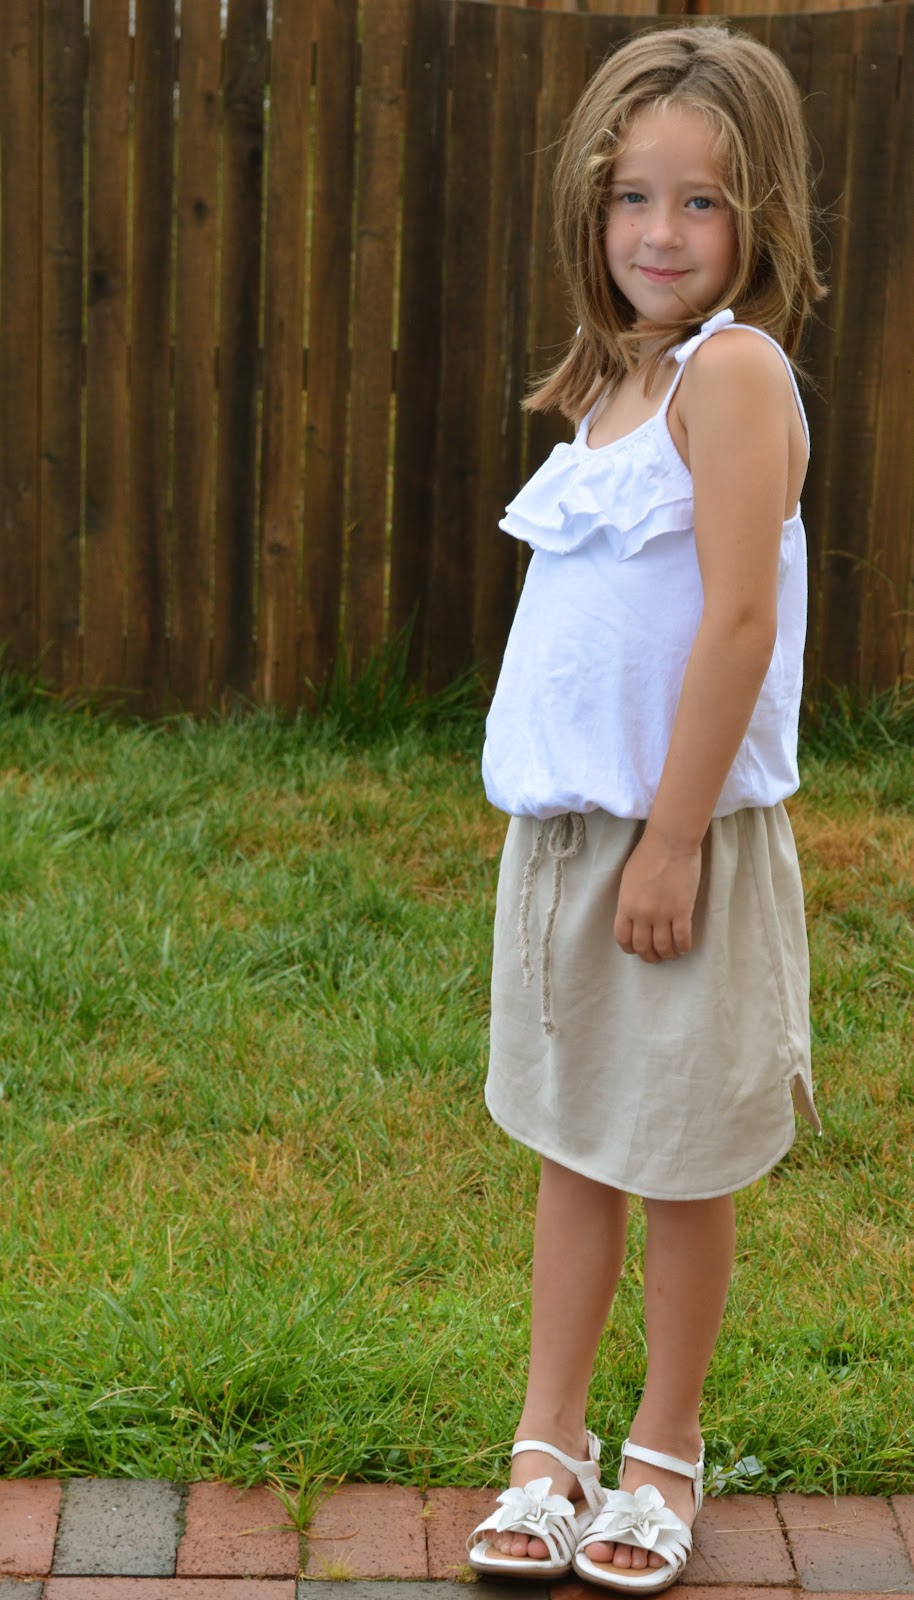
The Breezy Linen Skirt is great for whipping up because it’s very simple and can fit any size, newborn to adult, just by changing up the measurements. And despite the name, you can of course make it in different fabrics too. Seersucker or chambray would work especially well.
Throughout the tutorial I’ll be throwing in shortcuts, kind of like in yoga videos when they give people the option to hold on to a chair. So read through it first and decide if you want to keep it simple, or if you’re going full-on downward facing dog.
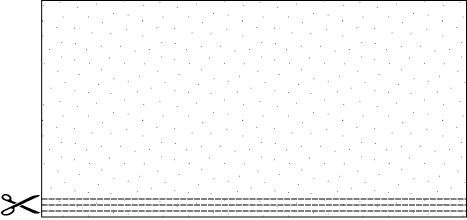
notes: I used a 1/2 seam allowance for the tutorial. The polka dots indicate the right side of the fabric.
Step 1:
First take your yard of fabric and cut 3 half inch strips from selvedge to selvedge. Depending on the width of your fabric, your size, and what method you choose to use, you might not need the whole length, but go ahead and cut it for now.
Step 2:
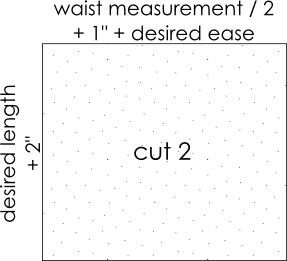
Make two rectangles with the following measurements:
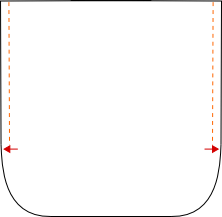
– for the width, measure the wearer around the waist where you want the skirt to sit. Divide that number by 2. Add 1 inch for seam allowances. Then add more for desired ease. I thought the style of this skirt looked better fairly straight, so I added about 4-5 inches. You can add more for more gathers and fullness.
– For the length, measure how long you want the skirt to be (it’s always best to measure down your bum so it’s not too short in the back!) and add 2 inches for the elastic casing and seam allowances.
Step 3:
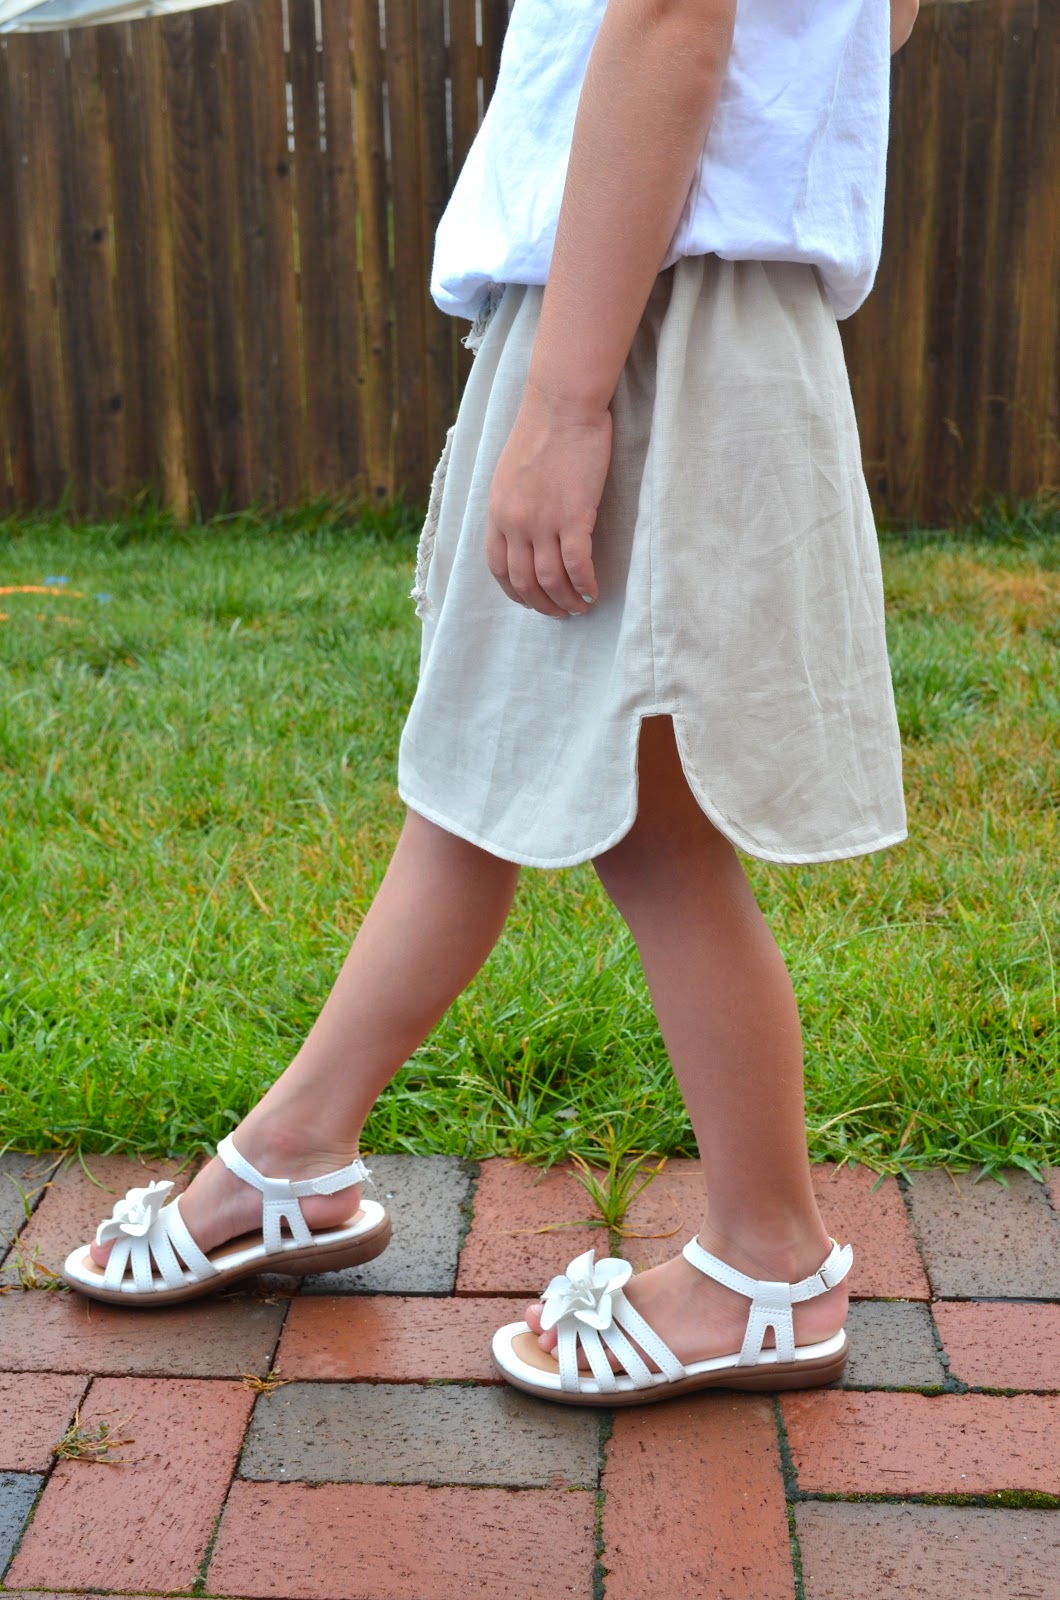
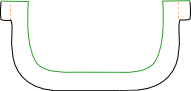
Take your front and back pieces one at a time and fold them in half. Lay a bowl or something round on the outer corner (not the folded side) touching the hem but staying a 1/2 inch away from the side seam. This will be the slit in the side of your skirt, so don’t make it indecently high (unless that’s what you’re going for).
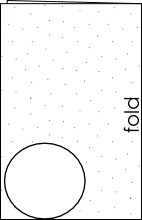
When you cut around it, make a straight cut over to the side seam 1/2 inch below where you want the slit to end.
Step 4:
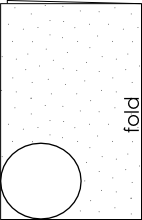
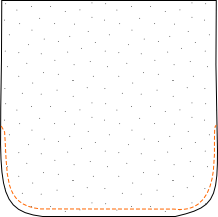
Lay one of the folded skirt panels down on folded fabric, lining up the folds, and use the bottom edge of the skirt to cut a facing. Repeat so you have two facings.
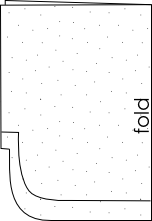
Step 5:
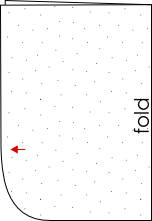
Put the skirt panel aside and cut the facings along the green line shown, keeping it an inch away from the bottom edge. Sew the two facings right sides together at the side seams, as shown by the orange stitch lines.
Sew the skirt right sides together down the side seams also.
Step 6:
Press open the seam allowances on the side seams of the skirt and facing. Turn the skirt right-side-out and the facing inside out. Line up the facing with the bottom edge of the skirt, matching side seams. Pin. Sew the facing and skirt together around the bottom edge. At the side slits, you will be sewing over the skirt’s seam allowance, the skirt, the facing, and the facing seam allowance. Sew the seam at a gentle curve coming up to the side seam. See the magnified portion for a visual.

Shortcut alert!
If you don’t want to deal with making a facing, you can do the following instead. If you are making a facing, skip ahead to step 7.
Do step 1 & 2, but then skip to these directions:
Step 3:
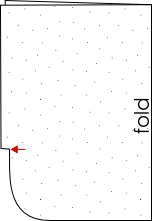
Place your bowl flush with the sides of the skirt and the bottom hem and cut around the curve.
On the inside of the skirt panels, mark where you want the slit to reach. Do this on both sides.
Step 4:
Pink, zig zag, or serge around the sides and bottom of the skirt panel to create a finished edge. Do this to the front and back.
Step 5:
Lay the skirt panels right sides together and sew down the side seams until you reach the marks you made.
Step 6:
Press open the seam allowances, continuing to press the bottom of the skirt up half an inch as well on the inside.
Now back to our regularly scheduled tutorial…
Step 7:
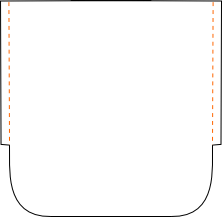
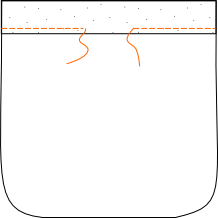
Cut into the corners and curves in the seam allowance at the top of the slit, being careful to avoid the stitch line. This will make turning and pressing easier. Turn the skirt right side out, press, and top stitch along the hem. You can come down from the top of the skirt, all the way down the side seam, or you can start above the slit at the side seam, angling out and down as shown by the orange stitch line below. Just make sure you catch your turned edge on the back.
Step 8:
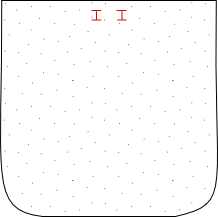
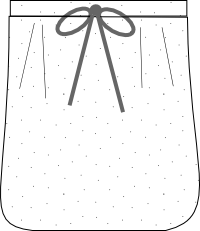
Find the top center of the front of your skirt. Measure 3/4 inch down and 3/4 inch out and mark a buttonhole opening. Do this on both sides of the center point:
Sew the button holes and cut them open.
Step 9:
Turn the skirt inside out. Press the waist edge down 1/2 an inch, then another inch. Sew 1/8 of an inch from the edge of the fold all the way around, leaving a hole open for elastic insertion.
Measure around the wearer and subtract an inch to get your elastic length. Pull the elastic through the tunnel you just made and sew the ends together.
Step 8:
Take your 3 lengths of 1/2 inch strips and braid them together. This just might be the hardest part of the project! It’s hard to keep the ends from braiding while you’re braiding the top, but just go slowly (or have 3 people hold the ends and jump over one another. That would be fun!) Depending on the width of your fabric and the size of your skirt, you might need to cut more strips and sew them together to make the drawstring long enough.
Pull the braided drawstring through the buttonholes and tie a bow.
Stitch the opening in your waistband closed.
Shortcut Alert!
If you don’t want to deal with buttonholes, just find the center of your braided drawstring and tack it on to the front of the skirt. For this option, you only need your drawstring to be about twice the length of your skirt.
And you’re done!
Thanks for following along!

this is lovely Adrianna. I love the side curved hem, perfect for Summer!
So cute and different! I’ve already bookmarked it for my to-do list! Thanks.
So cute! Very nice tutorial!
awesome! Even I can do this… thank u for sharing!
Perfect skirt for this hot, hot summer! Can you please just clarify for newbie sewers like me, is the facing a whole second layer (i.e. lining/slip) or just a strip of same fabric sewn along inside bottom edge to give it more body? Any help, hints would be most appreciated! Fabric and machine are standing by! Thanks, and congrats on great project.
Hi ardmore! Yes it’s just a one inch strip in the same shape as the bottom of the skirt like the illustration on step 5. You could also do a full lining and make it reversible fairly easily. I made up one sample that way but liked the drape of a single layer of fabric better. Good luck!