I wish I had a picture of the original, but H&M doesn’t have a (real) website, so you’ll have to use your imagination. A solid-color, cotton knit tank dress with a drop waist and rows of ruffles on the skirt. The original had a ribbon belt with a little bow on one hip.
At only 10 euros, I almost bought it. Though I love to sew, I still love to shop, and I can’t pass up a good deal. Even if I could make it myself. But the thought of all those knit shirts sitting in my refashion pile had me putting this one back on the rack and giving it try myself first.
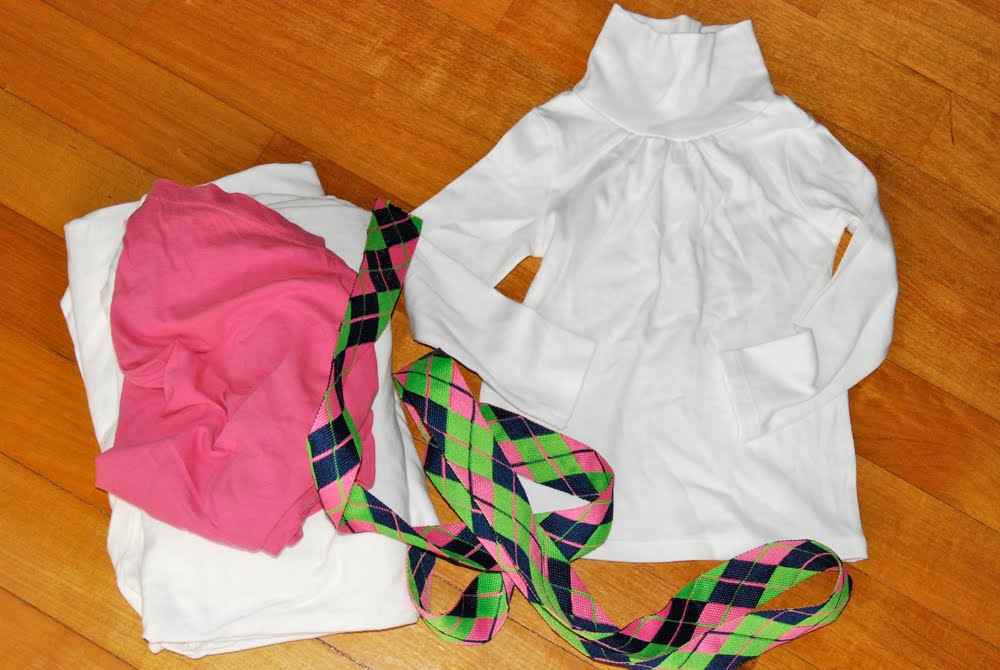
As soon as I got home, I grabbed a turtleneck shirt that fits my daughter well (but I hate, and I mean hate turtlenecks. not as much as purple, but close), a pile of old T’s, and some ribbon to construct the belt. The h&m version was monotone, but I decided to use two colors:
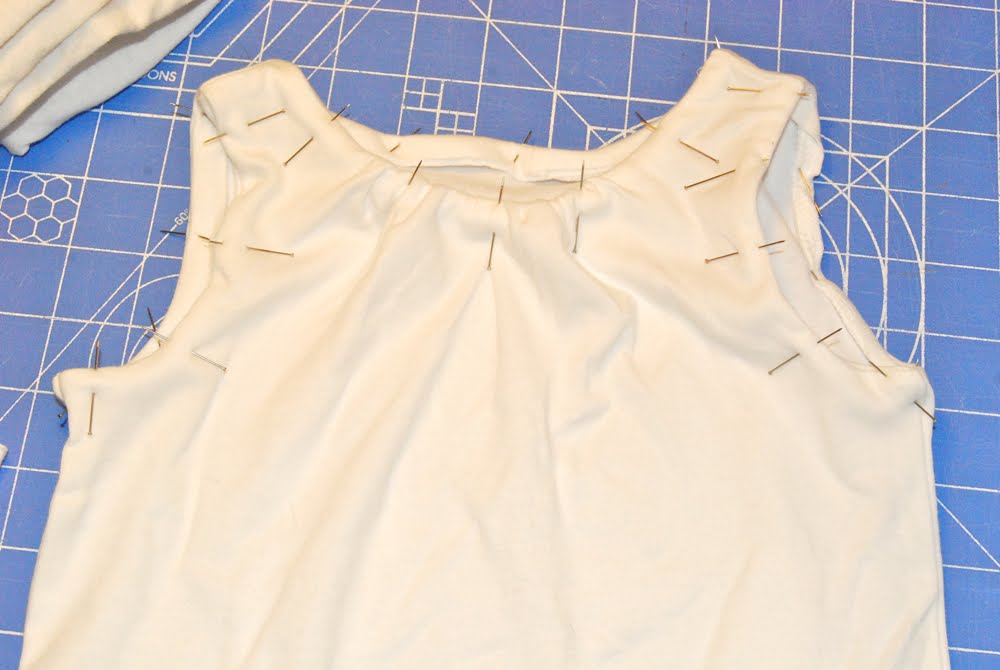
I carefully cut around the arms and neck of the turtleneck, leaving about 1/4 inch around the seams so I could tuck them under. Then I pinned like crazy:
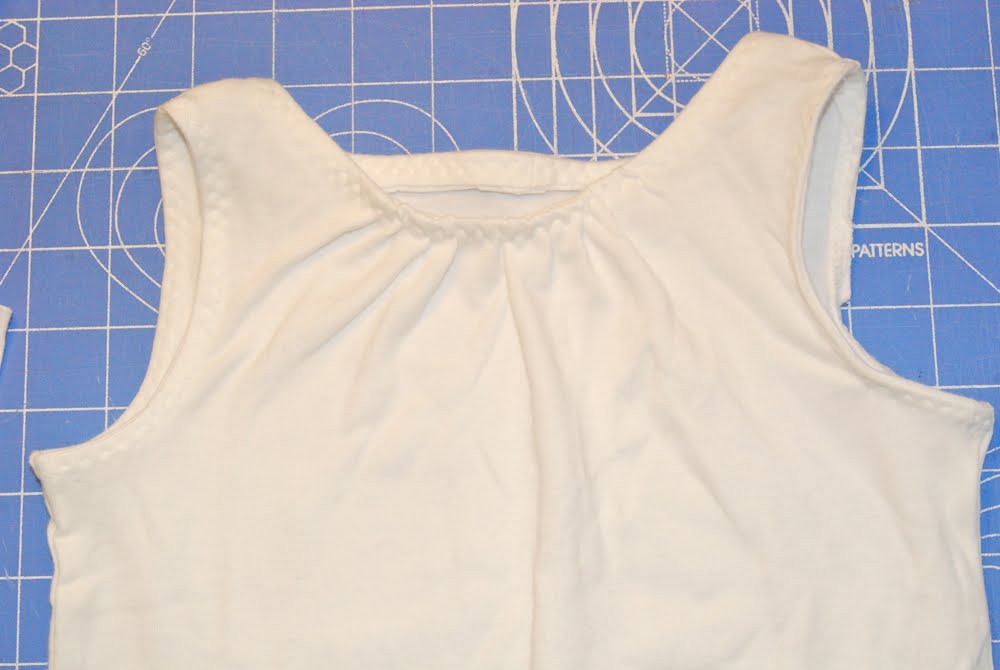
And sewed the raw edges down with a wide zig-zag to maintain the stretch:
Using a scrap shirt, I cut out a skirt shape in one long rectangle. The finished skirt will have only one seam. This picture shows it on the fold. Make sure the top of the skirt is the same width as the tank, plus seam allowances (note that the skirt I cut has a wonky angle on one side. Don’t do that. Make it a rectangle):

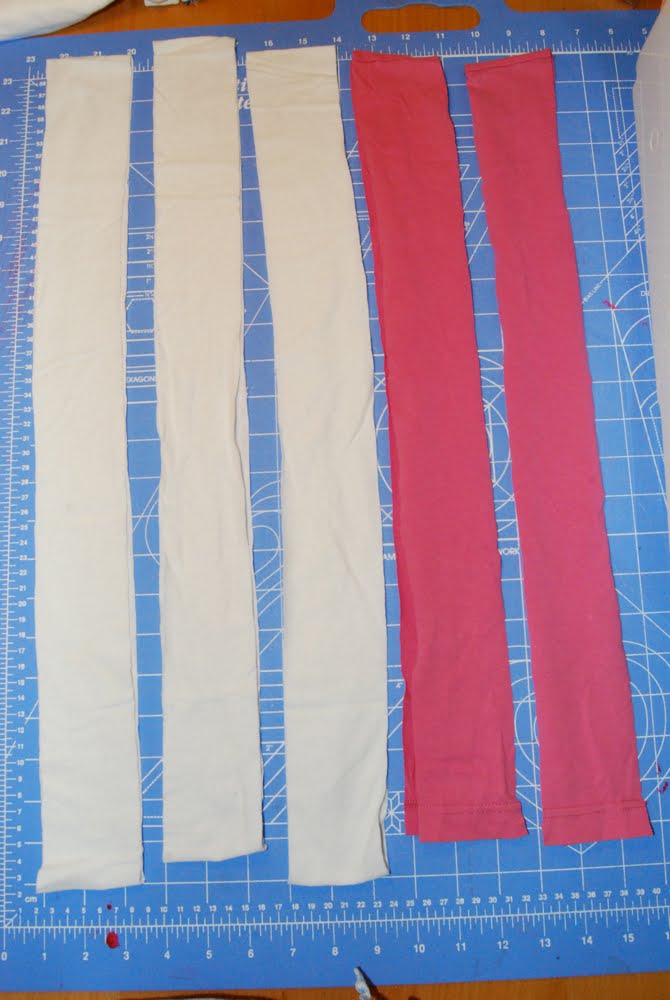
Then I cut 2.5 inch strips from more scrap shirts (these are also folded in half – they need to be super long:
Then I ruffled each long strip and began sewing them to the skirt base. Distribute the ruffles evenly, pin, and sew down. The top ruffle will have a raw edge meeting the top raw edge of the skirt:
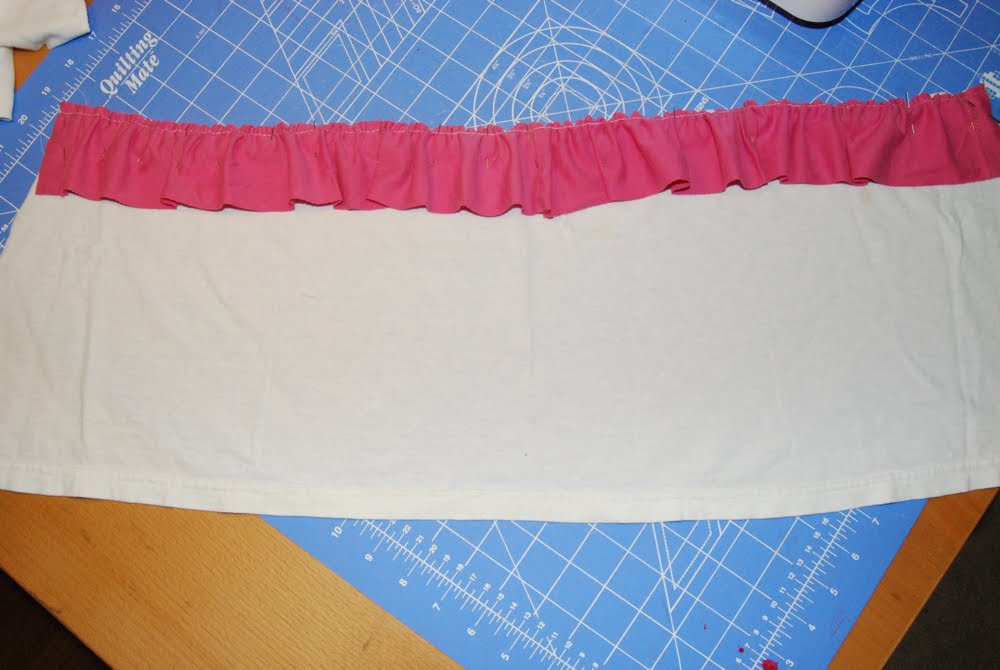
Pin each subsequent row so the seam is just covered by the ruffle above it:
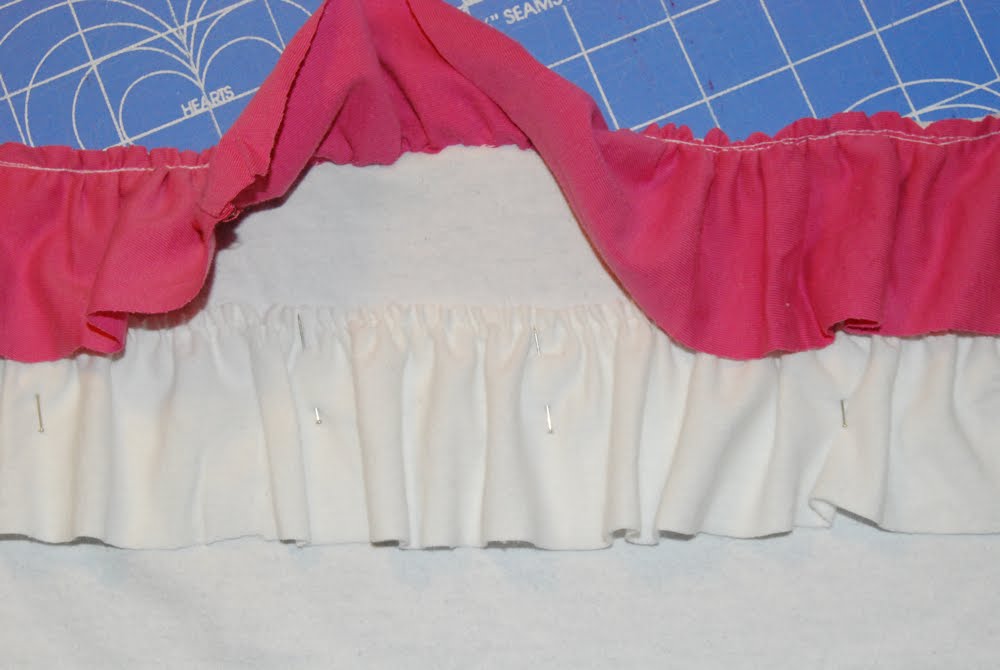
Are you still with me? Because I have to admit, after that 2nd ruffle, I seriously considered heading back to h&m with my 10 euros in hand. Totally worth it. If you persevered, however, you’ll now have this (note that the bottom ruffle goes beyond the hem of the base skirt):

Pin the raw edges of the skirt together, making sure that each ruffle is lined up down the seam:

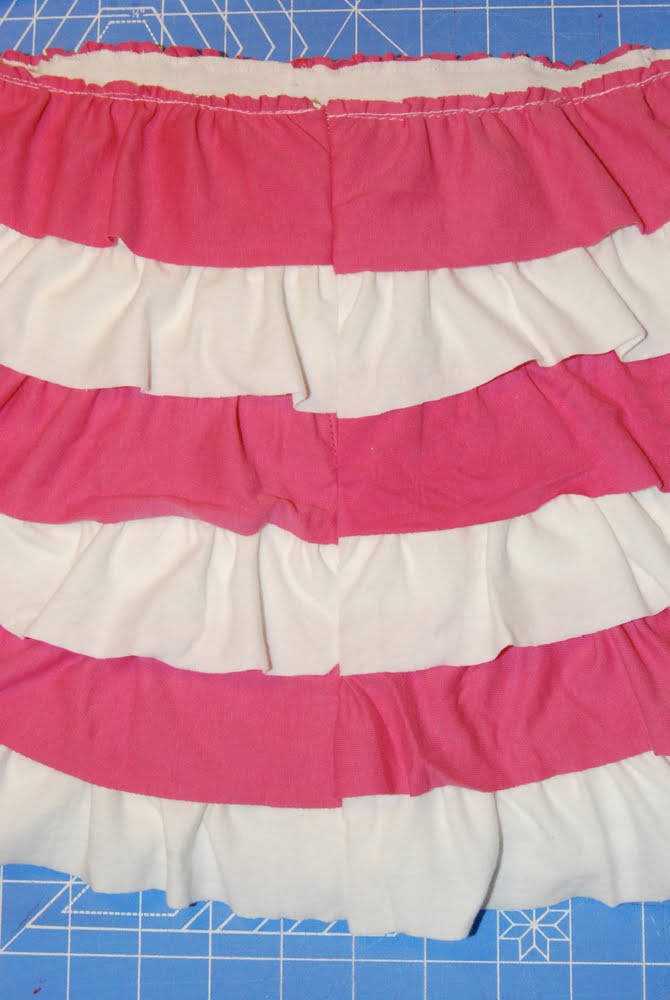
If you eyeballed correctly, your seam should look like this:
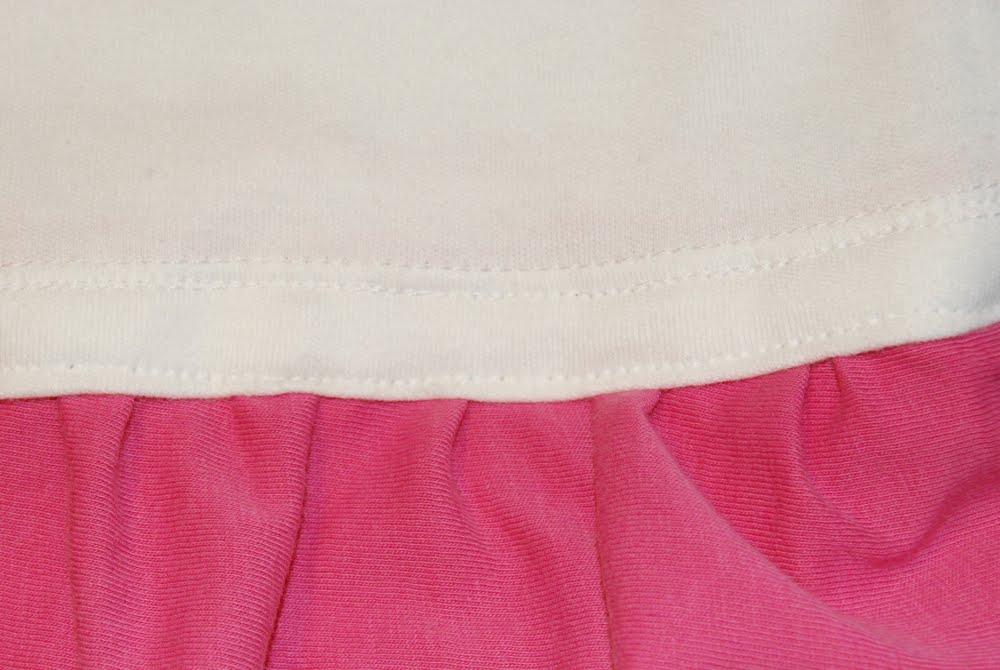
Now pin the skirt underneath the nice finished hem of the tank all the way around:
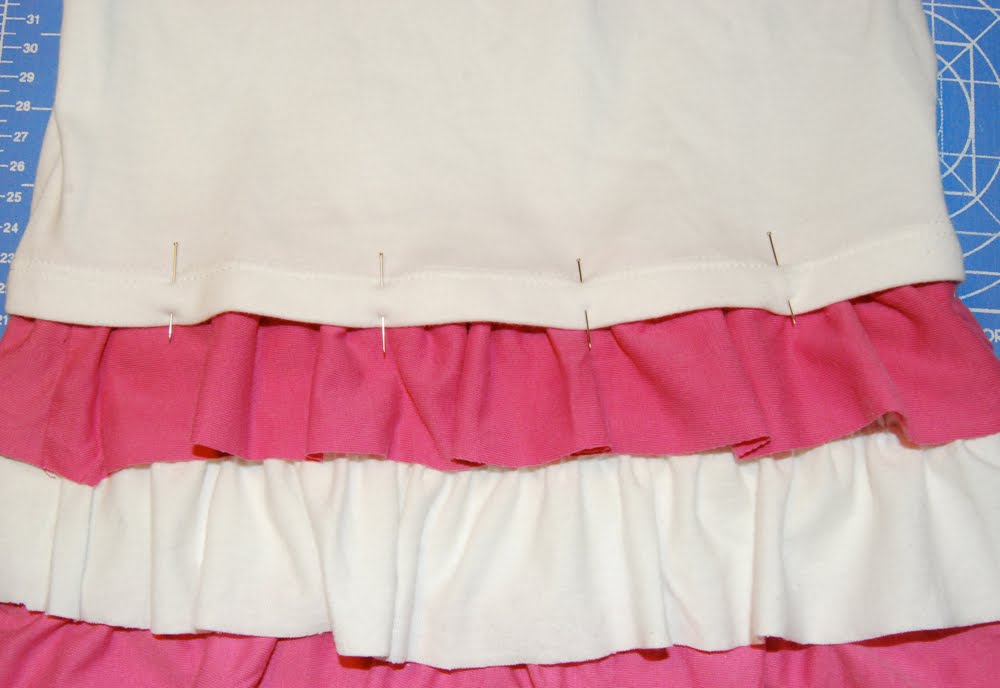
And stitch it twice, once over the existing seam in the shirt hem, and another time right at the edge. Now the skirt is good and in there, and it looks pretty too:
Here’s where the part where I’m a fickle woman comes in. I positioned my ribbon belt over the dress and decided I didn’t like it. I like simple clothes and all those ruffles were already a bit much for me. So I scrapped it.
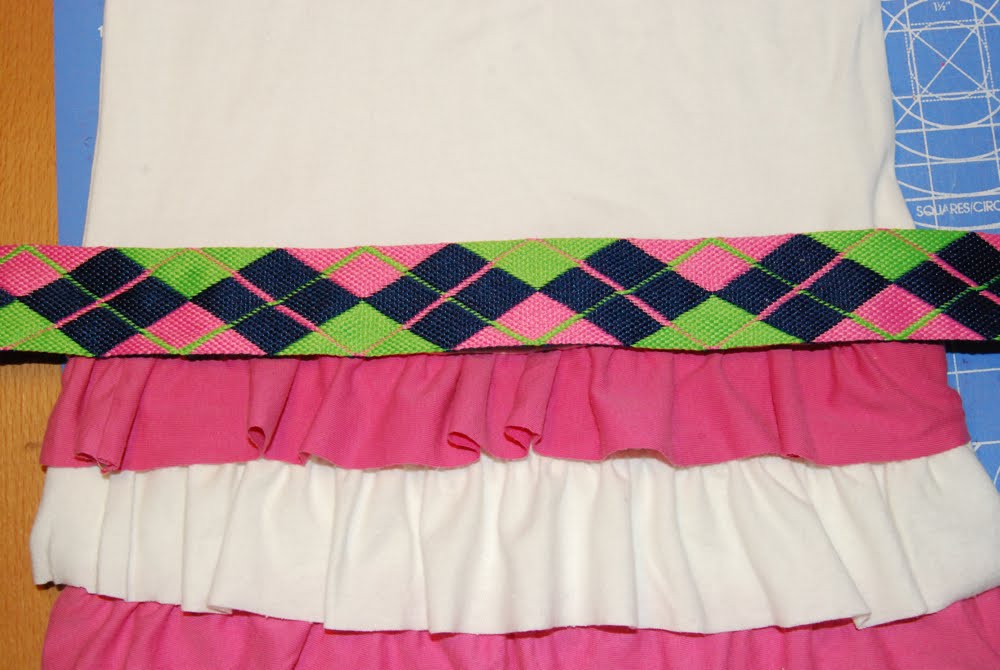
And while I was trying to decide how to embellish the tank, because it so clearly needed something, I absentmindedly tied a little bow with a leftover scrap. So I just slapped that sucker on, and there you have it!

This must be a dancing dress, because my twirly girl wouldn’t stand still for a single picture:
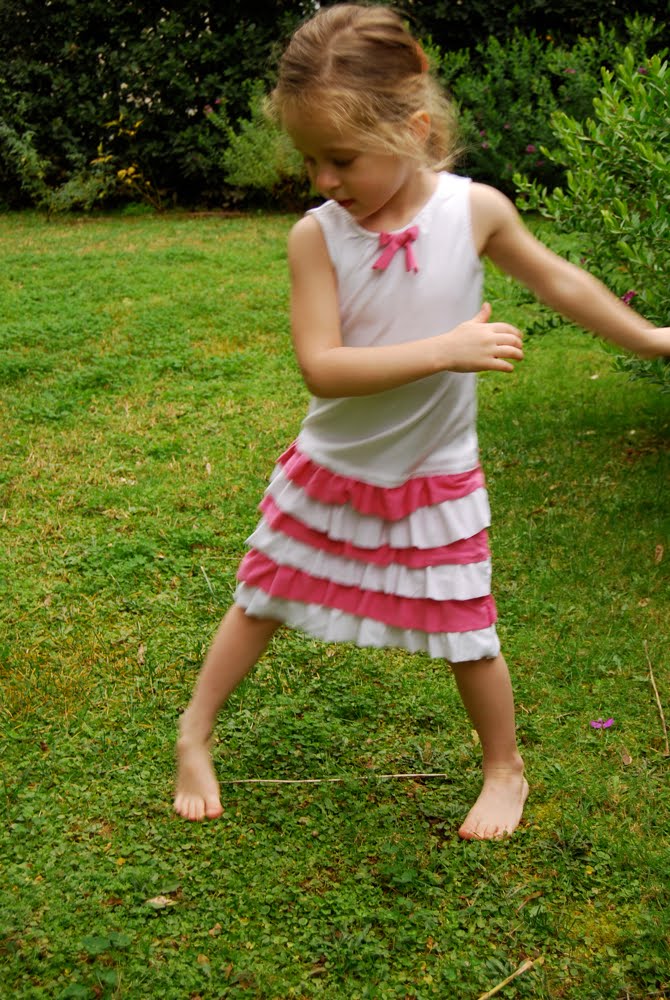
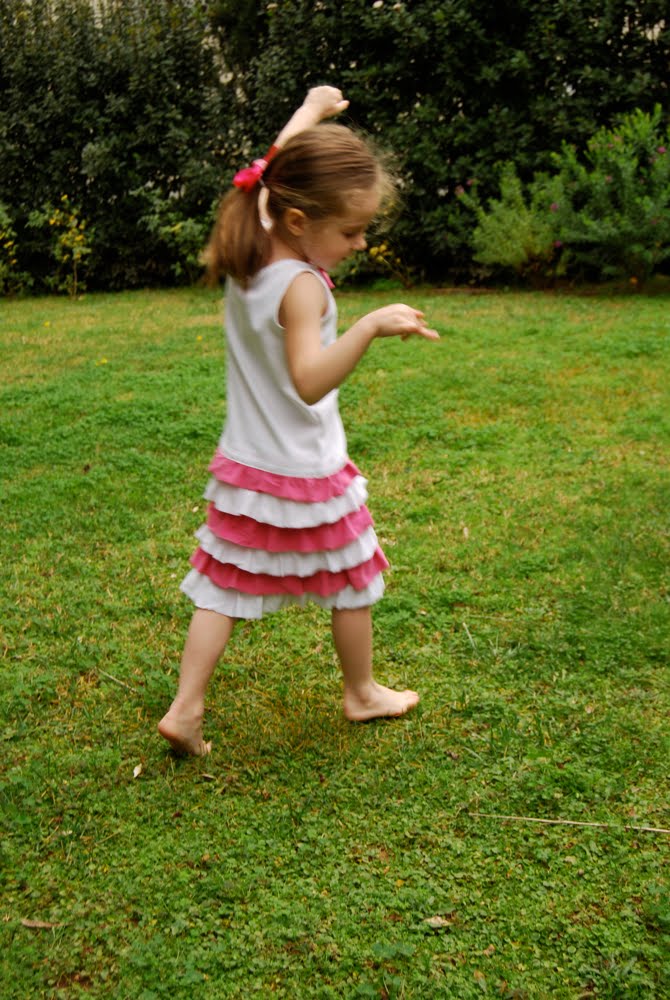
If I were wearing all those ruffles, I’d probably have to do a few spins too.
I’ve got a few more copycat dresses on my table, so stay tuned for those!
Oh, and if the idea of making all those ruffles and then distributing them evenly is giving you hives (like me), then I suggest something along the lines of this. In fact, I think I actually like that way better.

That is SUPER CUTE! Thanks for sharing! :)
this is jist adorable! I have to try this myself – my kids LOVE ruffles!
Looks amazing. I recognize that belt material from our trip to NY. Good times.
Cute! Very Cute! I also HATE turtlenecks. Who knew? We’re more alike than we thought. But the purple hating??? Why? I like purple.
Kyra
Super cute!
That is adorable. Thanks for the concise instructions!
SO pretty!! I love the alternating colors in the ruffles!!
I linked to your tutorial on Craft Gossip Sewing:
http://sewing.craftgossip.com/tutorial-girls-drop-waist-tank-dress-with-tiered-ruffle-skirt/2010/03/13/
–Anne
Hey! That ribbon is from New York!
Great idea! The dress is adorable, and I just happen to have all of the supplies on hand – my girls will love this!
OK I just made something similar to this and since I am way novice at sewing my only question is how do you fit it on the sewing machine? Once it is all pinned together and you are sewing skirt to shirt I can’t get it on my machine without sewing both layers or a random ruffle or sleeve. Please help!
I love this! Thank you so much! I actually wanted to make a ruffle tiered SHIRT and I couldn’t find a decent tutorial showing me how to apply ruffles, but this one is so well explained: I just love it!
I’ve been looking all over for a tutorial like this! thank you =]
now wish me luck haha
Oh, my LittleOne would LOVE that dress! I agree, the colorful Argyle was a bit much ~ might have made a really cute ‘Over the Shoulder’ bow! (0: