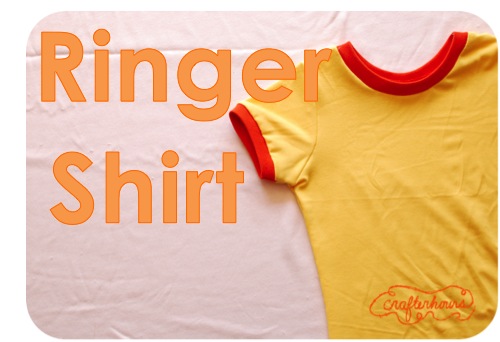
This classic shirt is about as easy as peasy gets. It’s the perfect project to conquer your fear of knits (that is, if you have one) and you don’t need a serger. NO SERGER! Got that?!
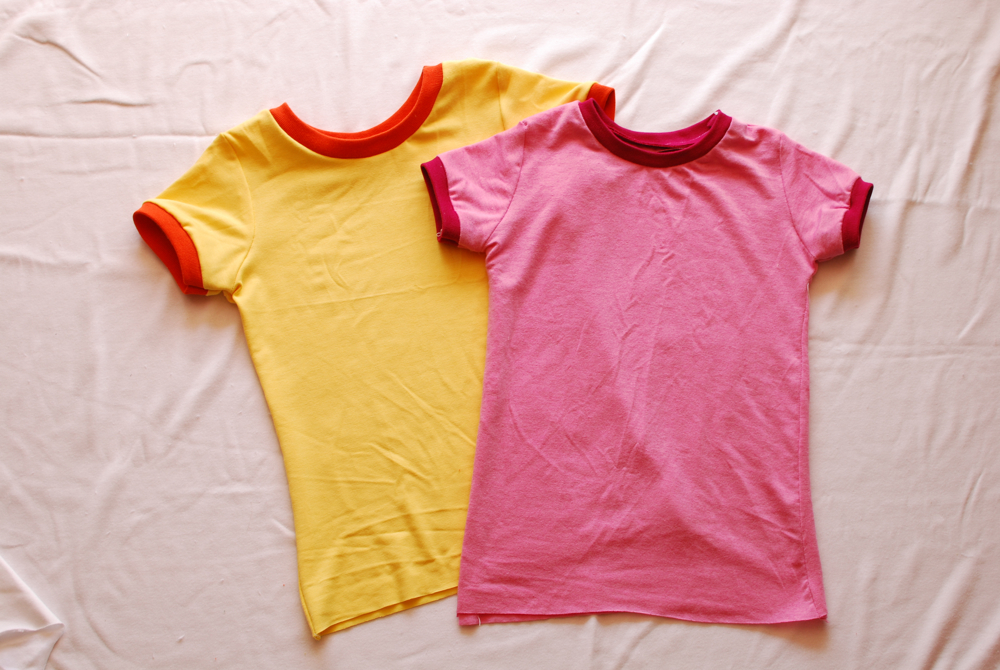
First, a note about knits. For this type of fitted knit shirt, you need to use jersey, or something of equal stretch. Interlock (this is what Hanes Ts are made of) is not stretchy enough and should only be used for boxier Tshirts. Your best bet for the neck and arm binding is rib knit, although you could also use an interlock or jersey. Have fun with the color combinations! I was limited and chose to do tonal colors, but if I had some maroon jersey in my stash, you can bet I would’ve cranked out a maroon and orange Virginia Tech tribute shirt!
Ok, on to the tutorial!
Step 1:
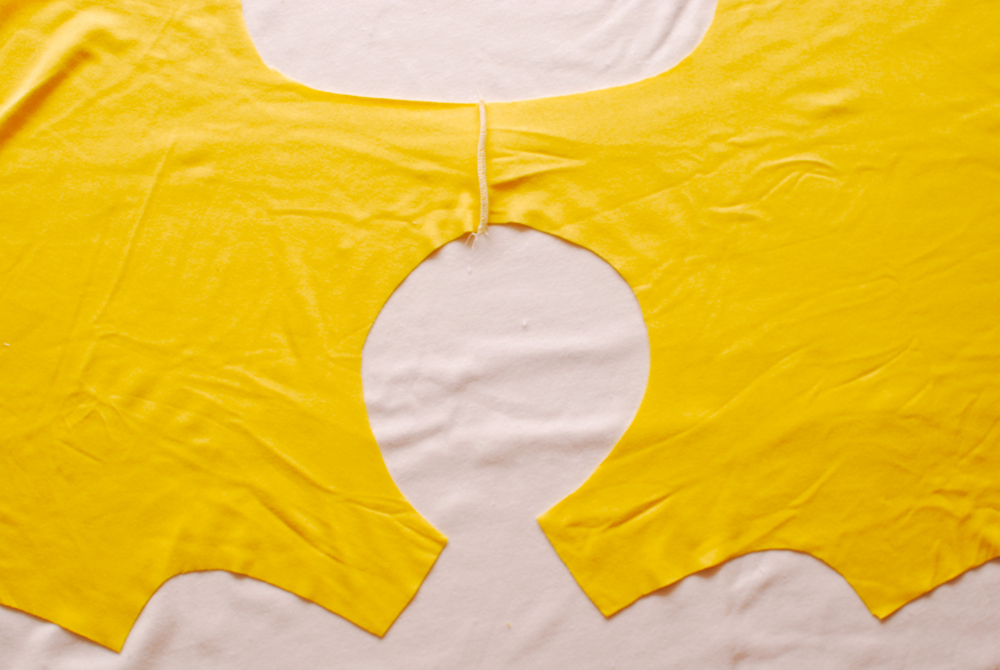
Here are the pieces you’ll need. Your best bet is to trace around a pre-existing crew neck knit shirt (make sure it is stretchy – not interlock). This picture will give you an idea of what you’re looking for. Note that these pieces are still folded and that the neckline on the back piece is higher than the front.

Step 2:
Sew the front and back right sides together at one shoulder seam. Just one! It doesn’t matter which one you choose. Use the stitch on your machine that looks like a little lightening bolt, or “stretch stitch”. If you don’t have that, set your zig zag to a smaller width (ie: set it so it doesn’t “zag” very much)
Step 3:
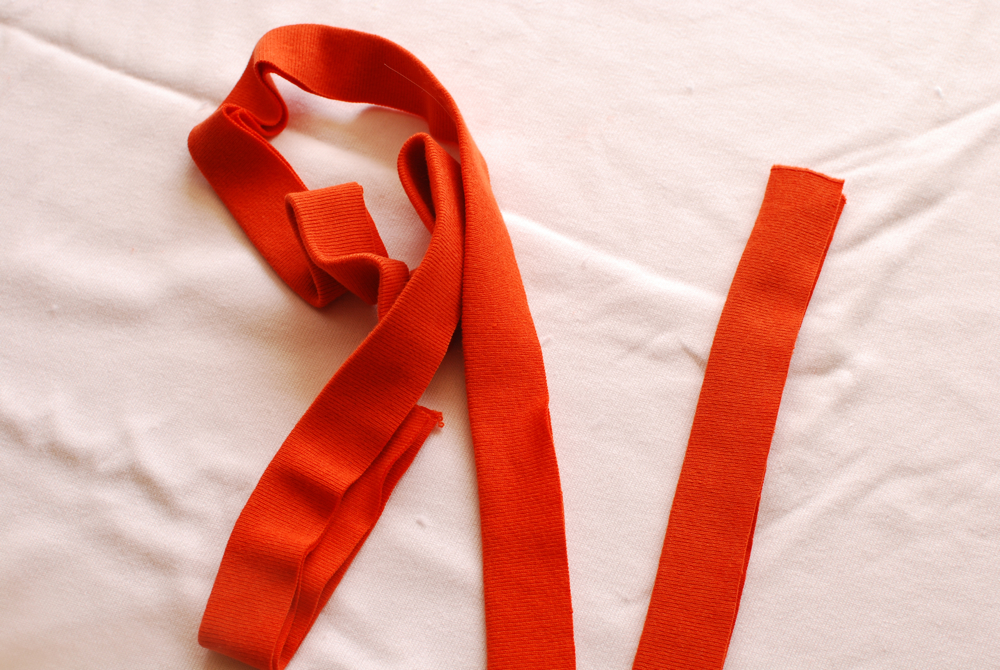
Cut a strip of rib knit 2 inches by the width of your fabric. You won’t use it all, but it’s better to have some left over than not enough. I know this is kind of wasteful, but then I figured a little 2 inch flap at the top of my yardage wasn’t going to be very useful either. Just cut it all off.
Step 4:
Fold your strip in half length-wise and press.
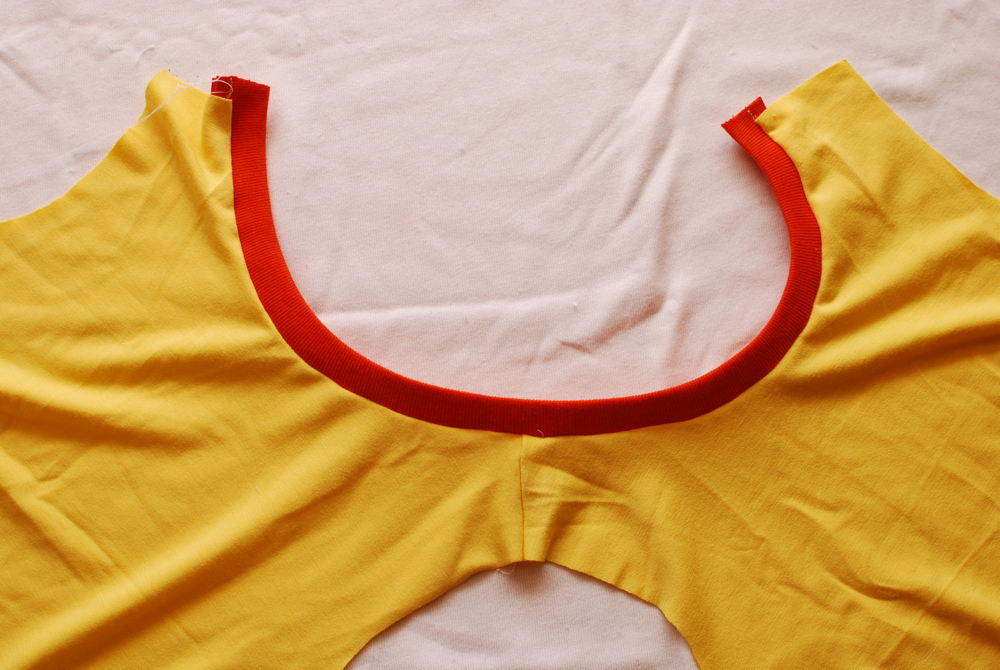
Step 5:
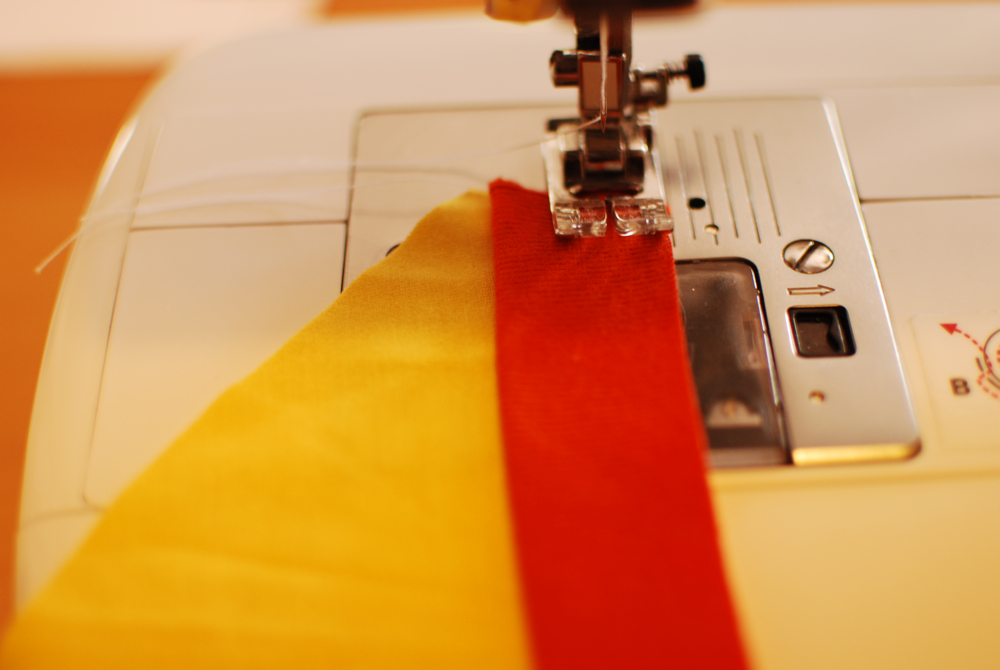
Line up the two raw edges of your rib knit strip with the raw edge of your neckline and sew it down, using the edge of your presser foot as a seam allowance guide. As you sew, guide the fabric with your left hand and use your right hand to stretch the rib knit strip slightly.
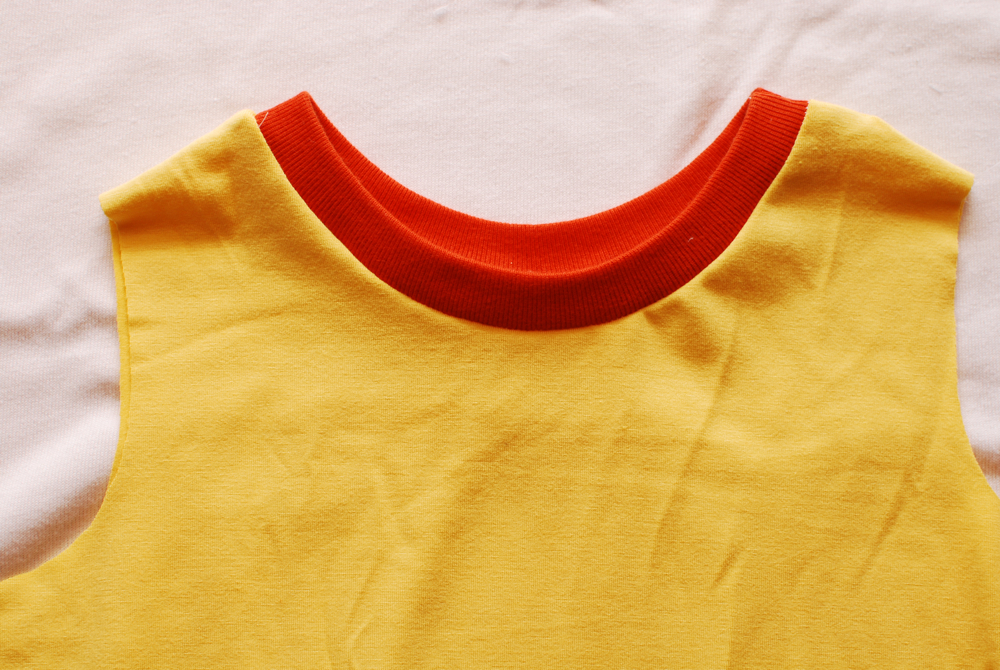
Step 6:
Ok, this isn’t a real step, it’s a step-back-and-admire step. Ooooohhhhh Ahhhhhhh.
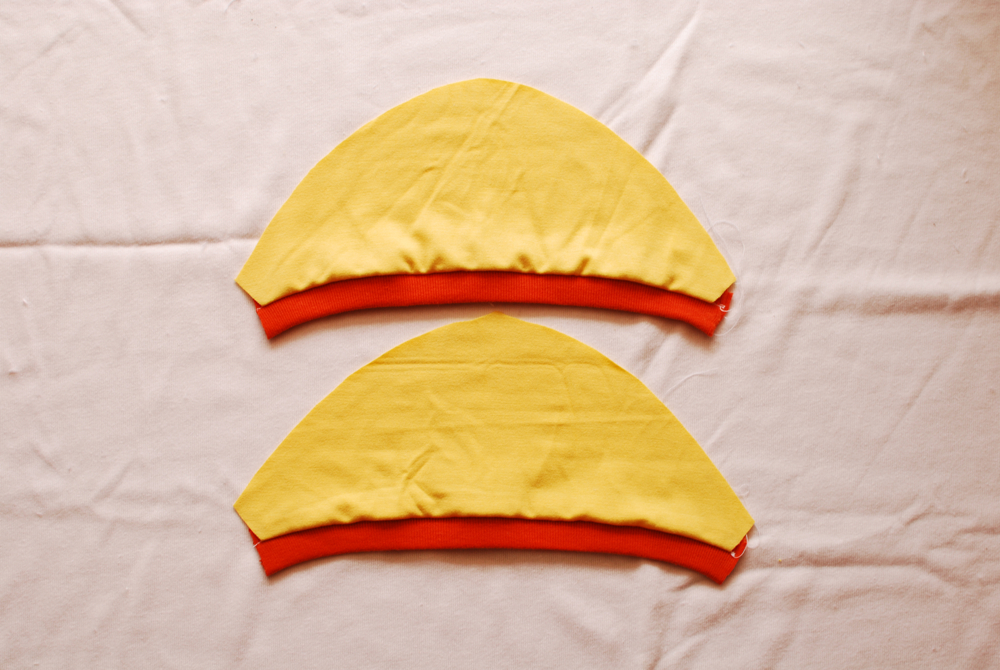
Step 7:
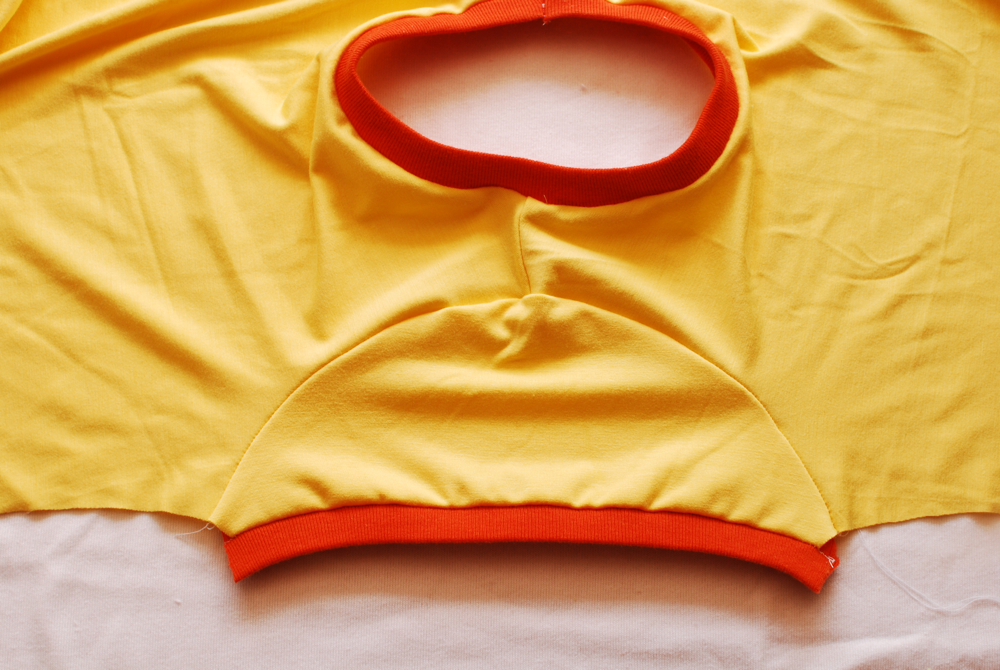
Attach the ribbing to the ends of the sleeves in the same manner. More oohing and aahing.
Step 8:
Now sew the second shoulder seam, right sides together, starting at the rib knit binding and ending at the shoulder.
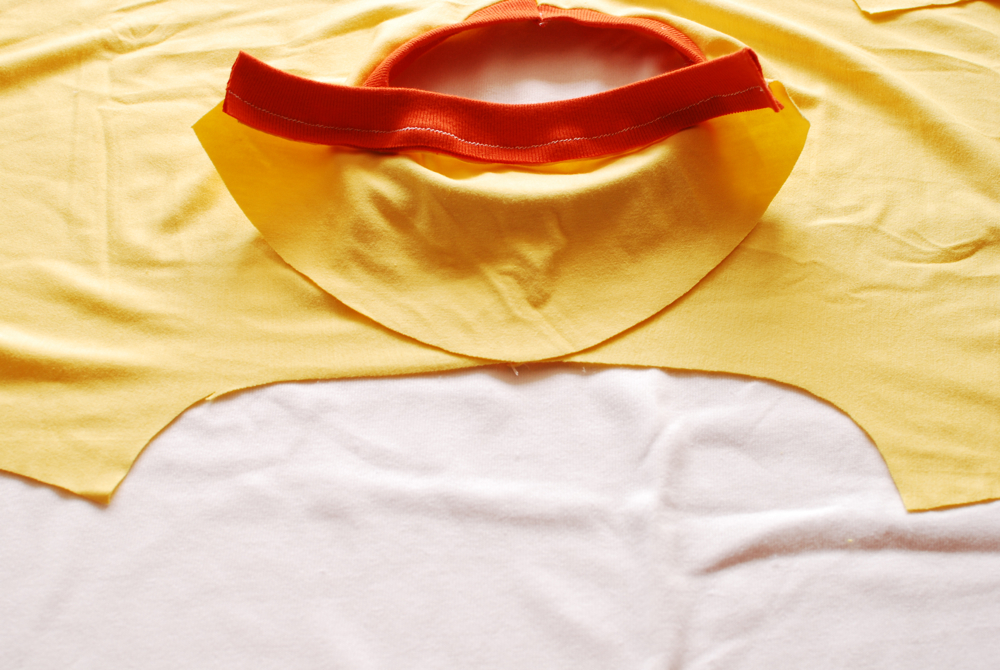
Step 9:
Open up your shirt so it is facing up and one arm curve is facing you.

Step 10:
Lay your sleeve right-side-down, centering it on the shoulder seam.
Step 11:
Pin the center of the sleeve to the shoulder seam. Then pin one side of the sleeve down the arm curve, bending it to your will as you go.
Step 12:
Sew from the pinned underarm to the shoulder seam. Leave your needle down and lift up your presser foot. Rotate the sleeve so you can go back down the other side. Now pin that side of the sleeve down to the arm curve and continue sewing.
After you’ve put in a sleeve or two this way, you’ll probably be able to just pin the center point and each underarm point and stretch and shift as you go. But for now, pin.
Step 13:
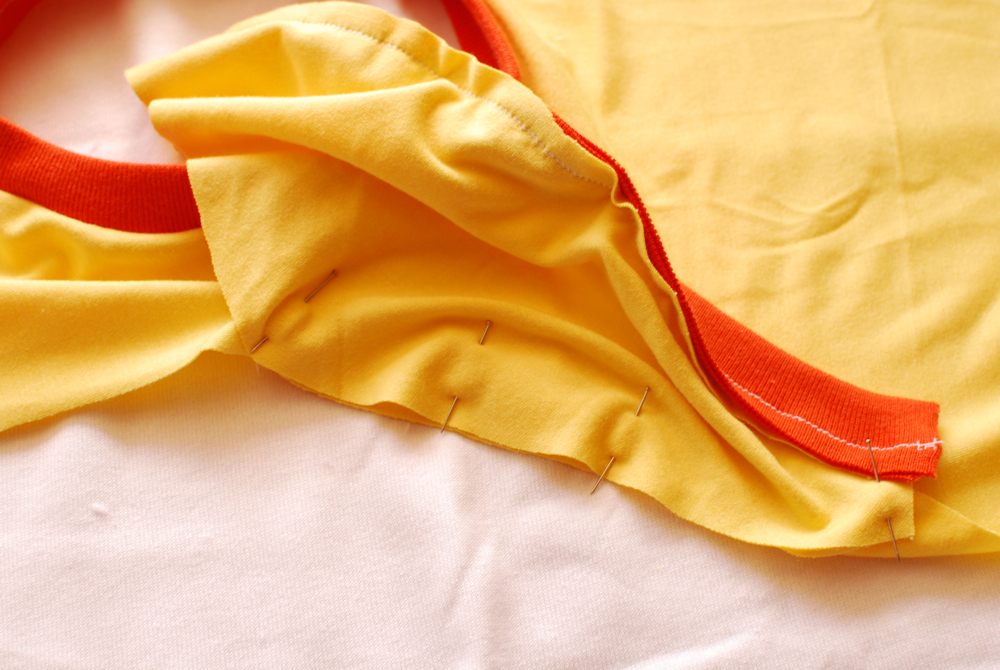
Another admiration step. Your sleeve is in! (mostly) Now do it again on the other side!
Step 14:
Right sides together, sew from the underarm (starting at the rib knit binding) down to the hem of the shirt. This will finish your sleeve and the sides of the shirt in one seam. Do that on both sides and you could be done!
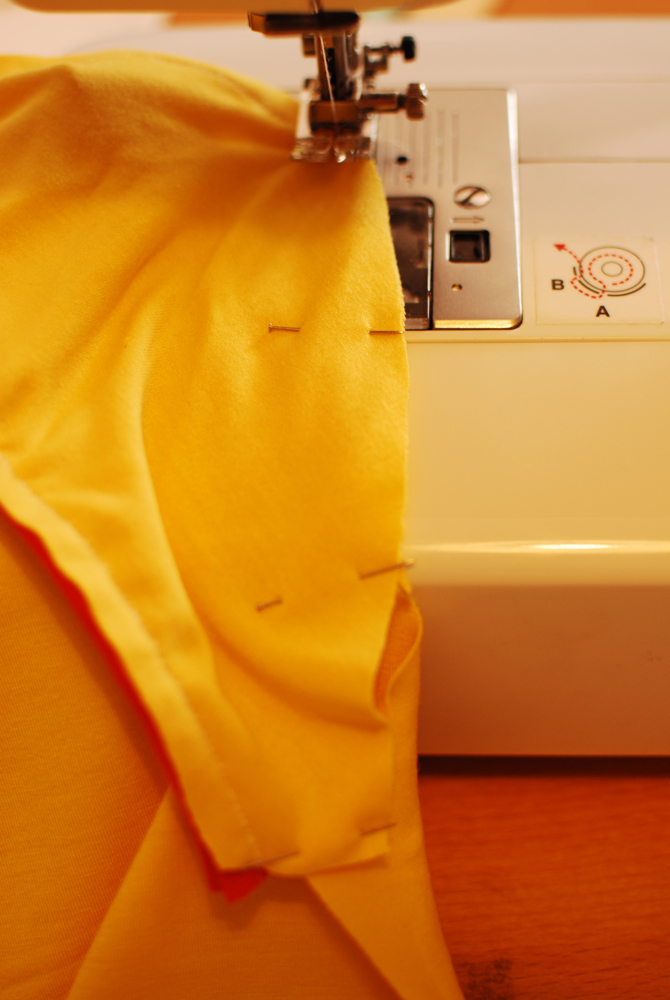
Optional: If you don’t want to be done yet, you could hem the shirt. There are a couple options:
#1: Don’t. Your shirt is perfectly fine unhemmed. It won’t unravel.
#2: Beg for, borrow, or steal a coverstitch machine. If you have one of these, a sewing machine, and a serger, there’s nothing stopping you. You’re your own sweat shop.
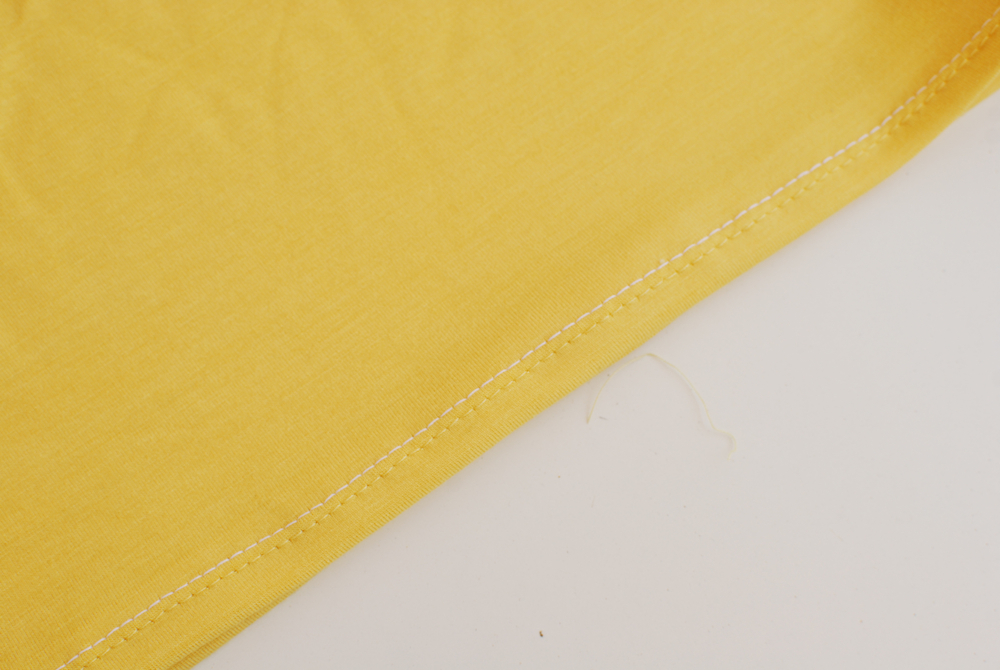
#3: Sew a single fold hem using a zig zag or stretch stitch. But be warned that you will almost definitely end up with a little bit of “lettucing”, or warping, at the hem. You’ll see this look done intentionally on some girl clothing usually with a serged rolled hem stitch at the hem, but it’s not my favorite look.
#4: Use a twin needle. My personal favorite option. (besides #1, and, ok, #2, though there’s no chance of that). You’ll have a nice professional look with minimal, if any, lettucing. Check it out:
Now’s probably a good time to mention that you’ll need two spools of the same color thread. Obviously I didn’t have that.
Once you’ve chosen your hemming option, you’re done! (for real this time)

The problem with saying “cheese”? You look like you’re saying “cheese”.

Catching them mid-laugh is a bit better.

Until they decide picture time is over and make a break for it.
Have fun! Make sure you post your ringer shirts to our flickr group. These shirts are the perfect blank slate for embellishment too – hint hint.

so so cute adrianna, i love this and it looks so fun and not too time consuming. :) yay for that!
Adorable! I love the colors you chose. Thanks for the tutorial!
Thanks so much for this awesomely easy tutorial…now let’s see if mine look as good as yours. I wanted to make my kiddoes some recycled tshirt dresses and now I know how to do the binding….yay!!!
terelauritsen.blogspot.com
So cute, love the pictures of the girls, they are getting so big! – Kim
Very cute! Nice tutorial! I used to do this for my kids (and myself) years ago. Now I’m thinking my g-son will be needing some.
Your girls are adorable! Great tute. Thanks ♥ Monique xx
Great tutorial! I have some knit in my stash that I’ve been skeered to try but now I’m thinking I might!
Thank you for making my dreams come true. Forever now I have wanted a simple T-shirt design but wasn’t advantageous enough to try one on my own as I’m fairly new to sewing. Thank you, thank you, thank you!!!
Lawks, Adrianna! You’re a clever one – you actually make it look incredibly simple. This will go onto my (very long) list of things I’d like to sew. x
They’re really cute!!!!
Awesome tutorial!! I recently conquered my fear of knits, and now I’m hooked.
I linked to your tutorial over at Craft Gossip Sewing:
http://sewing.craftgossip.com/tutorial-how-to-make-a-ringer-shirt/2010/07/12/
–Anne
so cute – is that what all that yardage i bought of rib knit is for???
Beth,
I should’ve mentioned, you CAN use rib knit for the body of the shirt. It’ll be slightly stiff and won’t lay as nicely as the soft jersey and slub knits that I used, but it definitely has enough stretch for this project.
Great instructions! I’ve been making these for a while now, but making them way more complex than they needed to be. I can’t wait to try it this way! Thanks again. Jen
Wow! This might actually be doable for even a novice like me! That’s it! It’s going on the to-do list! Great instructions.
These always remind me of the 70s/80s, and I LOVE them. Thanks for making it simple enough for people like me.
Love this tut!!!! I started making Reese upcycled knit dresses from LBB Sienna pattern but have wanted to try this style as the top part of a dress…thanks for the extra push :)
LOVE IT!!!
adorable! I’m just starting to feel a little bit more confident with knits…I think I need to try this one out!
I hear you’re going to be on Samster Mommy soon! Yay!
This tut came at a super time for me because I’m working on my first knit project – a jersey on too. I had a question about your twin needle hem – I tried doing the same but I want quite sure what the underside of the stitch should look like…mine looked like the bobbin tension was too tight, but I have a drop in. should the under side of a twin needle stitch be zig zaged? (mine keeps coming out straight, pulling the top thread… any info would be greatly appreciated!
thanks for doing what you do!
Nicole,
I’m not the best person to ask. The back of the twin needle is supposed to do a zig zag, but mine didn’t look like a nice traditional zig zag stitch either. My only advice is to lengthen your stitches slightly and maybe loosen your tension a bit. I guess the main thing is that it looks nice and neat on the top, and when you tug on it it still stretches a little bit. As long as you have that, I’d say you’re fine.
GREat tutorial, and adorabe models! Do you mind telling me where you got the fabric? I can never find jersey for less that 9 dollars a yard!?
I’m a newbie at sewing and I am going to try this. The shirts are so cute and look great on the girls. I have been looking every where for just a simple EASY t-shirt. Thanks!
Thank you so much for this tutorial. I have been wanting to make tshirts for my kids (I have the hardest time finding ones that aren’t printed!) and just made my first long sleeved tee tonight – in just about an hour! Hooray! Thank you thank you!
I just featured this tutorial on my blog. Hope you will stop by and check it out! Mine turned out so cute! And thank you, for creating such a simple tutorial!
Camille
http://allaboutmommies.blogspot.com/2010/09/knits-are-really-not-so-bad.html
Cute, cute, cute! I am featuring this on my blog!
seemesew.blogspot.com
Cute! And easy to follow directions. I’ve been saving some ribbed trim I cut off of a sweatshirt, and it’s about time I made something for my son (since most of my energy goes into girly stuff)–a ringer t-shirt it is! I’ll link back to you when I get around to posting it on my blog, bethbeingcrafty.blogspot.com
I didn’t read the other comments so maybe this was said already but I learned on Makeit and Loveit that when using the double needle it works to just make two bobbins of your thread color and use the second bobbin on your second spool holder. It’s been working great for me!!! :)