Normally I don’t advocate this kind of thing. I am a sew-it girl. I don’t do paper crafts, I don’t do cut-a-hole-in-fleece-and-call-it-a-poncho, I don’t do paint. That’s why I am only the co-owner of this blog (not that Susan would make a fleece poncho – that would totally negate our friendship. But she does do tons of stuff that I can’t/won’t do and that makes for more interesting blogging).
However, tragedy struck last week in the form of a broken sewing machine. Did we ever mention we don’t live in America? Well, we don’t. And finding a service shop and taking my machine there was not the easiest thing to do in this 2nd world country. But it is done, and hopefully it will return to me in working order and never happen again.
In the meantime, here are some ideas for you in case your sewing machine ever goes kaput:
1. Buy a second machine so you always have a back-up.
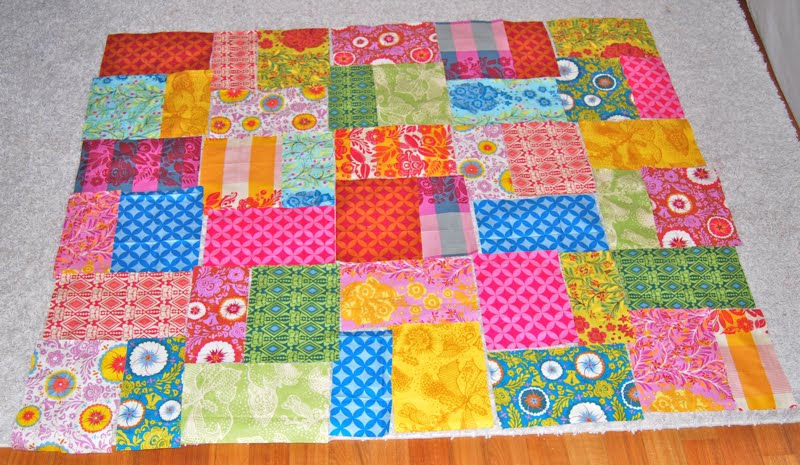
2. Cut out a quilt you’ve been meaning to start and lay it out. Stop there, as the rest involves sewing:
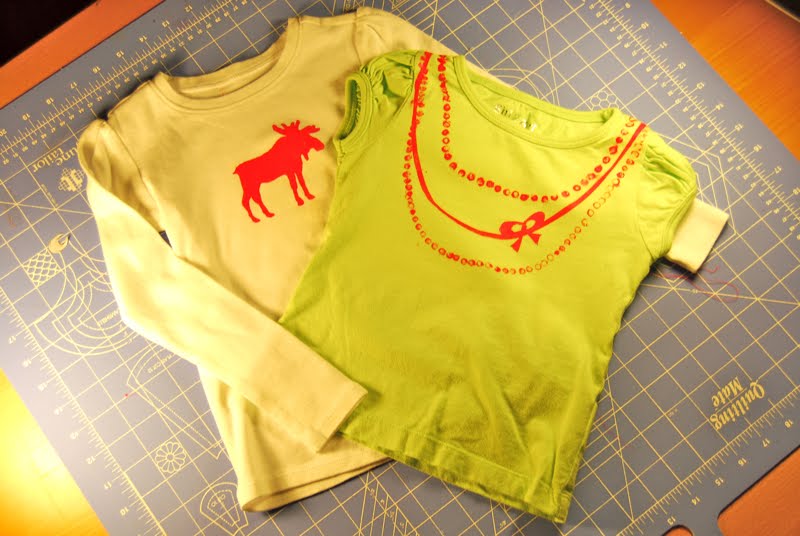
3. Reluctantly try your hand at freezer paper stenciling. Discover how easy it is. Get carried away:
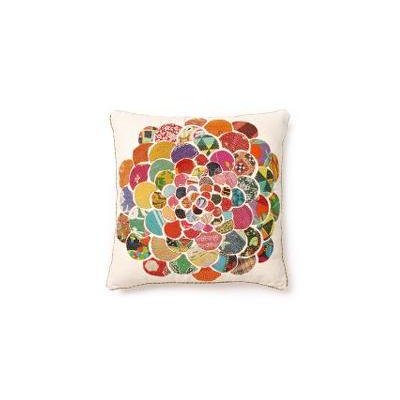
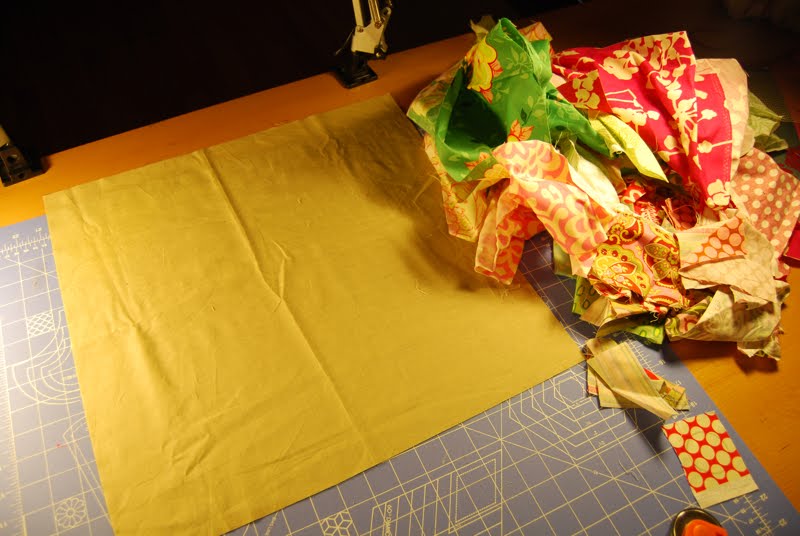
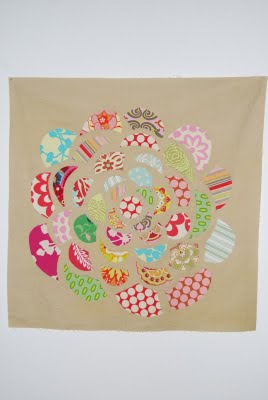
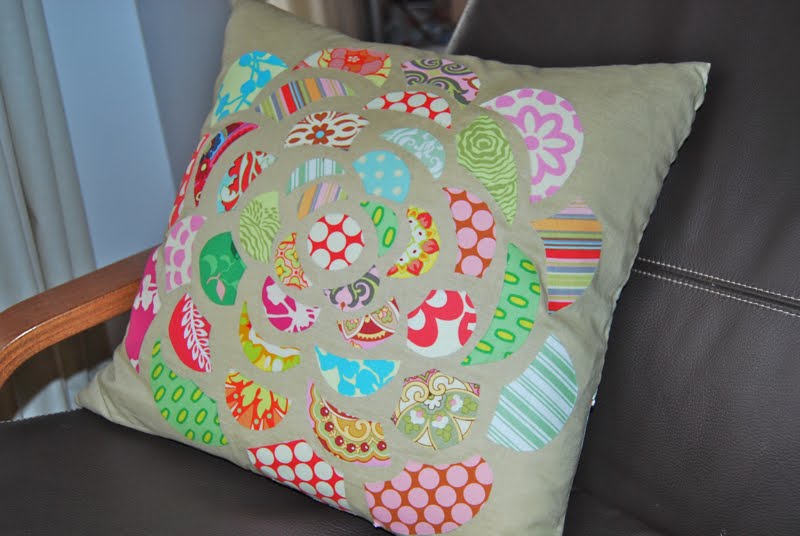
4. Finally copy make a scrap-busting pillow inspired by this Anthropologie pillow (now discontinued):
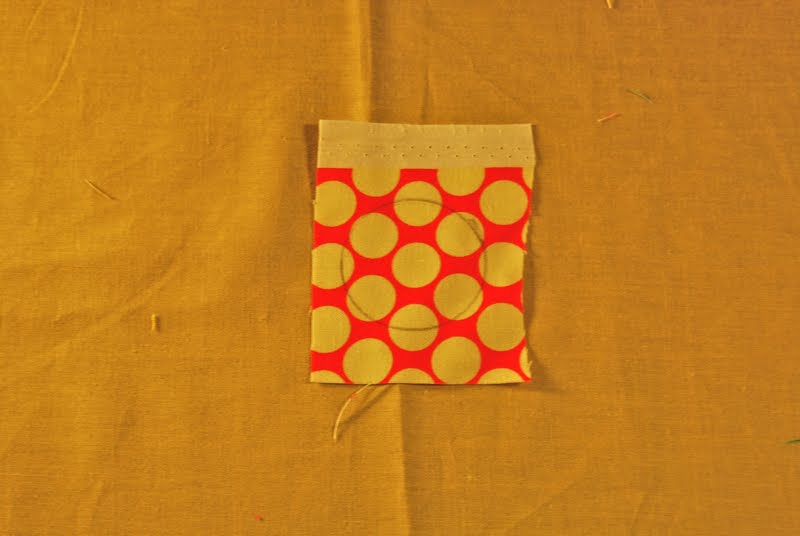
a. Start with a length of plain fabric that will be your pillow top. If the dimensions of your pillow are 18 x 18, for example, it is best to cut the fabric to that exact size. Once you sew it up with seam allowances, the pillow should fill it up nicely without any saggy corners or edges. Now unleash the full force of your scrap pile. Or, in my case, about 1/10th:
b. Use something round to draw a circle on one fabric. Mine is approximately 1.5 inches diameter, but you could make it any size you want. Trim around the circle, but not directly on the marked edge, like so:
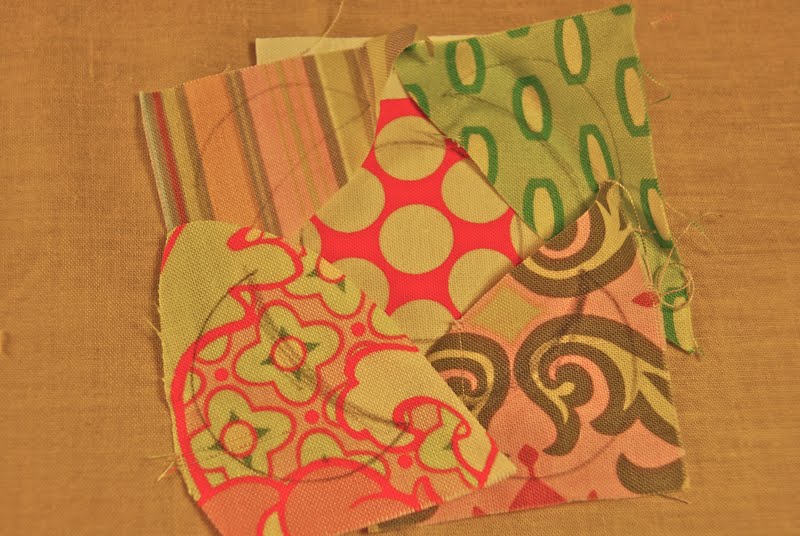
c. Use 4 more fabrics to surround the circle with half moon/crescent shapes. Again, don’t cut the shape out, just trim around it:
d. Place each of the scraps of fabric onto one of the sticky sides of Steam-a-Seam or other double-stick fusible. Next, cut neatly around the shape, peel the paper backing off the reverse side, and place them exactly where you want them on the pillow top. As long as you don’t iron them down, you will be able to move them around until you are satisfied with the arrangement. But try not to be as OCD perfectionist as me – this is supposed to be a fun and random scrap-buster, right?
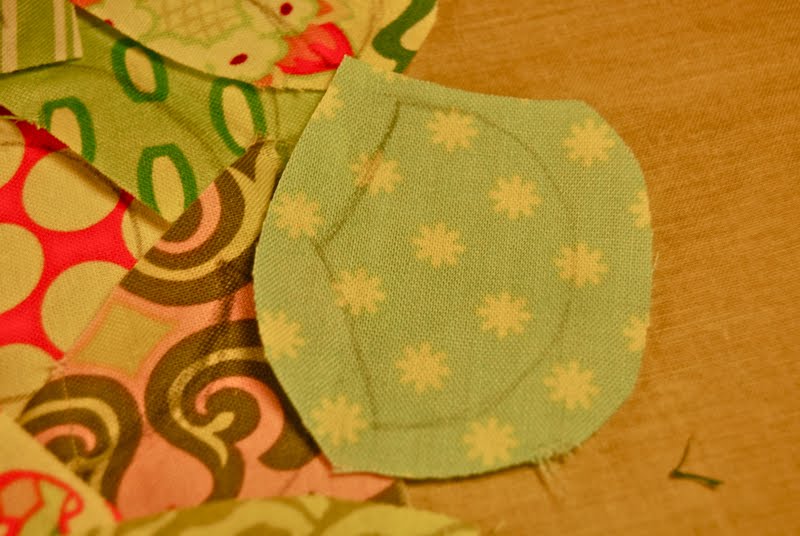
e. Continue to put petals around in larger and larger circles until you are happy with the size of your flower. As you go on, it will be easier to lay a scrap of fabric where you want a petal and then sketch a shape so you know it will fit perfectly. At this stage, I started cutting out the fusible for each petal individually or I would forget what order I had them in. Remember that you can make any shape petal you want:
I don’t think I’m done yet, I may do another round. But after this comes the pillow assembly, and once again, I would need a sewing machine for that.
some tips: put the petals closer together to make a fuller flower more like the anthropologie pillow, or keep more space between them to make this project go faster! You could also make this with a patterned background and solid petals, or all solids. If you’re using scraps leftover from a quilt, make a nice coordinating pillow to go with it on your couch or bed….use your imagination! You’ll end up with a free, unique, handmade creation that hopefully put a dent in your scrap pile and saved you $88. Yes, $88 was the price of that pillow. And after making one, you’ll understand why :)
ps: sorry for the sad dark state of those tute pics. I did this after the girls were in bed, so the house was dark and those compact fluorescents just don’t work for photography lighting. But it’s called crafterhours for a reason, remember?
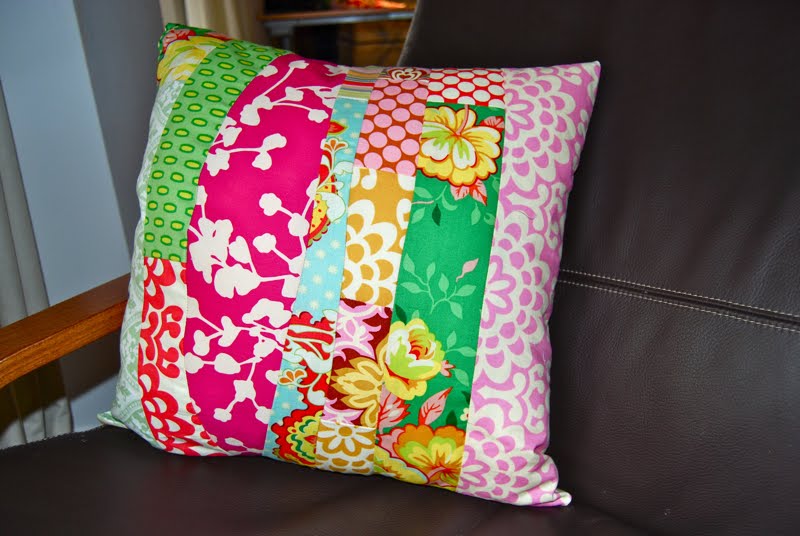
Update: I finished the pillow! I scrap-busted even further by making the entire back out of scraps. Check it:
i found your blog through ruffles and stuff. i just had to tell you that i was working on making a tutorial for this very same anthro pillow! you saved me much time so thanks! i am actually doing something other than a pillow with it but it is a secret! cute cute blog though!
Wow, where do you guys live? Like, Canada?
I love this tutorial for the Anthropologie pillow. I was looking for this awhile ago. I came through from Ruffles and Stuff.
I love it, my pillows are drab. . . I definitely need to spice things up a bit. You’re making me realize how badly I need a sewing machine! Craigslist here I come. :)
LOVE the freezer paper stencil shirts. So cute!
The pillow is also fabulous!
Great project – I love a good knockoff. And anything that allows me to NOT get the sewing machine out.
This is awesome! I also saw a wall hanging at Pier 1 that was very similar. I don’t sew much, but my mom does and I am so sending this to her as an idea for *my* Christmas present!
you realize you’re amazing. right?
Hi, I just found your blog! I know what you mean when you say that pillow was $88 for a reason! I recently tried my hand at Anthropologie’s Smoldering Hues shower curtain-whew! What a workout!
http://jessicapeck.blogspot.com/2010/04/anthropologie-smoldering-hues-shower.html
I’m in love. This is so cute! I’m definitely doing this one. I even have some of those fabrics, haha. Great job! Thanks for the tut.
Oh, super cute! I love it!
I know this is not a new post for you, but I love the project and have been looking for instructions to make one. Blogging about yours today!
Christine
greatoakcircle.com
this is adorable! thanks for showing us how to do this.
That’s great! I had a picture of that Anthropologie pillow pinned to my bulletin board for a year. Excellent. Thanks!!!