I fully intend to try Spoonflower. It’s on my to-do list. I would totally like to design my own line. But in the nearer term, I need Ghostbusters patches for our family costumes. (Our little one will be Slimer, in bright green fleece with little wriggly slimer arms. It’s going to be so awesome.) I read somewhere that you can make your own printable fabric, and after paying a seemingly ridiculous amount for it and looking hard at it and thinking “there’s not much to this” I decided to set out.
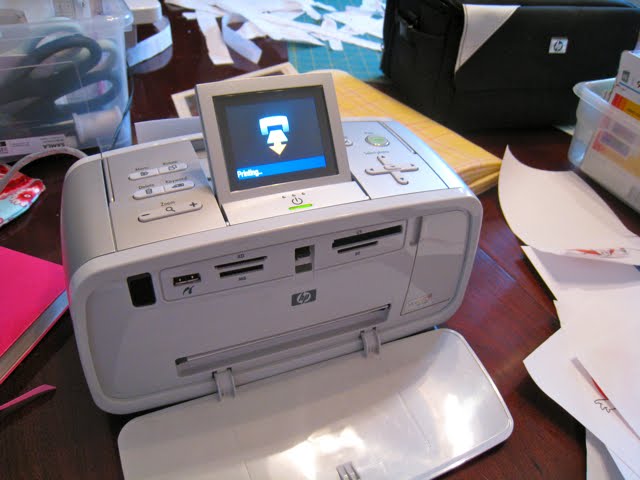
Stumbling block: my regular inkjet printer is out of ink. Frustratingly, it has two black tanks and one of them is empty and therefore the whole thing goes on strike. Uh, seriously, with two sick kids and not feeling so well myself, *I* still go to work, right? Sigh. Not the printer. So, I set out to try it with my little photo printer. It’s a HP Photosmart 475, if you’re into these details.
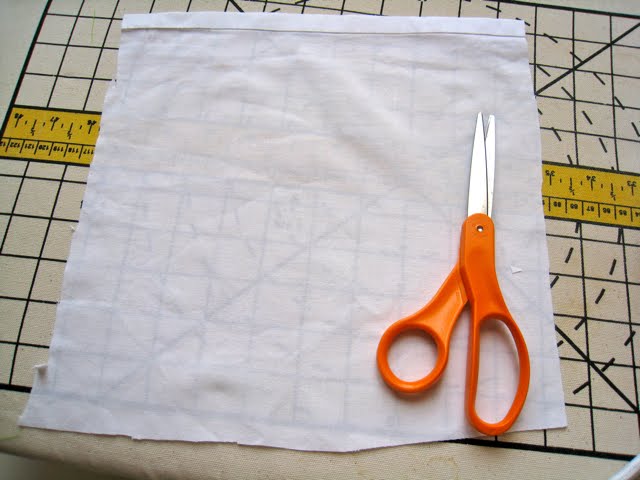
So I cut a piece of laundered scrap white fabric. Happened to be white, but it sure doesn’t have to be. I plan on trying this on some assorted Kona cottons. My printer will print 5 x 7, so I go for that. I cut a piece of fabric that’s a little larger than 10 x 7 and iron it flat with a little steam, then turn the steam off and iron until it’s completely dry. (I’m ironing on this. It’s a helpful little gal.)

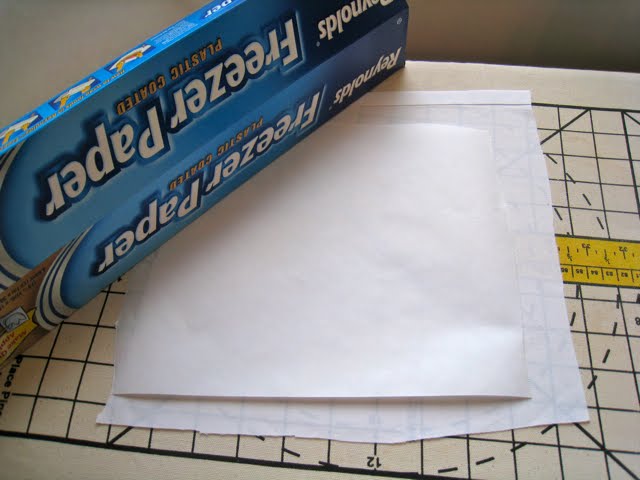
I tear off a piece of freezer paper to fit on my ironed scrap. With no steam, I iron it on both sides. Why? Because you want nooooo curl to this at all. Curl will separate the two pieces in your printer and jam it up. I have photos of this. It makes quite an unpleasant crrrruinnnnklecruuun ch ch ch in the printer.
This picture makes me sad. But we must go on.
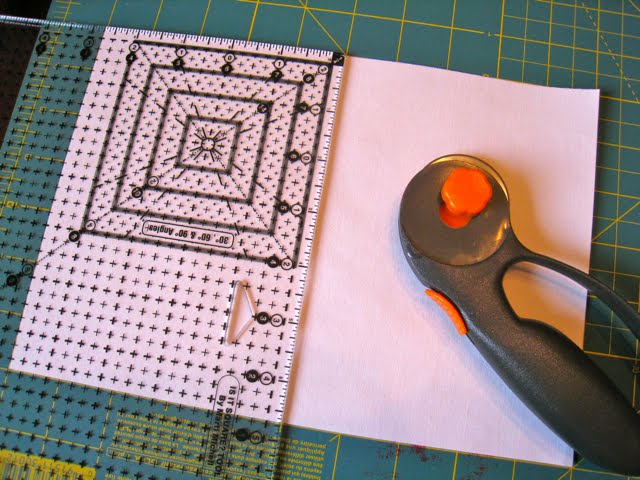
After it’s super flat, lay it on your cutting board and trim down the two 5 x 7 pieces. The edges need to be nice and sharp and the fabric and the freezer paper cleanly adhered.
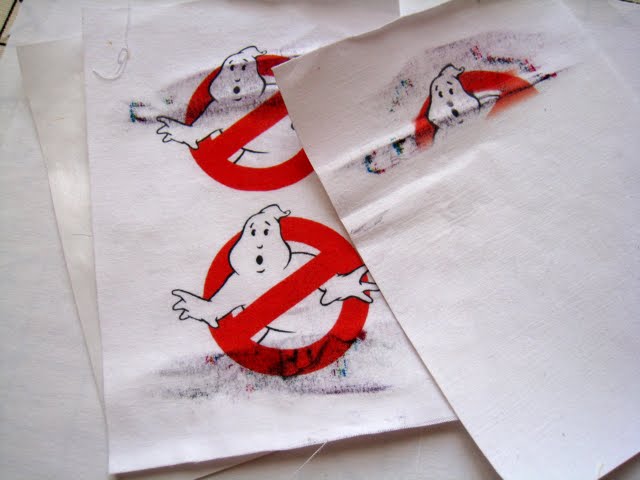
Carefully feed this through your printer. No matter whether you’re printing in Word or from iPhoto or from the fancy interweb or whatever, it works just the same as paper, but the manual feed tray would be best on most printers because it involves a less complicated paper path. Definitely feed one at a time, I say.
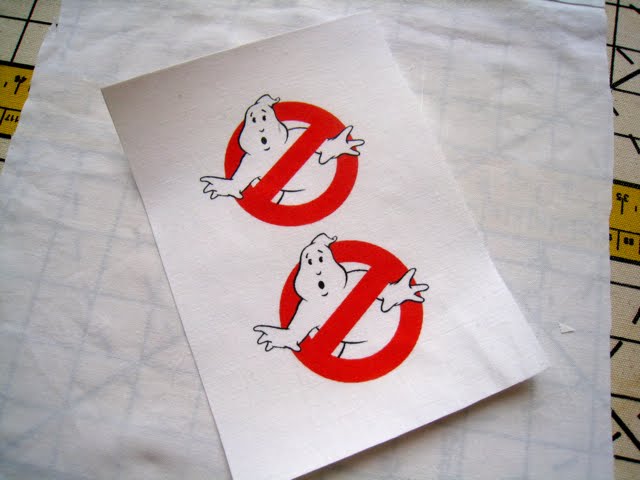
So once it’s printed, iron it again to set it. You can peel off the freezer paper and then sew it or attach it to fusible interfacing or whatever you like. I’m gonna make Ghostbuster arm patches. Who ya gonna call?
There are a number of things I like better about this than the printable fabric you buy:
1) It costs 1/20th as much.
2) You choose the base fabric.
3) You choose the size. Wouldn’t be all that tricky to print legal or tabloid size, if your printer will do that on paper.
4) It doesn’t automatically have fusible interfacing on the back. If you want to quilt with it, you can get on with your bad self.
Susan
March 11, 2010 Update: to make your fabric washable, see this.
Just one more reason why this house NEEDS a printer. Very cool! I can’t wait to see those Ghostbuster costumes.
This is an awesome idea! Is it washable?
I am currently conducting testing and will post the results!
Well, now I only need to find the equivalent of freezer paper in portuguese, and believe me that is going to be the hardest part!!!
Greetings from sunny Portugal!
i’ve read that you can also use card stock and spray it lightly with adhesive then put your fabric on it
Do you feed it in so it prints onto the freezer paper side or the fabric side? This is wonderful. Thank you.
Print on the fabric side. The freezer paper is really just there to give the fabric some rigidity so the printer won’t make a little non-musical accordion out of it. If/when you make something, show us! We get excited about these things!
Do you think this would work using a laser printer? I’d love to try the memory game listed on http://sugarnspicecreations.blogspot.com/search/label/Tutorial but only have a laser printer…
Anne, my vote is try it and see. I’m not sure. I think you want to use an all-cotton fabric with a really tight weave (nothing linen-y) and you won’t want to iron it after printing because that will peel the toner off. If it’s not something you’ll need to wash, it may work just fine. (Will you come back and report on how it turned out? I’d try it myself but I don’t have a laser printer!) Susan
I love to print my own fabric as well but what I do is I take a piece of card stock and just a small amount of spray adhesive then lay my fabric over the glue, I then stretch it flat so no bubbles or wrinkles. I them make sure all of the area that had glue on it was covered of cleaned up and all of the fabric edges lay flat. Put it in the printer and print, it works great. The plus to doing this is when it is done the fabric has a bit of stick to it so when you lay it on another piece of fabric you don’t have to pin it. Also the card stock stays sticky so you can use it over and over with out re-applying the pray adhesive.
I do this using A4 sticky labels. I attach the label to the fabric, trim it up and feed it through my printer. It’s so easy yet so effective and I have made loads of things using my very own customised fabric. It’s great to print out photos of the grand-kids and attach them to cushion covers for christmas gifts etc.
This is great! I should never have bought that fancy fabric/paper stuff that is so expensive at the craft store!