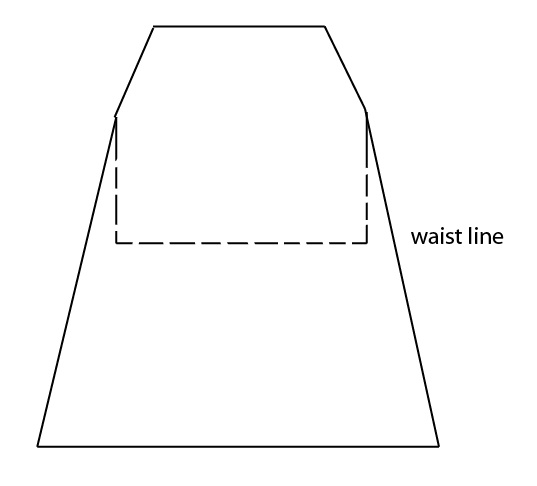
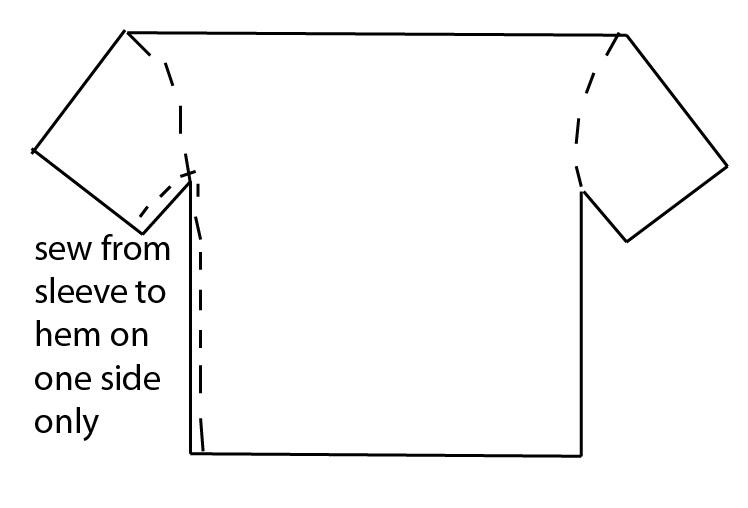
crafterhours

sleeping babes. crafting moms.

  • Tutorials
  • Patterns
  • Shop
  • Contact
  • Follow

Guest blogging at Brown Paper Packages & a Tutorial

May 4, 2010 By crafterhours 8 Comments

Last week was crazy busy with our Spring Top and Carefree Clothes submissions, so I didn’t even get a chance to tell you that I guest blogged over at  Brown Paper Packages!

Leisel is having a Pattern Makeover Month where she shows you how to stretch a dollar by using the same pattern to make a myriad of different outfits.  I highly encourage you to go check them all out.  Lots of inspiration there!  And the gorgeous models and photography don’t hurt either :)

Here’s my tutorial:


I call this the Boardwalk Dress because it reminds me of a little girl from the 1920’s skipping down a boardwalk with her balloons and cotton candy.

Susan and I agree that it would also be a terrific base for an Alice in Wonderland dress.  Just add an apron and a tea party!

You will need to have a peasant dress pattern or really any A-line dress pattern to make this dress.  The way I put it together may seem a little odd, but I did it this way so when you finish the inside seams, you are always sewing a straight line. I prefer it this way when using a serger.


Step 1:
Pull out your original front and back dress pattern pieces. You will need to reshape them so they go straight down, instead of angling out into an a-line. Measure your dress-wearer from neckline to dropped waist (about where their pants usually sit), and crop the dress off at that length, making sure to add seam allowances. In this illustration, the dotted line shows how you will be cutting your new front and back pattern pieces:
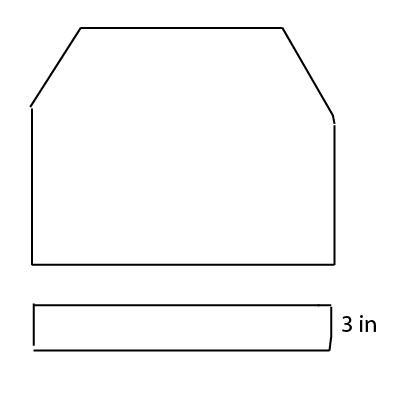

Step 2:
Using your new front and back bodice pieces as a guide, cut a strip of fabric that is 3 inches long and equal in width to the bottom hem of your new bodice, like so:
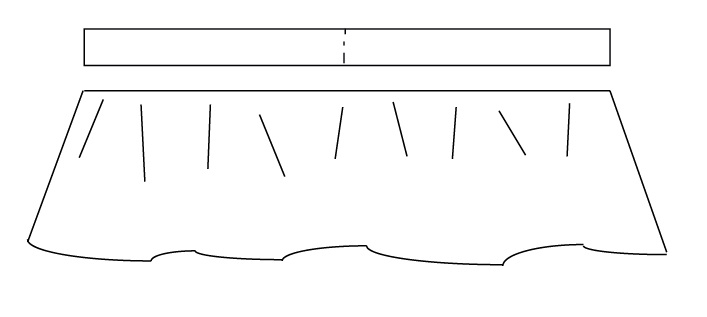
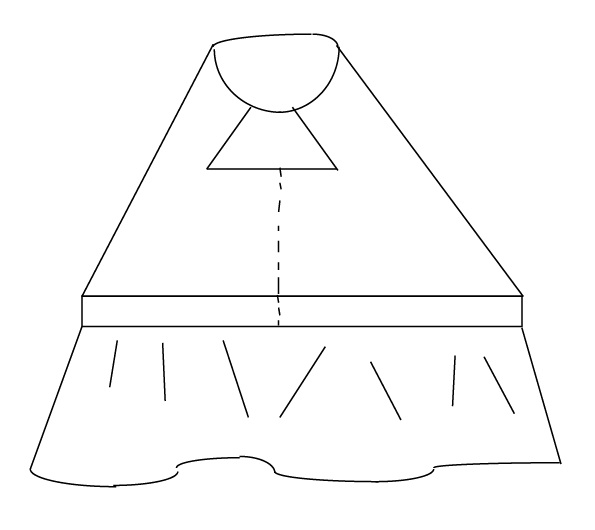
Step 3:
Sew those two strips together on a short end, forming one long strip. Now, depending on how full you want your skirt, cut a rectangle of fabric for your skirt. For the length, measure your dress-wearer from 2 inches below the dropped waist to wherever you want the skirt hem to fall. Add 2 inches for the seam allowance and hem. (Or use fabric like I used in the example, which is already hemmed for you!) The width is entirely up to you, but I suggest making it 1.5 to 2 times the width of your long strip for a nice gather. First, if necessary, hem the bottom of your skirt rectangle by turning it up a half inch, and then turning it up another inch and edge stitching. Then gather the top using a basting stitch and pulling the bobbin threads until the top of the rectangle is the same width as your long strip, like so:


Step 4:
Right sides together, sew the skirt to the strip. Finish the inside seam by serging, zig-zag stitching, or pinking.


Step 5:
Attach the sleeves to your bodice following pattern directions. Then, right sides together, sew from one sleeve hem down to the end of the bodice, and finish the seam. Do this for one side only.


Step 6:
Open up your bodice so it lays flat, and sew the long strip to the edge of the bodice. Finish the inside seam.
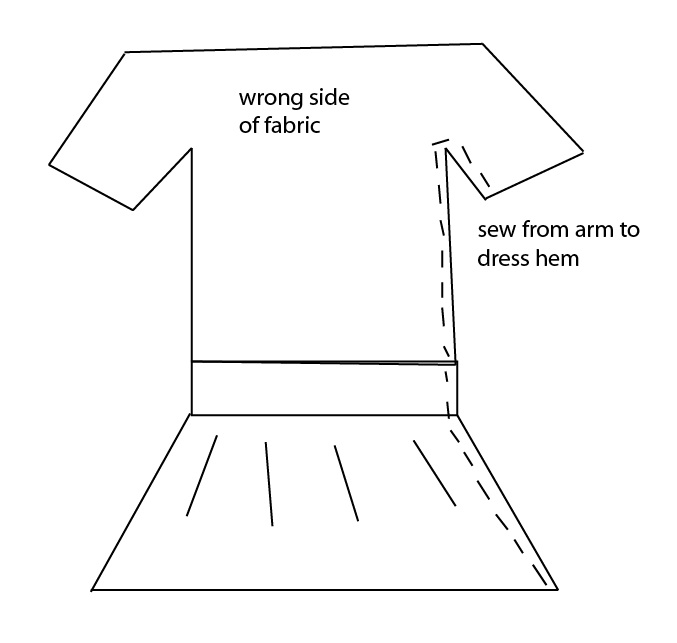


Step 7:
Now that the skirt is attached, flip the garment inside out and sew the other side, from sleeve hem to skirt hem, making sure to line up your seams as you go. Finish this seam.


Step 8:
Finish the neckline and sleeve hems as the pattern dictates, and you’re done!


Enjoy!


Related

Filed Under: Uncategorized Tagged With: Our Favorite Pattern

« My Kind of Math Equation
Who is Awesome?! »

Comments

  1. frikadel says

    May 4, 2010 at 8:18 am

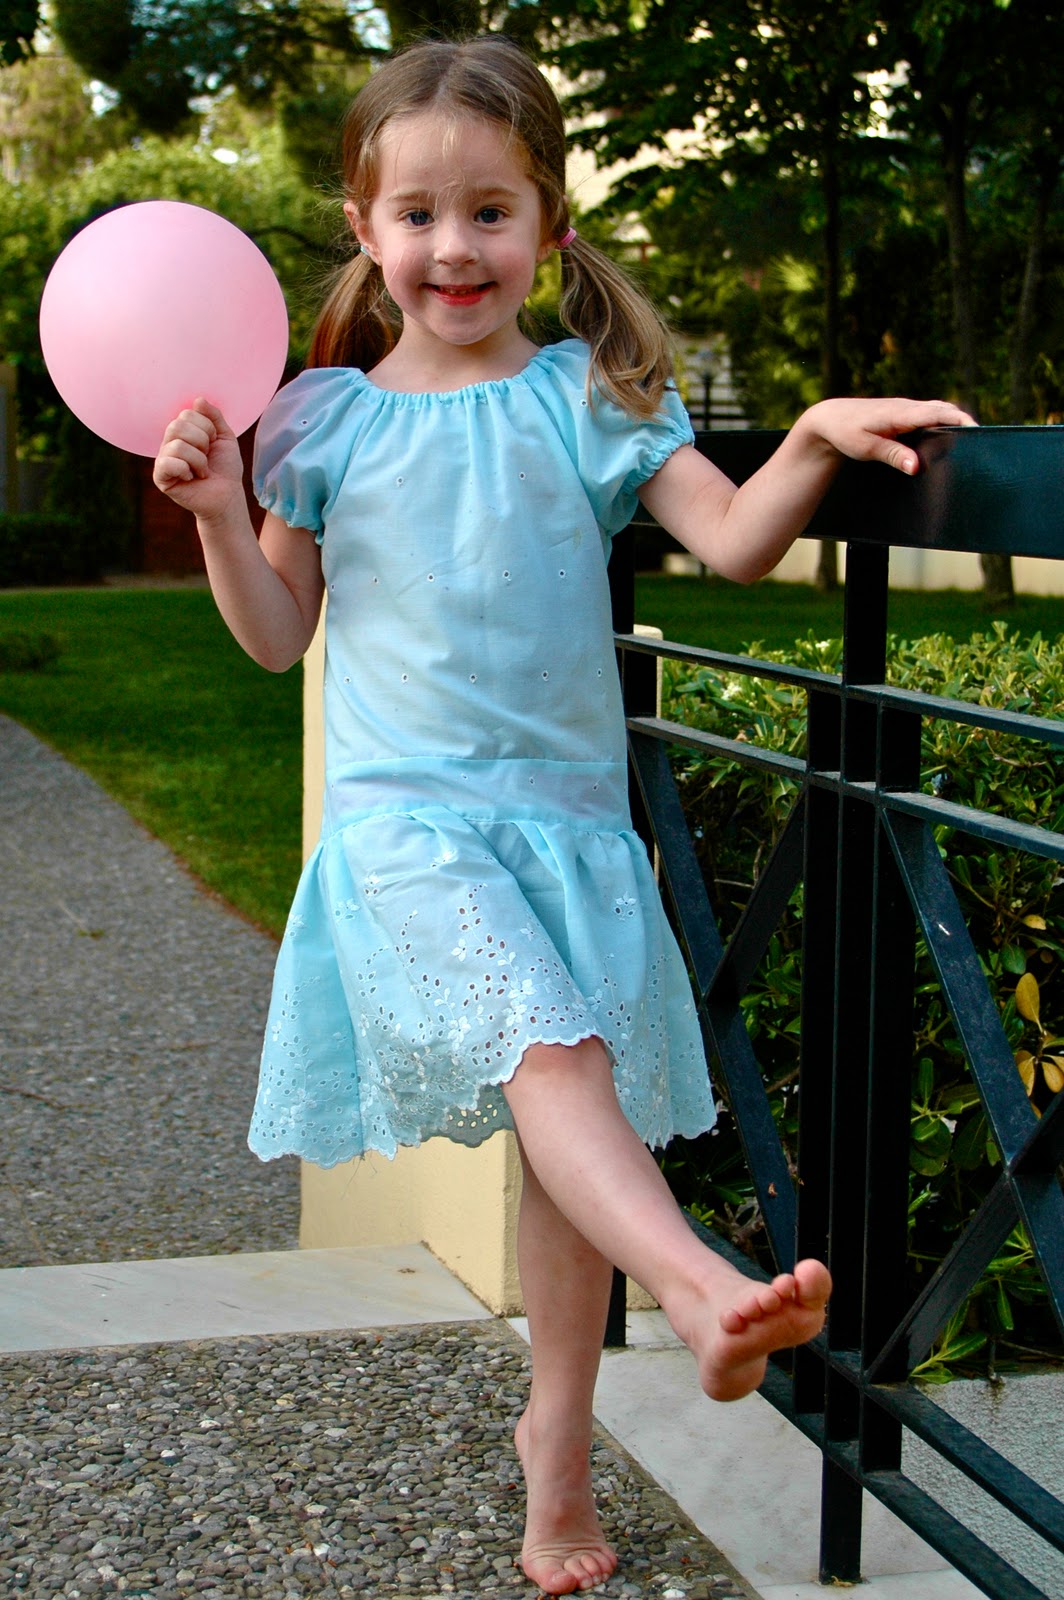
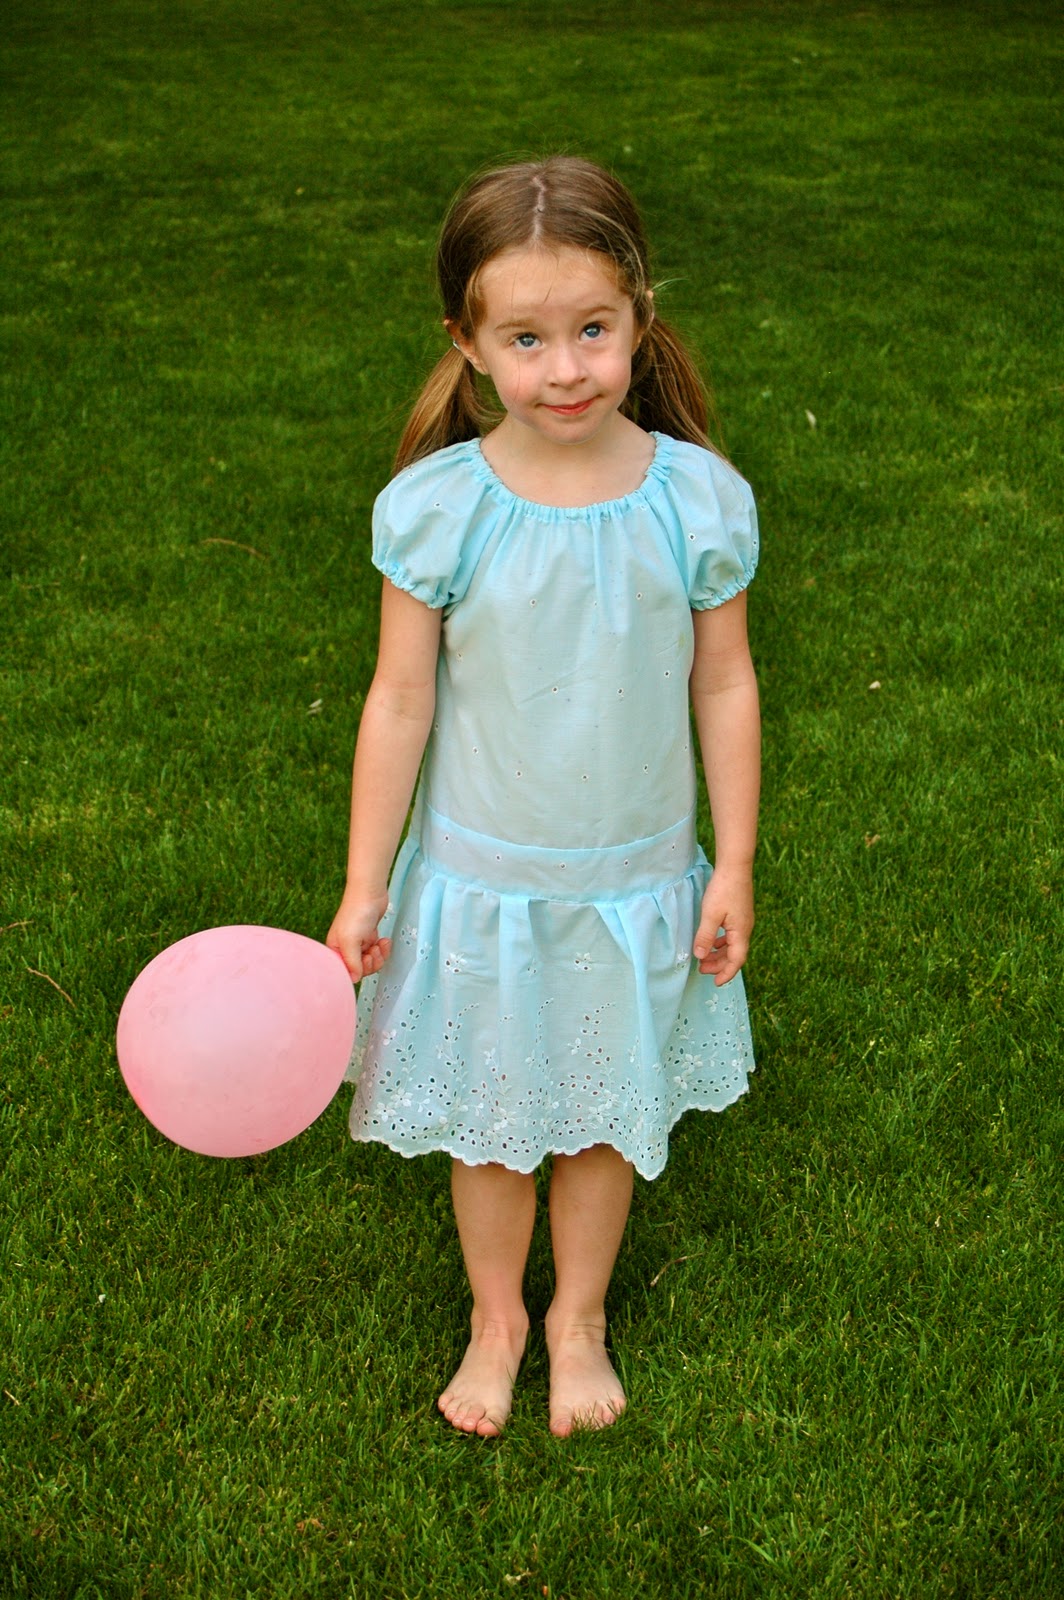
    I really love this dress
    i really see what it reminds you…

    Reply
  2. Bethany says

    May 4, 2010 at 9:31 am

    She looks so happy in it! I need to find a little girl to sew for….

    Reply
  3. Alisa says

    May 4, 2010 at 10:06 am

    This is really cute!

    Reply
  4. Melanie says

    May 4, 2010 at 11:14 am

    totally cute! I used the same fabric in yellow for my spring top. I think I like it better on a little girl ready for a stroll on the boardwalk ;)

    Reply
  5. jill says

    May 4, 2010 at 2:10 pm

    I Love the way you put it together– just seems so much more logical than the way I’ve been sewing dresses!

    Reply
  6. crafterhours says

    May 4, 2010 at 3:43 pm

    Thanks Jill! I like to do it this way too. Just keep in mind if you’re ever strapped to chair with a gun to your head by the sewing nazis that this is technically the WRONG way to sew! Don’t go telling anyone I taught you this :)

    Reply
  7. opsiedaisy says

    May 10, 2010 at 1:34 am

    This is really nice…

    Reply
  8. Sew Much Ado says

    November 10, 2010 at 3:45 pm

    That’s super cute! I’d like one for myself. Not quite sure if I could pull it off though :).

    Reply

Leave a Reply Cancel reply

Search This Blog

Archives

Popular posts

  • Side Panel Shirt Refashion: A Tutorial
  • T-Shirt to Tank: A Tutorial by Jen from Upcycled Education
  • FREE Pattern: Monkey Bar Skirt
  • Racerback Dress: A Tutorial + PDF Pattern
  • A Note on Sewing Skirts for Girls
Visit Susan Yates's profile on Pinterest.

Want our posts in your inbox?

Enter your email address to subscribe to crafterhours and receive notifications of new posts by email!

Our Privacy Policy

Copyright © 2023 ·Foodie Child Theme · Genesis Framework by StudioPress · WordPress · Log in


Creative Commons License
This work is licensed under a Creative Commons Attribution-NonCommercial-ShareAlike 3.0 United States License.
»
«