
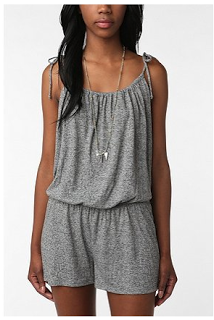
So, I had this dilemma. I’ve seen lots of cute rompers for grown up girls lately, like these two from Urban Outfitters (click the pictures to go to the site).
 |
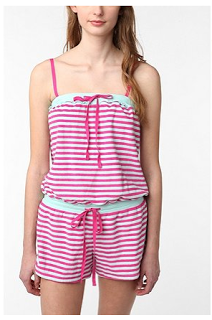 |
But I just don’t think I could pull them off in real life, unless sitting at the beach wearing a bathingsuit underneath. What do you guys think? Could you pull this off? Anyway, I found the answer to my dilemma. If it makes me feel like a 4 yr old while I’m wearing it, I may as well make it for my 4 yr old, right?
ps: you can use this tutorial to make one for yourself too, if you feel so inclined.
You’ll need:
Up to 1 yard of fabric for 0-4 yr olds, more for bigger kids.
1/2 inch elastic to go around the chest
elastic thread
all the other sewing paraphernalia
First you’re going to need to construct a pair of simple shorts. I discuss the main points in my shorts tutorial if you need further instructions. For these shorts, you don’t need a waistband though, so just add 1/2 inch at the top for seam allowance.
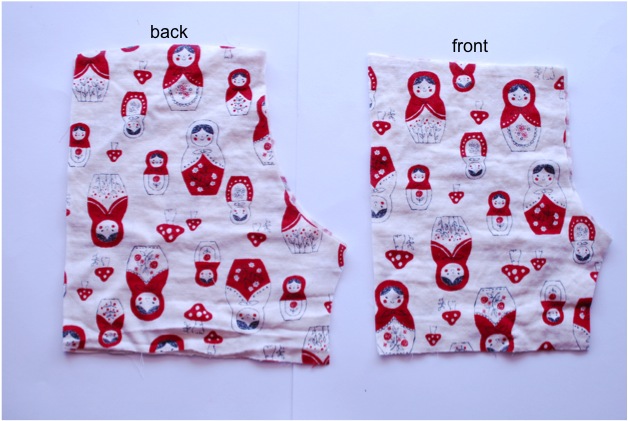
You’ll have 2 back pieces and 2 front pieces. The back piece will have a deeper crotch curve and a higher rise. The front piece should have a rise that slopes up to meet the height of the back at the side seam. Cut them so they are mirror images of eachother (ie: one back piece faces right, the other faces left. To do this, cut through two layers of folded fabric or cut one, flip the pattern piece over and cut another)
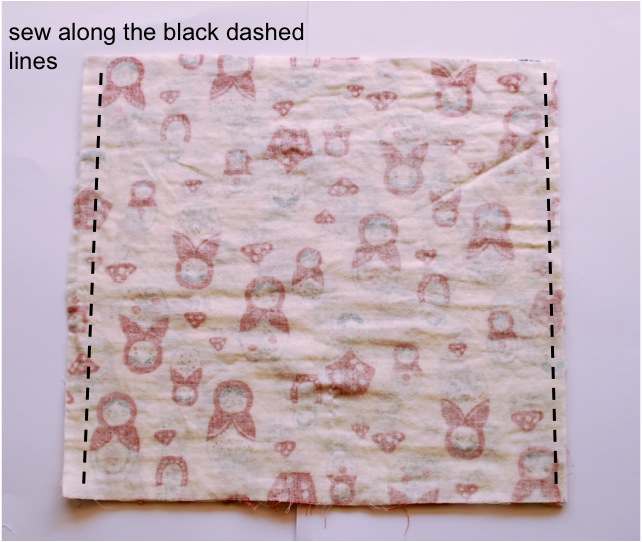
Next you’ll need to cut 2 rectangles to these measurements:
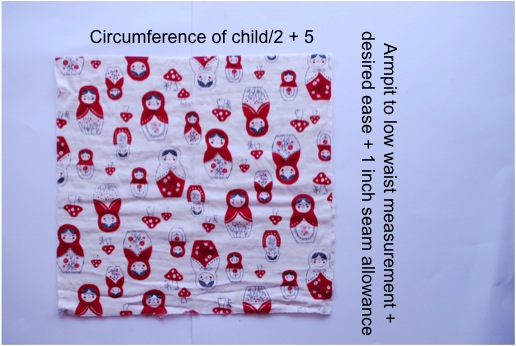
The “low waist” point should be where the waistband of the shorts would sit. I added 3 inches of ease, and that is plenty to make the shirt very “blousy”. If your fabric has a pattern or “nap”, make sure it is going vertically, or in the direction you want. (As a guide, my rectangle was 16×15 for my 4 yr old that is the height of a 5.5 yr old.)
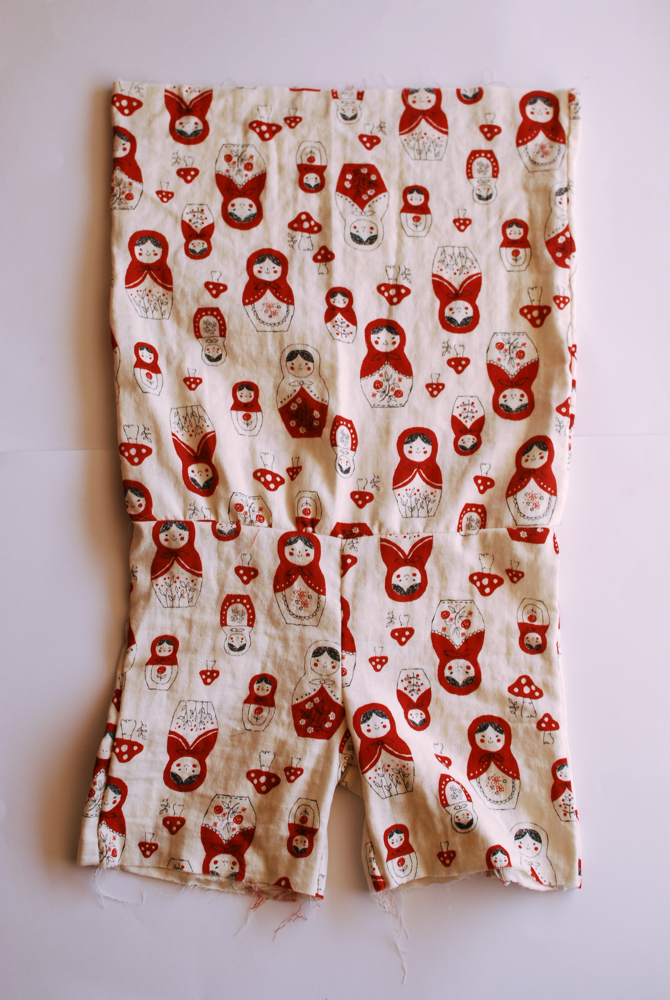
Now sew your shorts together. Each back piece will line up with each front piece.
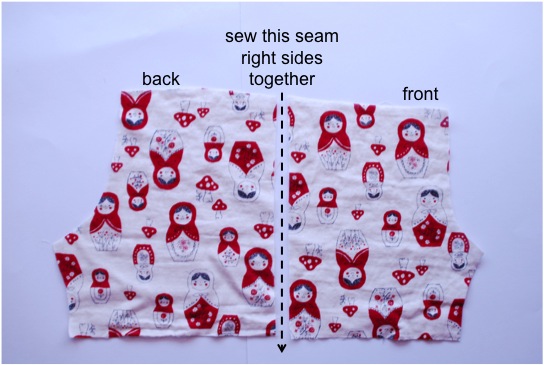
Once you’ve sewn each set together, lay them on top of eachother right sides together and stitch where the picture indicates.
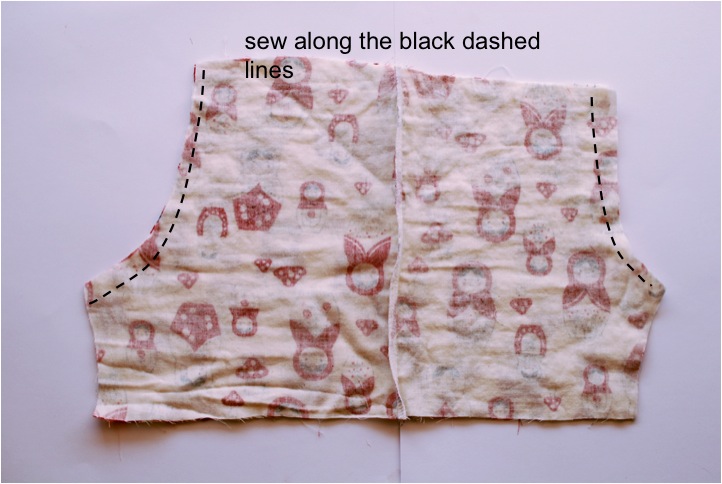
Now open them up and lay them down so they look like shorts. Stitch along the crotch curve.
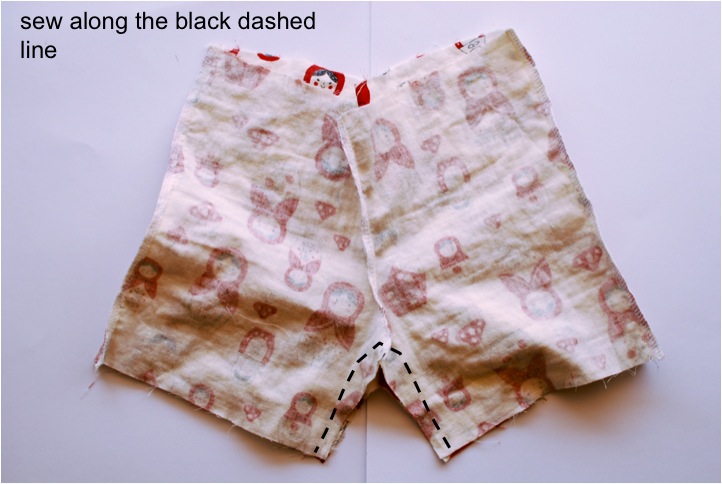
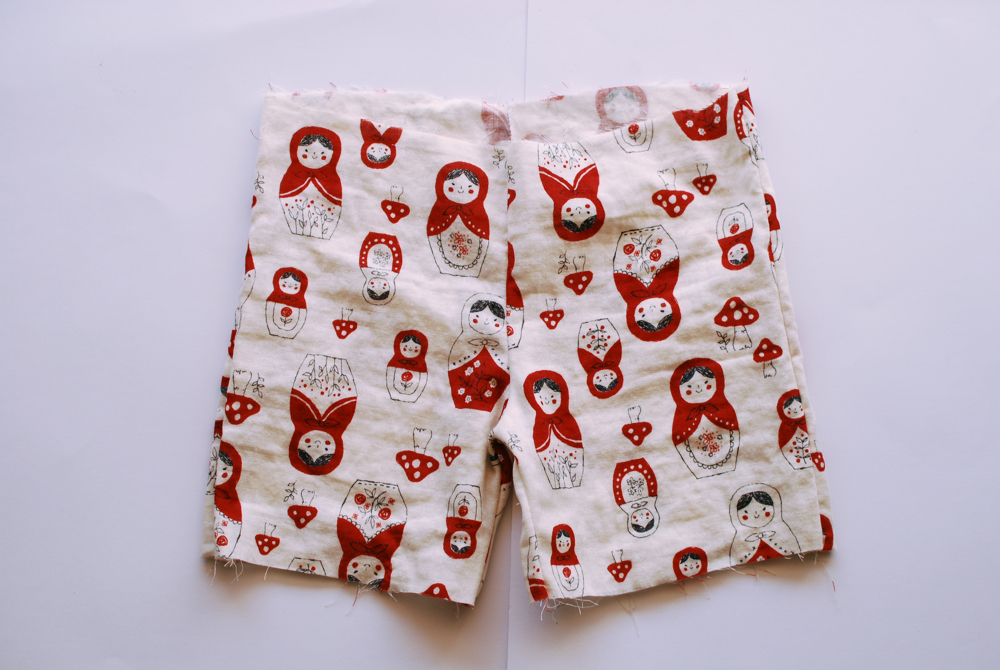
And now you have shorts!
Set those aside and grab your two rectangles. Sew them together at the side seams (my rectangle was only 1 inch longer in width vs length, so I marked them to make sure I was sewing the right sides.)
Now lay that rectangle over your shorts and see if there is a difference in width.

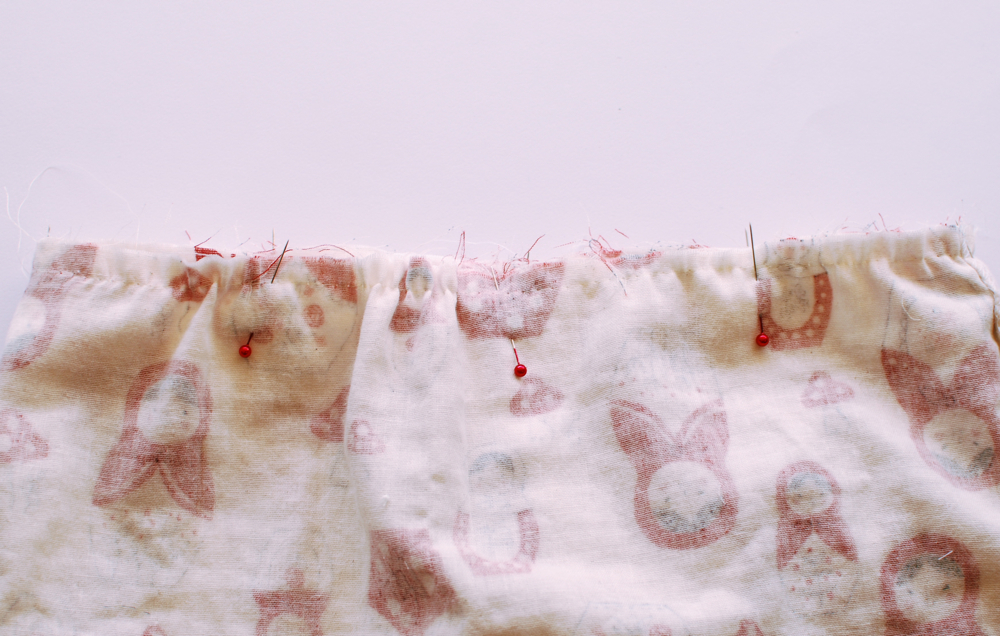
My top was slightly wider than my shorts, so I need to gather it to fit.
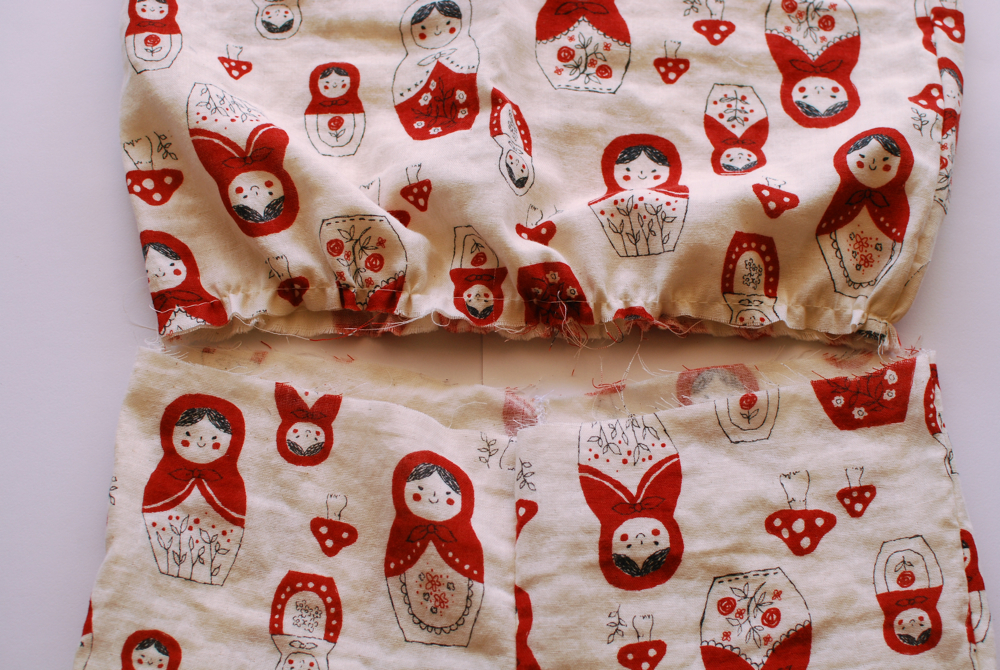
When they are the same width, sew them right sides together. When sewing a gathered piece to a flat piece, it helps to sew with the gathers facing up so you can manipulate them as you go.
And now you have this!
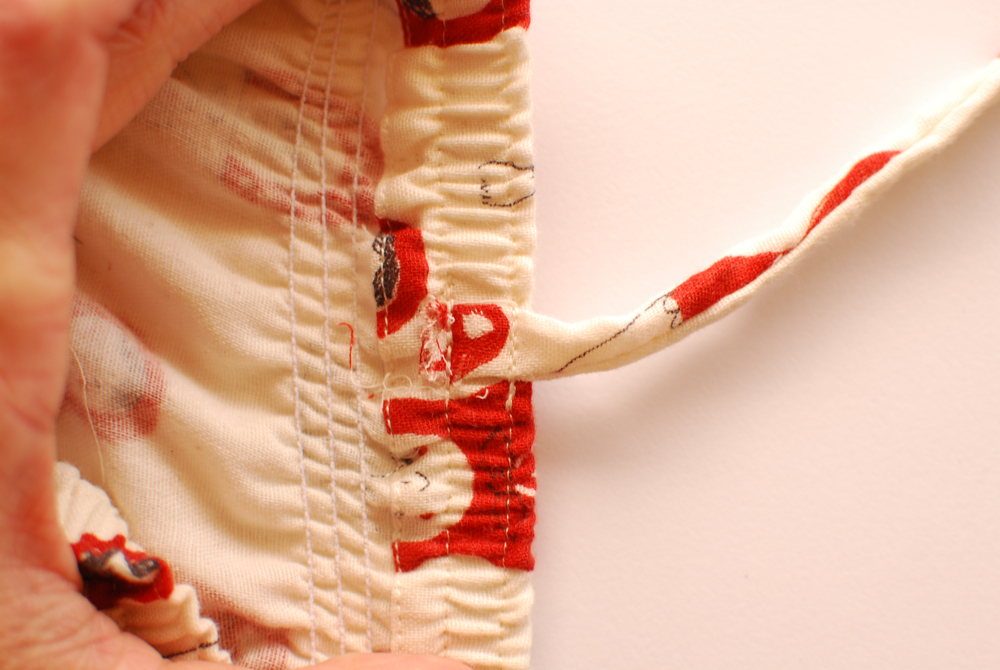
Sew a casing at the top of the romper to fit your elastic. First press 1/4 inch down, then press another 3/4 inch down and edge stitch, leaving a hole to thread your elastic. Measure your elastic length by wrapping it around your wearer so it is snug against the skin under the armpits, but not tight.
Insert your elastic and stitch the hole closed.
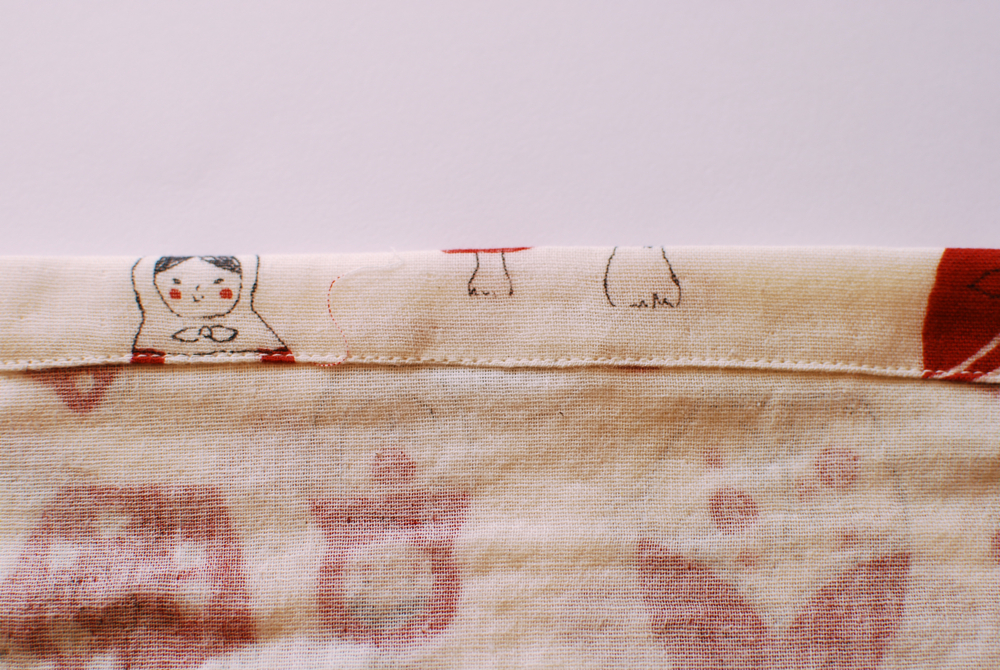
Now hold your elastic as taut as you can and top stitch over it in two parallel lines. This will help your elastic casing blend in with the lines of shirring we’ll do in a second.
Now is a good time to construct your ties. I prefer spaghetti straps that tie at the shoulders because I think they fit this style of romper well, and because my 4 yr old needs to be able to easily slip them back on after a bathroom break. But you could also make wider straps that tie as a halter or spaghetti straps that cross in the back. Lots of options here!
For my 4 yr old, I made my strips 1 inch x 19 inches long, but you can adjust the length as necessary.
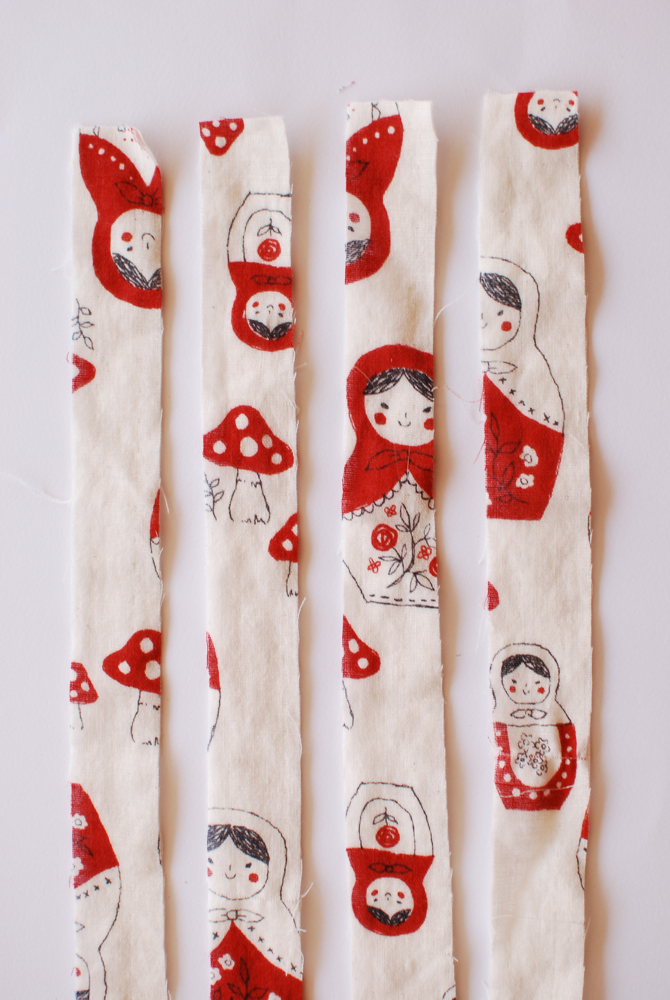
Sew the strips right sides together with a very small seam allowance – I edgestitched at about 1/8 inch. If you don’t think you can do this, make your strips 2 inches wide and stitch them together with a 1/2 inch seam allowance.
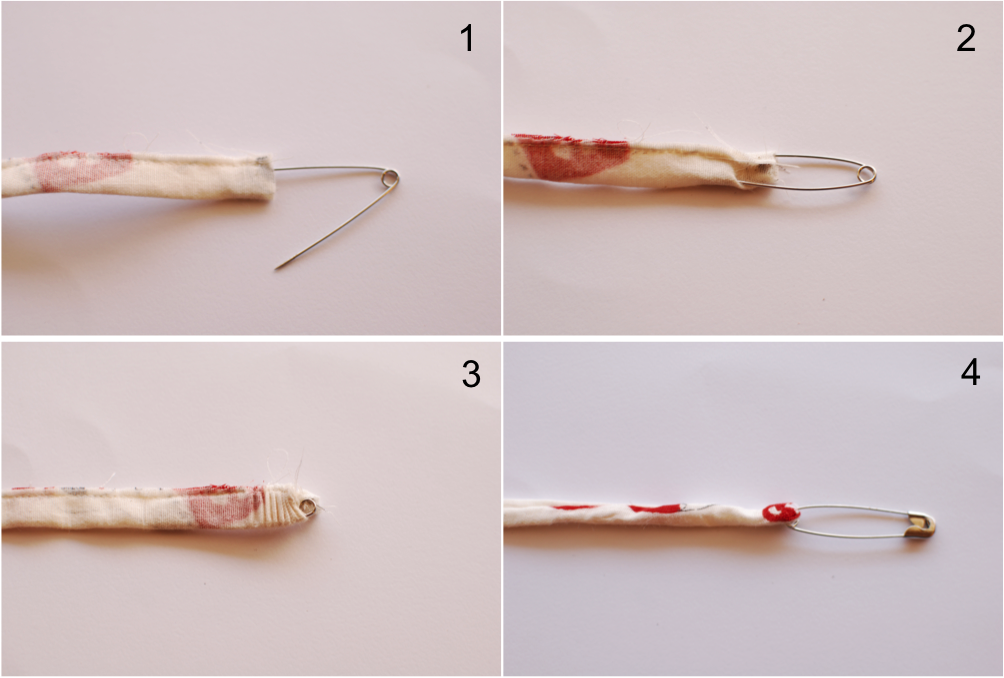
Here’s a little trick for turning super skinny spaghetti straps (that I totally made up as I was doing this).
1. Insert the top of the safety pin into your tube.
2. Close the safety pin, poking through the fabric as you do so.
3. Push the safety pin through the tube
4. Bring it out the other end, flipping your whole tube right side out as you go
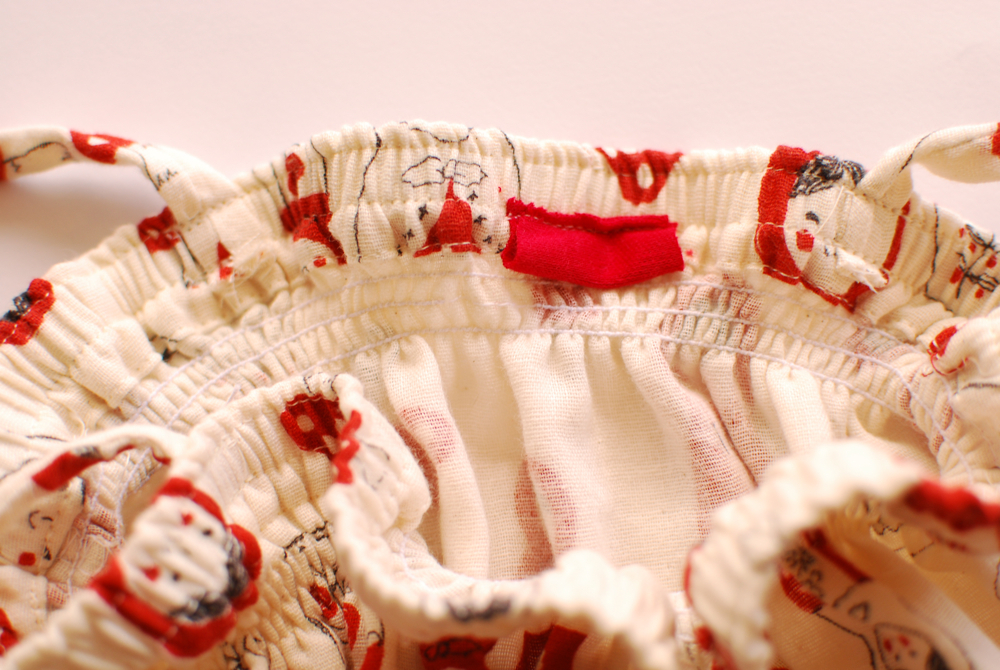
Now sew the straps to the insides of your garment (ignore that shirring, I did things out of order). Stitch one line over your top stitching line and another over the second line to anchor it well and make your stitches invisible on the front. Go over it forward and backwards a few times. I positioned my straps 3 inches in from the side seams, but measure on your child to see what works best for you.
Knot the ends of each tie.

And it always helps to sew your own label or a little knit scrap to the back. If you put this romper on backwards it won’t be very comfortable :)
And while we still have regular thread in our bobbin, it’s a good idea to go ahead and hem the shorts too.

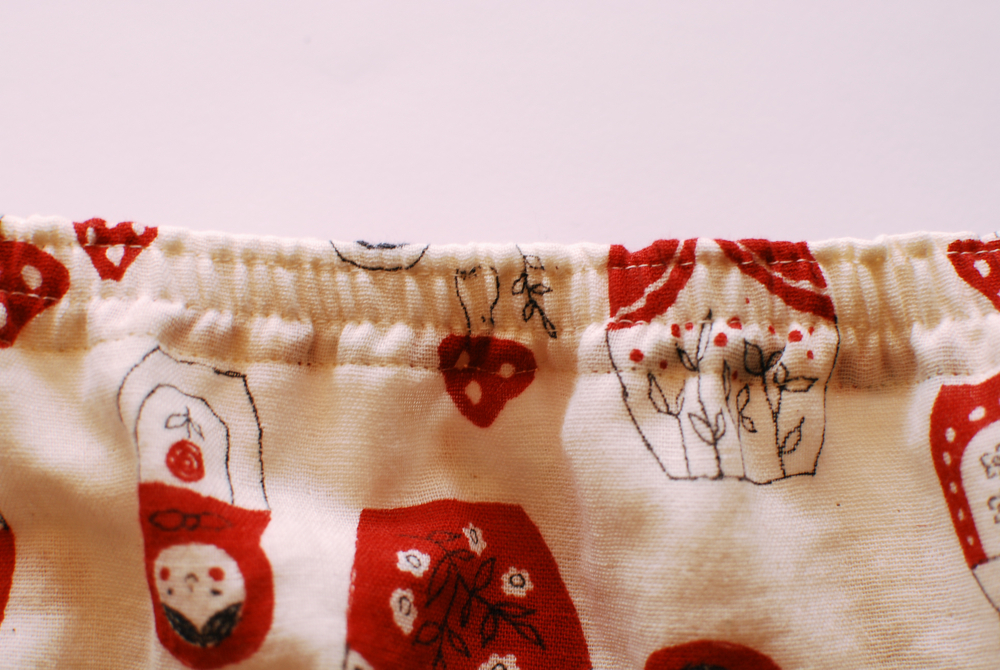
Now switch out your bobbin thread for hand-wound elastic thread. If you need a shirring tutorial, I recommend this one from Flossie Teacakes.
Shirr as many rows as you like. I went for about 1 1/2 inches.
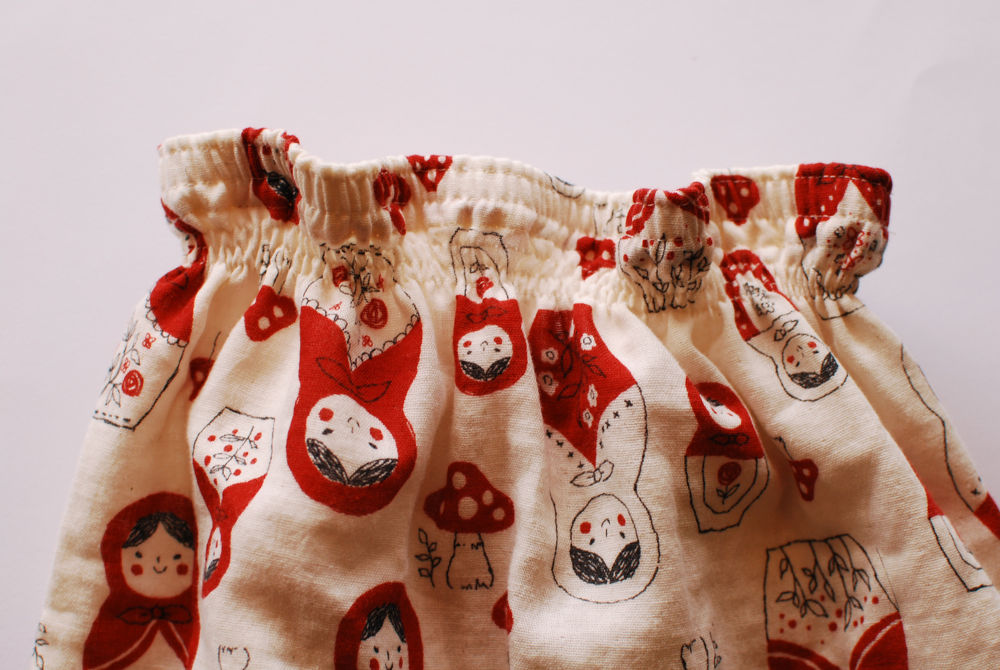
Now do that again, starting at the waist seam and working your way up toward the top for another 1 1/2 inches or so.
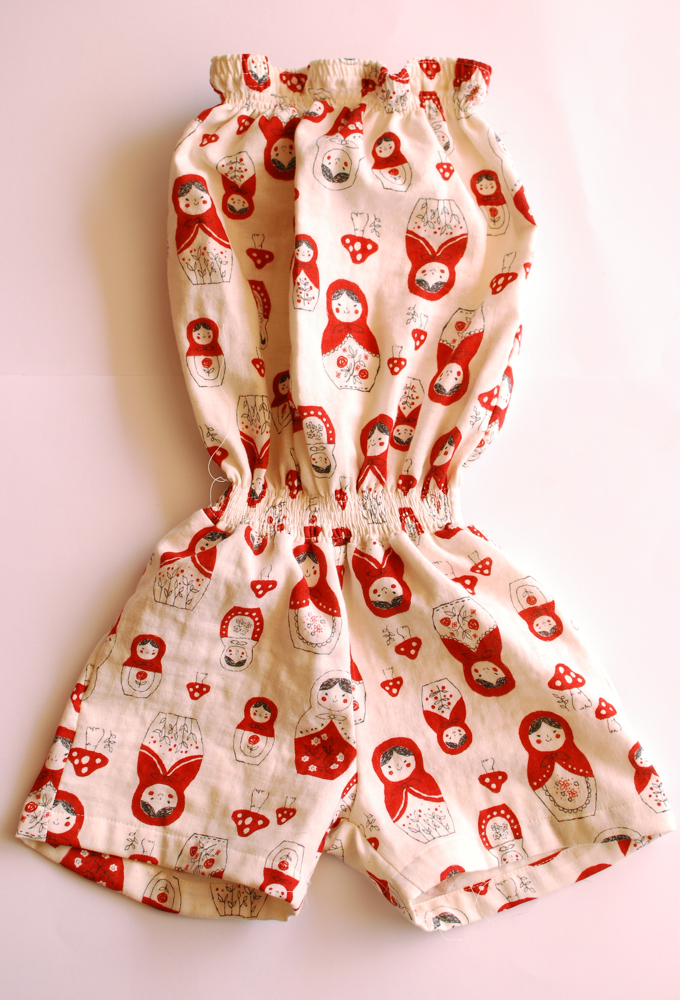
Unlike my pictures, your straps are already attached, so you’re done! Now put it on your kid or yourself and go romping!

Is this technically romping? I had a hard time explaining to my daughter what “romping” means. I think she’s doing some kind of reverse Heisman move in that middle picture.
Or you could just do some unsolicited funny posing instead.

I can’t wait to see your versions! Make sure you stick them in our flickr group or email us a picture or link if you do!

seriously adorable. i want to work with elastic thread..but i am a chicken! :)
you did a great Job. So cute!
I have been wondering about those adult versions, they look great on the models, but I couldn’t carry it off particularly because I remember wearing the terry versions in the late 70s early 80s!
I love your children’s version. I might give it a try with knit.
This is perfect – I was just looking at some ready to wear kids rompers yesterday. The ones at the store had snaps at the crotch for easy in bathroom duties, I wonder how hard it would be to add that?
and I actually bought a romper for myself last summer – on a really hot day they are super duper comfortable. I got one with short sleeves, which makes it look a tiny bit more grown up, but not really. I still feel like a 4 year old in it.
Awesome tutorial! I can’t wait to give this a try for my daughter. I too would feel like a 4 year old wearing one!
Very cute! I agree- no romper for me, but they would look great on the girls :)
Super cute. Thank you very much for the tute. Have added to my to do list for summer.
super adorable! I am loving the nesting doll fabric too! I would so make these for Sadie-but maybe when she’s got going to the potty down a bit more. She still freaks out if she can’t get her pants down in 2.5 seconds. :D
too cute!!! I love it….and my big girl is gonna love it too =)
That is just adorable! I love it! The fabric choice makes it. This romper needs a good quality cotton–I think the terry is a bit cheapo-looking myself. Nice work!
I always love all of your tutorials! You are so creative. Thanks for sharing
This is so adorable! I think rompers look hilarious and ridiculous on adults but they are so cute on little girls…I have a 3 year old who will look very cute in this!
These are sooo cute! Are they easy to get off to use the bathroom? That would be my main concern. Thanks for sharing!!
http://btanders.blogspot.com
Oh my goodness you could wear a BAG AND LOOK ADORABLE !!!!! (or a romper )
I love it! … but of course I do have a weakness for matryoshka fabrics. (Kyra)
Very cute! Love the fabric as well!
Love this tutorial, Thank you! I have already started one for my daughter… I added your tutorial link to my Saturday Stumbles post!
~Jamie @ scatteredthoughtsofasahm.blogspot.com
Love this! We saw a romper today and Old Navy, and I didn’t buy it – I just took a picture of it because I knew I could make one, and I thought I could probably find a tutorial online to walk me through doing it. Yours is perfect!
Yeah, no way I could pull it off. But if I was four? Totally! Super super cute!
what a cute project.
Thanks so much for the tutorial! I made one yesterday. Turned out great. Here is the link~
http://gingercake.typepad.com/gingercake/2011/06/playsuit-and-bubbles.html
Love this! I need to make one for my daughter…but she is only 8 months! Maybe I’ll wait a bit… as for me, I like them, but only some of them. I find that most women’s rompers are a little too short for me, but I love the trend!!
Love this outfit, can’t wait to make one for my daughter!
Hi ladies…I whipped this up last night and it turned out sooo cute! The directions were great and so easy to follow. I have two more to make and would love to send you some photos:).
Tishelle
Tjward5@yahoo.com
Este blog é uma representação exata de competências. Eu gosto da sua recomendação. Um grande conceito que reflete os pensamentos do escritor. Consultoria RH
My niece turns 5 in may…guess what she’s getting for her birthday!!! I will be putting a little elastic in the hem of the shorts as well, with a bit of ruffle.
My Goodness that is so creative and such a great idea! I would definitely, need a pattern piece for the shorts though. It looks great.
Thanks for sharing this tutorial. I would love to make some for my girls. I am having a hard time finding them this year.
Excellent tutorial! I think I will try this for the kids clothes week challenge!
This comment has been removed by the author.
Are these made with knit fabric? I wonder if they would be comfortable in wovens….Such a cute tutorial!
Wonderfull and easy I will try sewing one for my daughter she is 3 years old
Thanks alot.
Thanks for the great post on your blog, it really gives me an insight on this topic.
Just finished one for my 4 year old, and can’t wait to make another! So easy and detailed, even a beginner could do it (aka. ME!) Thank you so much for this tutorial :)
Really cute!
These rompers are adorable in a retro orange and pink floral cotton for my 5-year-old, and this was a very satisfying 2- hour project! It was my first attempt at shirring, and I am now converted! There is a Kate Spade chambray dress that is shirred, and I wonder if I could hack it…. Thank you for the fun tutorial.
I just finished sewing this adorable romper for my 6 yr old grandaughter. She loved it! I loved shirring so much I made a dress too! Thank you for your tutorial it was simple and easy to follow.