It Has Begun!! Happy Skirt Week 2013! Flickr groups are open for all your lovely skirt creations made any time between last year’s skirt week and now, so go enter them already! You can enter up to three in each of the categories (full details here):
For the next week and a half, we’re going to be parading some great skirt tutorials by our lovely guest bloggers here, but first up, one of our own!
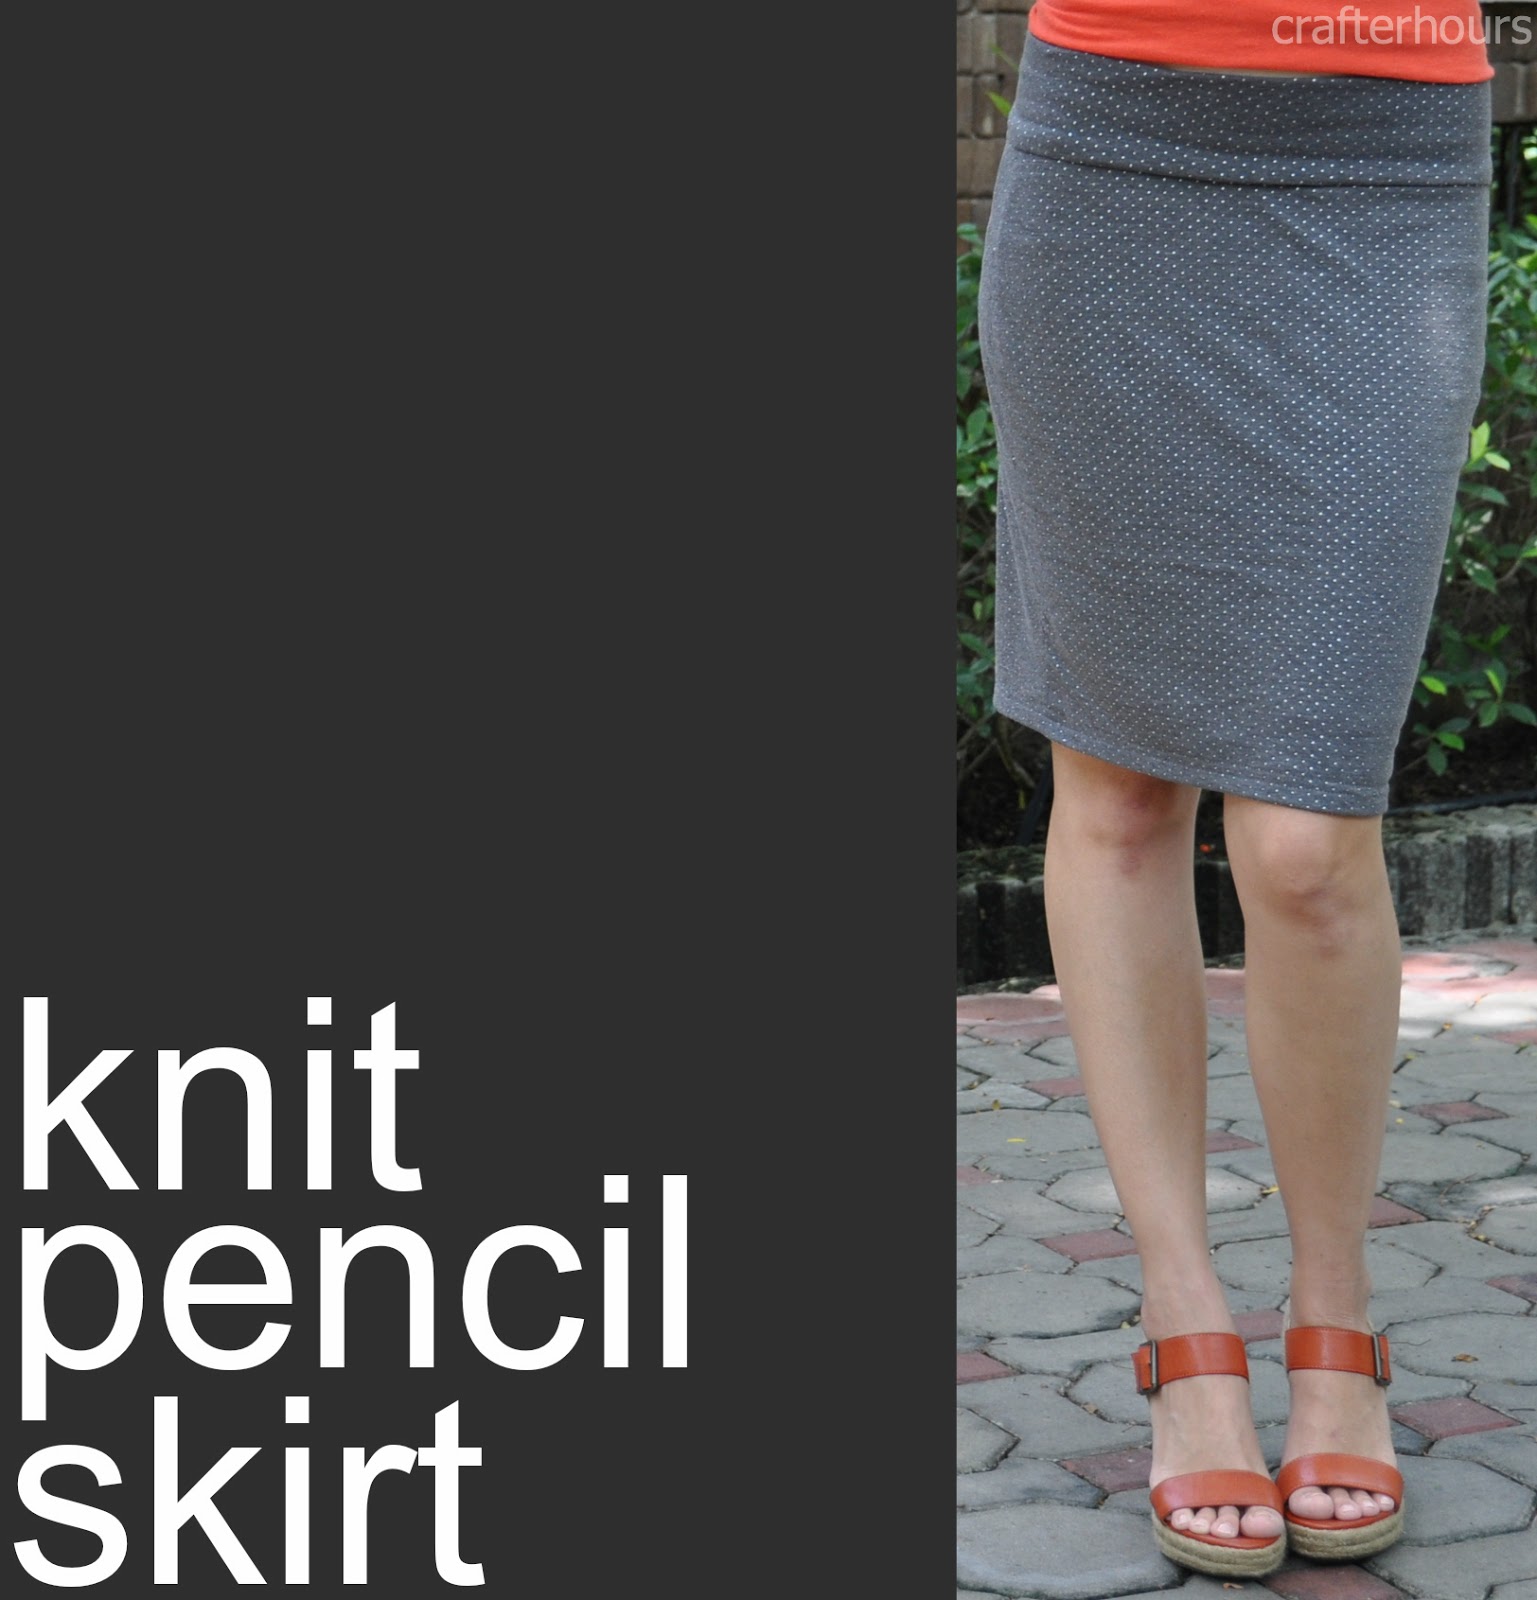
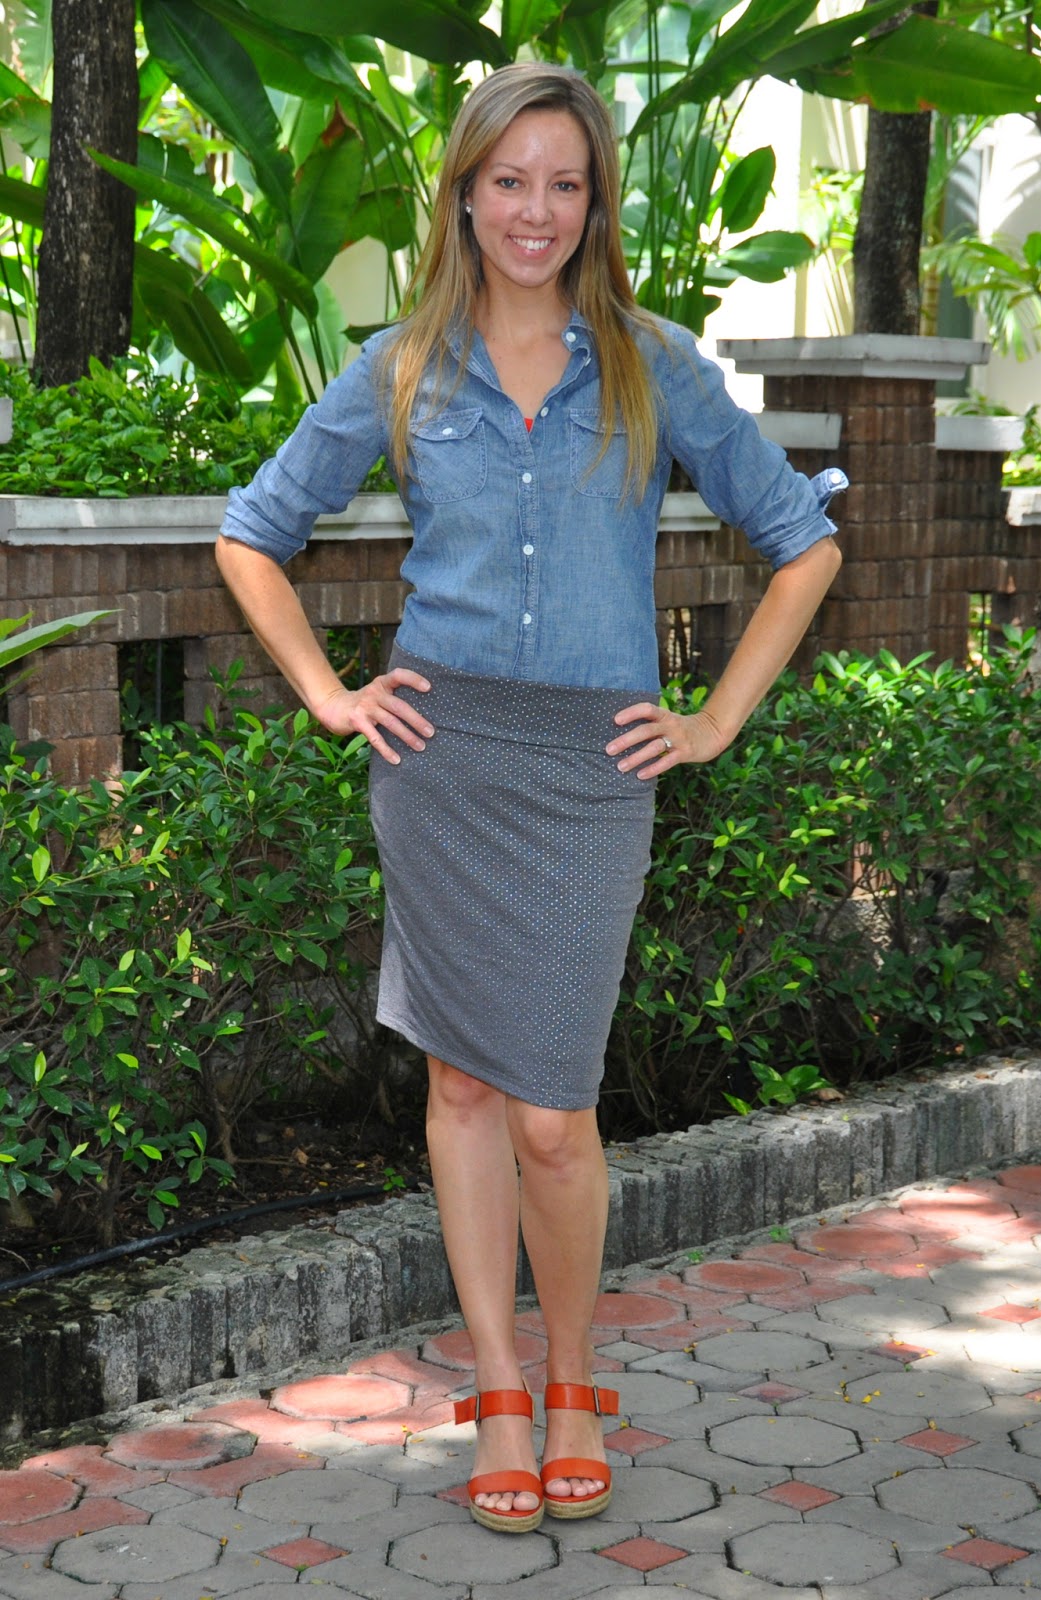
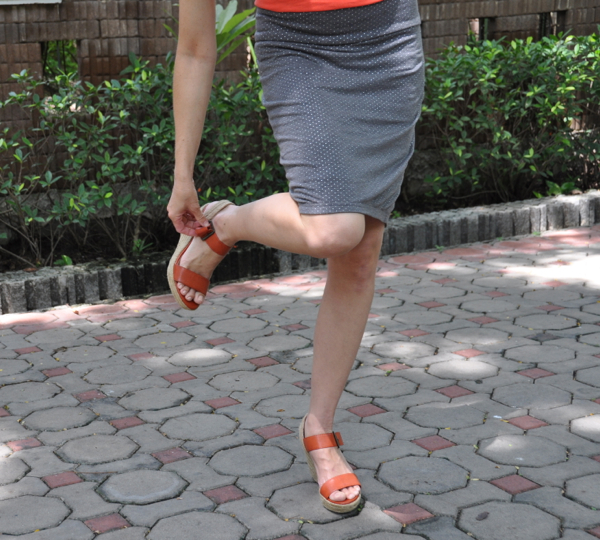
The knit pencil skirt is a great dress up or down item, and a perfect addition to your wardrobe whether your career involves cubicles or carpools. Pair it with a slouchy tee and flip flops or a blazer and heels, either way you’re good to go. It’s the perfect item to make you look more dressed up than you feel.
This is pretty similar to your standard knit, yoga-waist skirt, but I’ve added the options of a lining and some side-seam manipulation to take it to the next level. You’ll get a more precise fit and a better looking finished garment with only a few extra simple steps.
You might be laughing at the thought of a fitted knit garment on your bottom half (I was!), but I’m here to hopefully prove that this skirt is for everyone. This tutorial bases everything off of your measurements, so it’s guaranteed to fit you perfectly, and since you’re the designer, you can make it as tight or loose as you want. Let’s get started, k?!
You’ll need:
– 1 yard of a sturdy knit fabric (interlock, cotton jersey, 1×1 knit ribbing, double knit). You want this fabric to stretch, but not be slinky. I would suggest you avoid anything with the words “rayon” in the fabric content. A good test is that you should be able to hold it against your body and not see too much VPL (that’s visible panty line).
– 1 yard of a lining fabric. This one can be slinky, and in fact you should pick something described as having a “soft hand”, “soft drape”, or weighing at 7 oz or less. A rayon knit would be completely appropriate.
– matching polyester thread, “stretch” or “ballpoint” needles, optional: a twin needle and walking foot
For this tutorial, I’ll be showing the illustrations and then putting the steps below. First you’ll be doing some measuring, so get ready to record your information somewhere. Then you’ll use those measurements to make a pattern, and then I’ll show you how to sew it up.

1. Measure around your waist. This can be your low waist or your natural waist, or where ever you want the skirt to sit. Just remember that the waistband will rise 3″ above this point, so you’ll need to account for that. This number will be “X”.
2. Subtract 1″ from your X measurement. This will be your “A” measurement.
3. Measure the drop down from your waist point to the fullest part of your hips. This is typically around the biggest part of your bottom. This will be your “B” measurement.
4. Measure around the fullest part of your hip to get another “X” measurement.

5. At this point you can choose to keep the skirt tight by subtracting 1″ from your X (hip) measurement OR, you can leave the measurement as is for a looser fit. For a very loose fit, add 1-2 inches. Just remember that knits stretch a lot, and giving the hips negative ease (subtracting 1″) will not make it skin tight, just nicely fitted. The number you get will be your “C” measurement.
6. Measure the drop down from the hips to where you want the hem to fall. Traditional pencil skirts have a hem line at or just below the knee. I chose to make mine just above the knee so it would be easier to move. You can also raise the hem line to mid-thigh and make a mini. The choice is yours! Just try to measure in front of a mirror or with someone helping you. If you bend over to look at the ruler, it could mess up your measurements and you would end up with a mini whether you wanted one or not. The drop from hip to hem will be your “D” measurement.
Measure around the hem. This is also completely arbitrary, depending on how straight or tapered you want your skirt to be. My hem width ended up being the same as my waist measurement. You could make it smaller or larger. If your hem width is wider than your hips you’ll end up with an a-line skirt though. This will be your “E” measurement.
7. Now divide your A, C, and E measurements by 2. This will give you your a,b, and c measurements. You’re doing this to divide your full waist, hip, and hem measurements into front and back measurements.
8. Now we’ll be figuring out the exact waist, hip, and hem measurements for the back of the skirt. We will be adding width to the back and later subtracting width from the front. This isn’t 100% necessary, but humans tend to have more curves in their rear than their front, so this way the side seam will be balanced to provide more space for your bottom. It just produces a better fitting, more professional garment. For the waist, add 2 inches to your “a” measurement, at the hip, add 2 inches to your “c” measurement, and at the hem, add 1″ to your “e” measurement.

9. Now we’ll be doing the same thing for the front of the skirt, except subtracting width. So, subtract 2 inches from the “a” measurement, subtract 2 inches from the “c” measurement, and subtract 1″ from the “e” measurement.
10. Now you’re ready to start drawing out your pattern. You will need a large roll of paper, or some printer paper taped together. You will need enough to draw a pattern for the front and back. (you can also draw these lines directly onto your fabric to save a step. Just fold the fabric right sides together and use a disappearing or water-soluble marker.) First, draw a line straight down equaling your “B” measurement. Make a small horizontal line at the end of this line. From your end point, draw another vertical line equaling your “D” measurement. (if drawing directly onto your fabric, this line will on the fold, so just mark the top, the bottom, and the point where B meets D)
Because you’re only drawing half of the back skirt and half of the front skirt, we’re going to have to divide our measurements by 2 again. When your pattern is placed on the fold of fabric and cut, it will yield a perfectly symmetrical skirt front and back.
11. For the back of the skirt: Draw a perpendicular line from the top of your previous line that equals your “a+2” measurement divided by 2. Do the same for your hip and hem measurements, as pictured. Connect the ends of your measurements with a gently curved line.
12. Repeat step 11 for the front of the skirt. Remember that this time you’ll be subtracting width before dividing by 2.
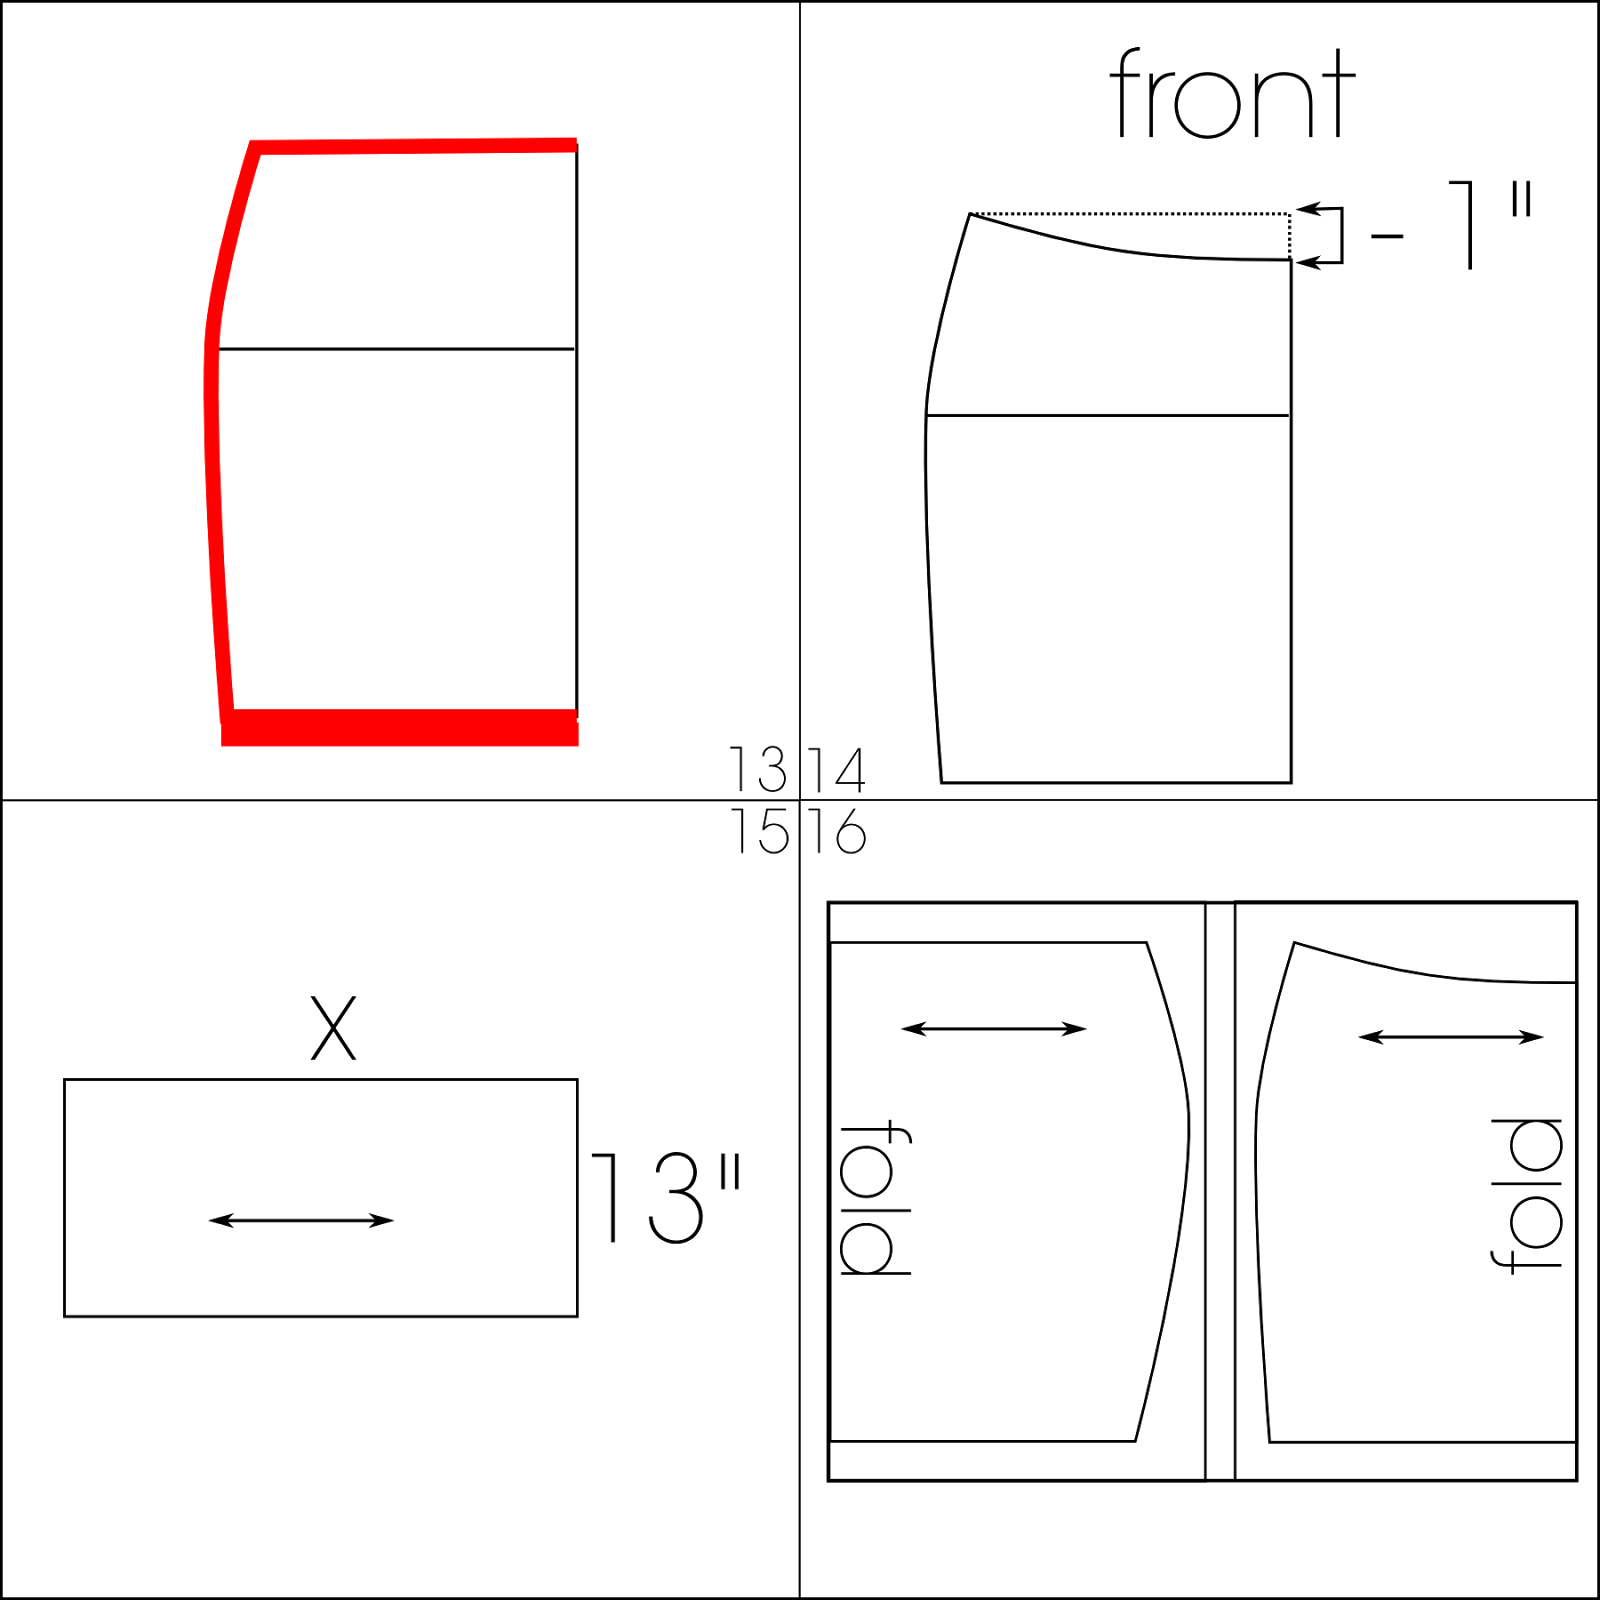
13. Once your front and back patterns are drawn, add a half inch seam allowance to the top and side, and a 1 inch hem allowance to the bottom, as shown.
14. Just one small adjustment to provide a better fit: on the front skirt piece, drop the center front down 1 inch and draw a new waist line, curving up to the side seam.
15. Cut your waistband. The waistband will be a rectangle 13 inches by X. X is the measurement around your waist with some negative ease. The amount of ease you need to subtract from your waist measurement is completely dependent on the amount of stretch in the fabric you’re using. I’ve found that the best way (although not very scientific) is to simply wrap your intended fabric around your waist, making sure the stretch is going around your waist (horizontal stretch). Pull the fabric around you so that it is slightly stretched and snug. It needs to be tight enough to keep the skirt up even after stretching. It is much easier to accidentally make the waistband too loose than too tight, so get it good and snug. Once you have a good fit, mark the two points that meet with your fingers, unwrap it, and hold it up to a ruler. If you don’t have a ruler long enough, you can mark these two points and measure them with a tape measure. Add 1″ to your X measurement for a seam allowance. Cut your 13 x X waistband from your main fabric. Note the direction of stretch in the illustration. It should be going horizontally.
16. Lay your front and back pattern pieces on the folds of your main fabric and cut, noting the direction of stretch. Repeat with your lining fabric.

17. Sew your skirt together at the side seams, right sides together. You can use your serger, but this seam doesn’t need to stretch, so I found it easier to control the fabric and guard against wavy seams by using my sewing machine. Use your walking foot if you have one and you’re so inclined. I adjusted my presser foot pressure and slightly lengthened my stitches and had no problem. Press your seam allowances open, if applicable. Repeat this step with your lining front and back. Baste your lining and your skirt wrong sides together along the waist, matching side seams. To baste, just use your longest stitch length and sew using a 1/4 inch seam allowance. From here on, you will treat the skirt and lining as one.
18. Sew your waistband right sides together at the short ends, forming a tube. Press your seam allowances open, if applicable.
19. Fold the waistband down on itself, wrong sides together. You’ll end up with a tube with a fold on one edge and two raw edges on the other.
20. Use pins to mark four equal spots on the waistband. Start with the seam, then pin directly opposite. Bring the two pins together to find the spots for the side seam pins. Repeat this process for the skirt, but begin by putting a pin in each side seam, and then fold to locate the center front and back. Then move your two side seam pins 1 inch to the back of the skirt. This is to balance out the width we added to the back and subtracted from the front earlier.

21. Wrap the waistband around the top of the skirt, right sides together, with all 3 raw edges together, facing up. (the skirt should be right side out). Match the seam in the waistband to the center back of the skirt and pin. Continue matching up your other three pins, removing them and pinning the waistband to the skirt as you go.
22. Sew the waistband to the skirt using a 1/2 inch seam allowance. This seam does need to stretch, so I suggest using a serger or stretch stitch. You may also use a zig zag stitch, just change the settings so the stitch is longer but less wide than a regular zig zag.
23. Turn the skirt inside out. Press the main skirt to the inside by 1 inch. If your knit is susceptible to burning, use a press cloth. Topstitch the hem on the right side of the skirt using a 5/8 inch seam allowance. This is a great place to use a double or twin needle. If you don’t have one, you can use a modified zig zag stitch (set longer and less wide than normal, so it’s closer to a straight stitch.) If you try on your skirt and you can take a good stride and sit down without stretching the hem at all, you can also choose to just hem the skirt with a straight stitch. Just be careful as this seam needs to stretch to accommodate movement if it is tapered in toward your legs. If you use a straight stitch, lengthen it so it doesn’t pucker your fabric. Press the hem well from the right side with a press cloth.
You can choose to hem your lining or just cut it an inch shorter than your main skirt. Knit won’t fray, and in this case, leaving it unhemmed might be the better choice because it won’t have any extra folds that could create bulk on the outside of the skirt.
24. And you’re finished! Congrats!


Fabric is of course from the wonderful Girl Charlee, a Skirt Week sponsor – holla!

I love it! I have a knit dress that I have been wanting to refashion into a skirt. I’m going to have to give it a try!
DO it!!
It looks KILLER, girl. So hot! Well done!!
Thanks Kat :)
Oh boy you look niiiiice in this skirt! And I am sooooo jealous of all the graphics – it makes it all SO clear. You will see what I mean when you see my tutorial tomorrow, argh ;-) Oh well me and computer graphics are probably not going to be in this life…..
too late, I’ve seen your graphics now and they’re awesome! The white on black is really clear and easy to read too – very smart.
In step 7, I believe you mean A, C, & E. :)
Thanks for making such a great tutorial! It’s very thorough, and the diagrams make everything very clear. The skirt looks super easy, and there are some great little fitting details to elevate it to look very flattering.
K
gah, thanks!!! I just knew this was going to happen. I’m just glad it’s in the text and not the picture – much easier to fix. So, if you’re reading it that closely, does that mean you’re making one? ;)
Oh, I think so. I have the fabric already lying in wait. I’ll send you a link to it!
K
sweet!
i’m pretty darn in love with this!!!!
I’m determined to use this with my Girl Charlee knits! I think your VPL comment was my favorite part haha awesome!
do it! I actually had a different girl charlee fabric picked out but then this one caught my eye in the stash and I couldn’t resist. Even though it has metallic polka dots, I think it works more as a neutral than the stripes I was going to use. GC rocks!
You are such a babe! So…I totally posted a knit pencil for GC today and had no idea you posted one as well! (forehead slap) I have been busy in the sewing room and not on the computer. So sorry. I am really apologizing mostly to myself because..if we were to compare, yours is really waaaaaay better, more precise, just totally awesome. I admit it. You wore it better. :) (and I feel silly)
Lovely skirt and tutorial! And I too have a serious case of The Face. Either happy or snotty. Apparently if I have a nice angled bob it elevates me from unapproachable to ‘hot but bitchy looking’ according to my hubby. ha!
You’re posh spice!
DAYUM girl, you’re so cute. Love this skirt (and your sassy pout face). I need to buck up and make one of these, looks like it’d be so fun to wear. I have a stretch wool one from banana republic that i’ve worn pretty regularly since 2003, so maybe it’s time for an upgrade?
Hi, Adrianna! Thanks for great tutorial! I made a skirt using this tutorial( and added ruffle on the hem). Link to my blog is here :http://nutta.typepad.com/my-blog/2013/06/anthro-knock-off-skirt.html. Your tutorial was so clear and easy to follow! I’m participating in Skirt Week with this and one more skirt! Thank you so much for sharing tutorial and hosting Skirt Week!! ( and you look soo nice in the pictures!!)
Wow, that was quick! I’m so glad the tute worked for you. Good luck!!
Thank you for this awesome tutorial!!! Wow! I just used it to draft my own skirt. Then I cut it all apart to create a bandage style skirt. I linked to this tutorial in my post. Thanks again! http://www.familyeverafterblog.com/2013/06/sewing-tutorial-bandage-style-knit-skirt.html
Miss you girl! Cute skirt. :-)
Thank you so much for this tutorial! It yielded a perfectly fitting skirt for this five-month-post-partum mama. How great to get sewing AND wardrobe satisfaction at the same time! You can see my effort here: http://www.flickr.com/photos/23557464@N03/9294079162/.
Thanks for the great tutorial – I’ve made two of these and am really happy with them.
http://thirtynineblog.blogspot.com.au/2013/07/a-stretchy-skirt-for-me.html
This tutorial was AWESOME! I wasn’t sure if I was the pencil-skirt type, but using my measurements made it SO flattering! I used some adjustments to the milkmaid skirt to add pockets and elastic, and this skirt became my Era challenge for the Project Sewn sewalong. Love, love, love it–thank you!
http://www.bethbeingcrafty.blogspot.com/2013/10/the-era-challenge-mad-men-inspired.html
So excited to try this! Though as someone who has never drafted before may I suggest moving up that part about adding the seam allowance. It does go quicker the second time but I wish I had saved myself the work :p. Just waiting for my next coupon and that baby will be made!
Got alittle lost with the waist band…but got the basic idea…Love the graphics to help illustrate the concept.
Did you figure out how to do the waist band…i also got lost!
Congrats on making it into Tip Junkie! So proud to say I know you!!
Thank you for the tutorial! I “pinned” it intenting to make one for myself and I still do but today I used it to up-cycle a shirt that I was going to donate. I called it the “shirt to skirt” project. I made a pencil skirt for my oldest daughter but it’s fits both her and her younger sister, I love how it turned out and now I am really excited about making one for myself! https://www.facebook.com/humblemesew/photos/a.393106664039667.111467.204963336187335/844390188911310/?type=1&relevant_count=1
I was in the middle of making this skirt and got a little bit confused on how to attach the waistband and finish it…very new to sewing! Could someone please explain a little further, thanks!
Sorry if this is way too late, but let me try to help. You take the skirt part, right-side out and lay it down with the raw waist up at the top. You take the waistband and flip it inside out with the raw edge also up. You slide the tube of a waistband over the skirt, so that the two raw edges are touching each other and the finished “top edge” of the waistband pointing down toward the bottom of the skirt. You sew the two raw edges together (preferable to serge) and then flip the waistband up…hope that isn’t more confusing! This is a great tutorial and I look forward to trying it out!!
Wow, lots of good tips here I have not seen anywhere else. I wondered if you could add/subtract from front and back because I am not evenly divided in half! Why is the skirt lined? Could it be made unlined and still look good? I have a 10″ front rise (to natural waist) and 19″ back rise, and my waist is 14″ narrower than my hips if I measure my hips sitting down, which is recommended for a better fit with wovens; not sure whether that is necessary with knits? Can you tell me how to adjust for these issues?
Hi Chris,
You can definitely add and subtract to make the back and front fit you better! The skirt is lined because the combination of knit fabric and negative ease means it can show every little lump and bump, assuming I’m not the only one who has those ;) If you’re using a ponte de roma or any thicker knit you could probably get away without lining, but then be very careful about fit since it won’t stretch much. You can also angle the front and backs to be as high and low as you need them at the waist. Just angle them both to meet at the side seams. Because you’re using knit and negative ease, it’s not as important to measure sitting down, but you certainly can. It might be a bit looser than what you see on me. Hope that helps!
It sure does help. I have too many lumps and bumps to wear a skirt with negative ease, so I’ll sew it with an inch or two extra and see how that looks. I’m kind of confused about the many different kinds of knits. It’s too bad double knits mostly are plain and dark, but maybe on my figure that’s a good thing. Sigh. Thank you so much Adrianna!