Bloggers sometimes use image maps to create graphics for readers to click-through to social media or to other blogs. If you’re one of our non-blogging crafty readers, I hope you’ll just ignore the obnoxiousness of this techie post, because *I* need it. By tomorrow I’m going to forget how I did this and come back to this post to remind myself. I was one of many who used to use a free online tool to do this – image-maps.com – but they’ve recently switched to a subscription based service for a number of features that’s $7 a month. For something I only use a few times a year that just seems silly, especially when there are other ways to do it. So. Here’s another way. 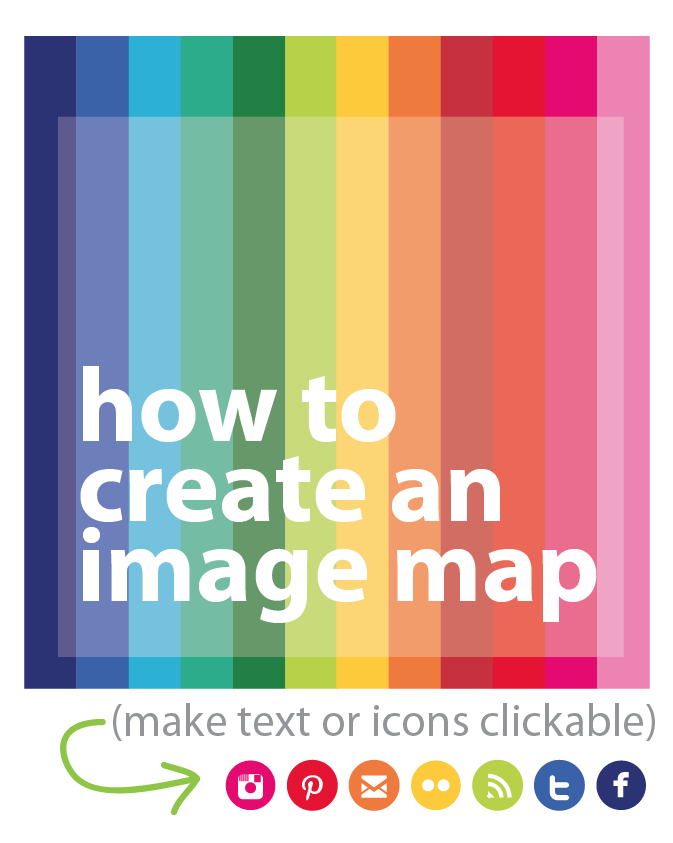
Start by downloading Gimp. Adrianna is probably twirling in circles to see this, as she’s a Gimp/Inkscape cheerleader and I’m an Adobe cheerleader, but I’m a Gimp girl for this DIY. Gimp is a free program for photo editing and it has an image map function. Find it here. Lots of users are dedicated to Gimp and Inkscape — I’m sure it’s every bit as useful as the Adobe programs I use, but once you start learning on one or the other it’s a total pain to learn a whole new language. In the case of image mapping though, Gimp wins.
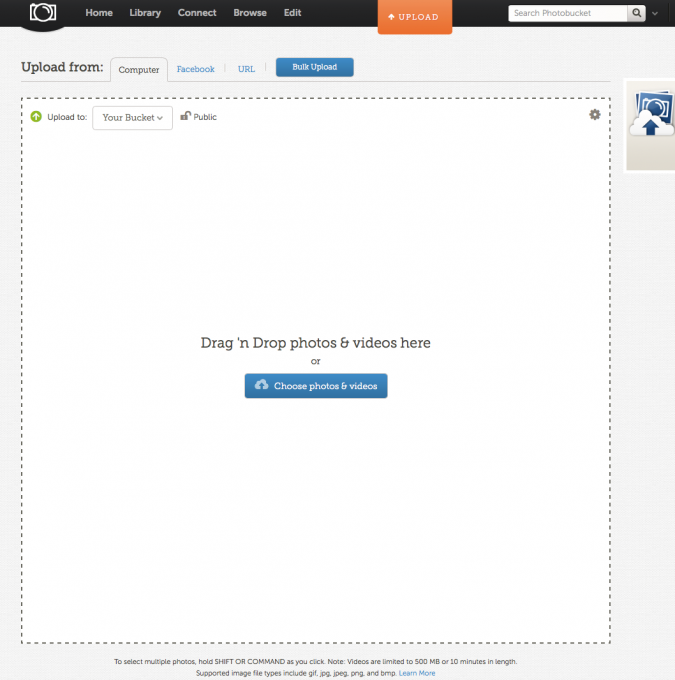
While Gimp is installing (or opening if you already had it), upload your image that you’re planning to map to a public spot. We use Photobucket most often but you could also use Google Drive or Dropbox, as long as the share settings make the file public. Upload your image.
In Photobucket the “share” links are easy to find. However you’ve uploaded, you need the link that’ll be available to the public without them being logged in. For example, if you upload to Flickr but the image is restricted, it won’t show up. That’s kinda self-defeating here. At the end of this tutorial I’m coming back to grab the “Direct” link you see below on the upper right.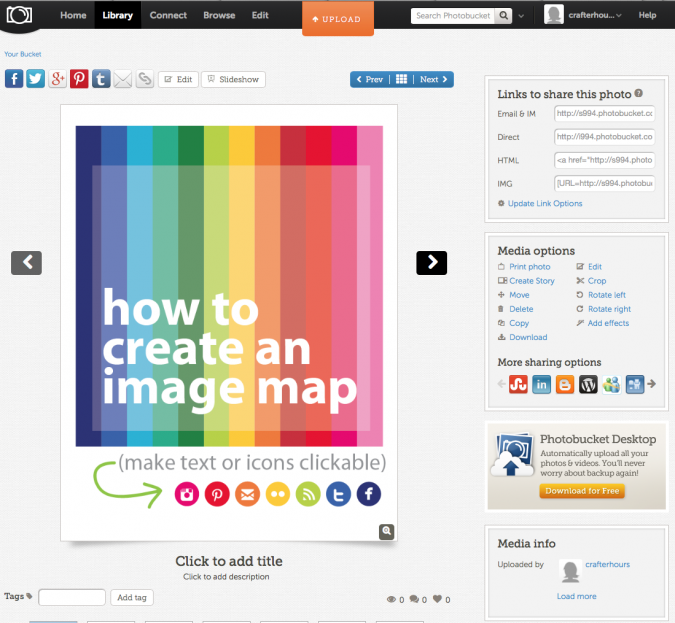
Now open the same image in Gimp. It’s important that the image you open here is the same one you’ve uploaded for sharing — the size has to match exactly or your image map will get crazy in a not-fun way. Hey, here it is! 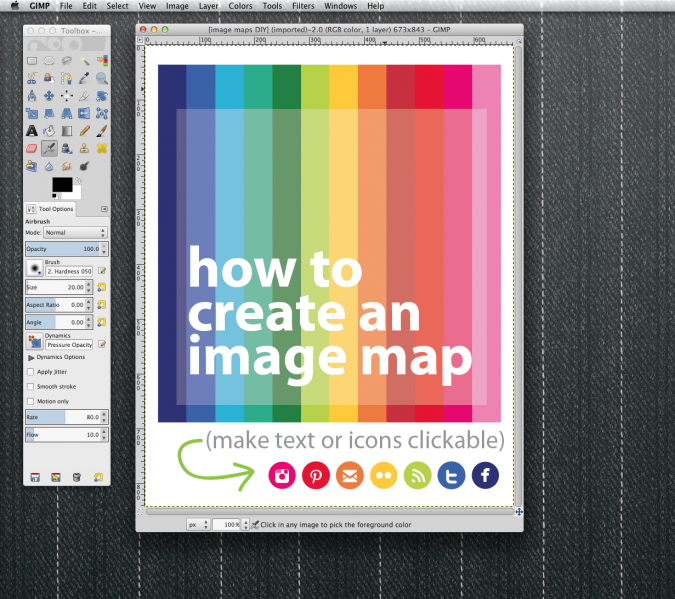
Now, under Filters, choose “Web” and “Image Map”.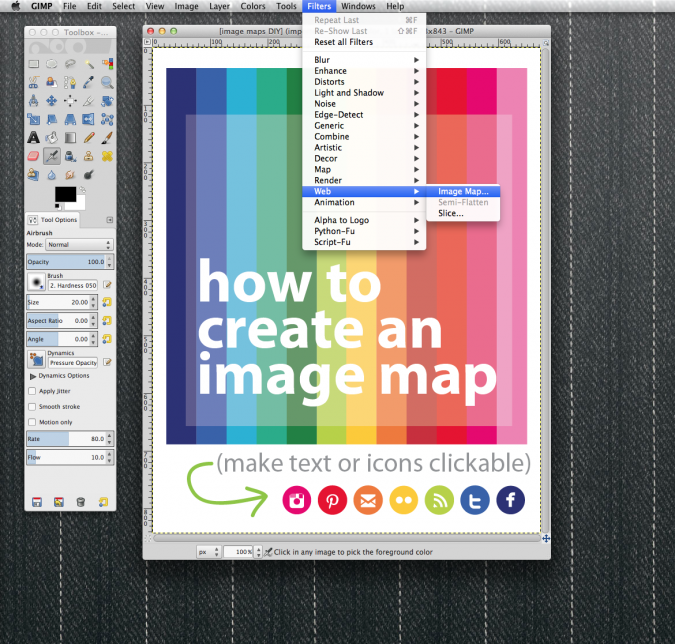
If you’d ever used the image-maps.com tool, this will feel familiar. If not, it’s still easy. Just use the rectangle tool (or a shape-i-er tool if you’re fancy!) and select the area you want to link somewhere when people click on it. I’m using our social media links here, but it could be a list of blogs you love or links to tutorials. Whaaaaatever you like.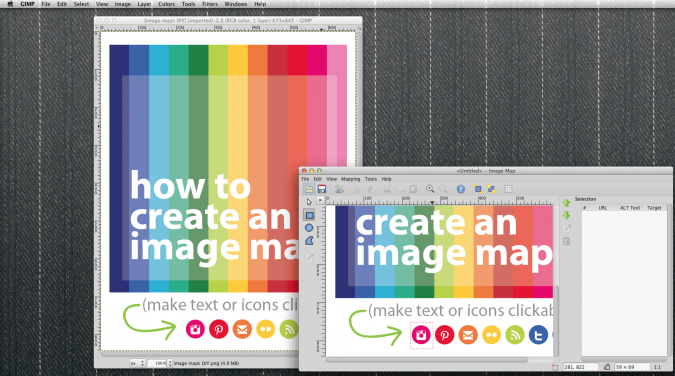
As you create the rectangles you’ll have pop-ups appear where you’ll paste links. Easy peasy. Click “ok” to close each one and draw the next.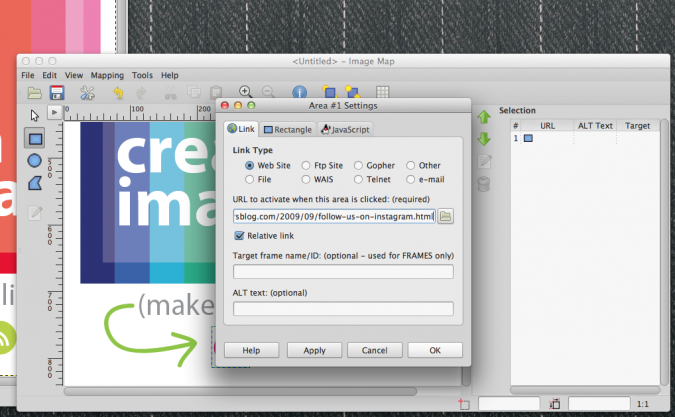
When you’ve added all of the links, click on the disk icon to save your map. Remember where you save it!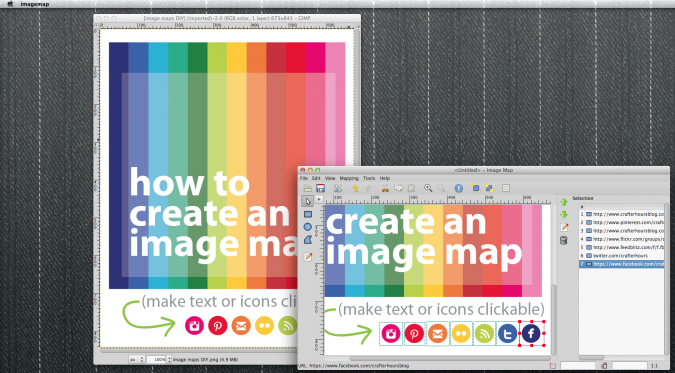
Once you’ve saved it, open it again, this time in Notepad or TextEdit or whatever text editing option you have. Select the “image source” area I’ve highlighted below…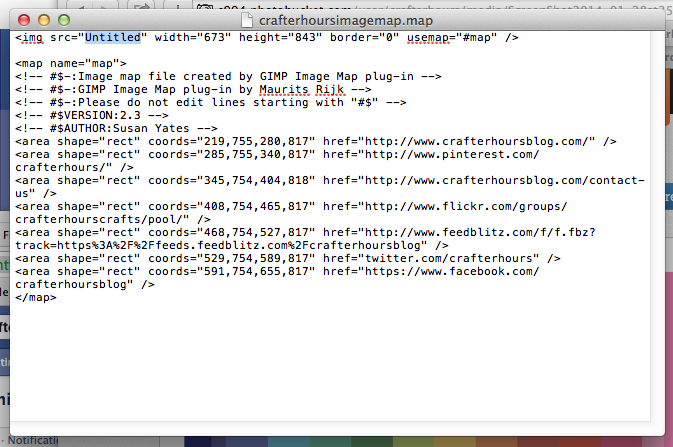
…and paste in the share link for the image that we saved in the beginning of the process. NOW. You’re done! Copy alllll of this code and paste it into the HTML window of a blog post or a widget, depending on how you’re using it. 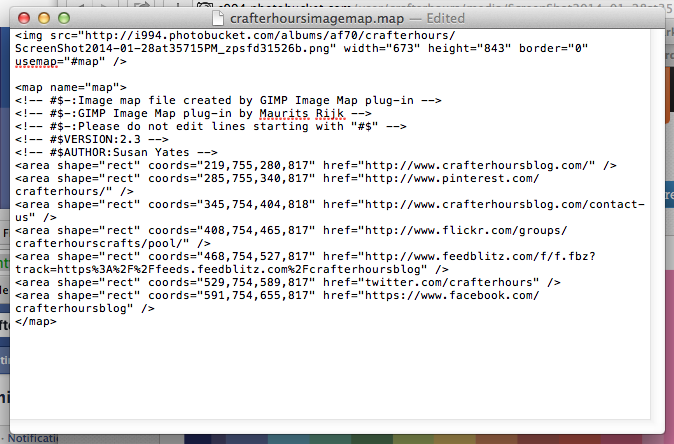
Easy peasy, right? If you have a related tip to share or see something I should add or edit, comment below pleeeease. I don’t fancy myself a tech tip writer, but I will need to refer to this myself later. Now. Back to the sewing I wanted to be doing today before I got sidetracked!
Thanks so much for this! Adrianna converted me to inkscape, so I’m excited to know more about Gimp too. Thanks ladies!
You rock! I am forever using Image Map and then totally forgetting how I did it and got my image to map. You just saved me a whole lot of time and heartache. Yay!
For as much as I do love Inkscape, I gotta say that gimp drives me bonkers!!! Glad to see it’s good for something. It’s like you said, you know what you know. And I learned photoshop first.
very coo! Thanks for sharing .
Wish I had this a few years ago when I was trying to do a clickable web page header! :) Great tutorial!!!
THANK YOU, Susan! I keep meaning to learn how to do this, and now you’ve made it so easy! And I had not even heard of Gimp…will be checking this out STAT! Thanks again!
THANK YOU! I’ve been wanting to learn how to do this for a looooong time, but I didn’t even know what the terminology was for it. :)
Was this just for me?!!! :) lol
I have spent HOURS trying to figure this out. It’s been more crazy making than the lace shawl I’ve been working on. Thank you so much!!!!
Holy moly. Get back to that lace shawl then. That sounds way harder.
I’m obsessed with gimp. I’ve used it for years and it’s pretty much what I use for everything. I haven’t even used any of the adobe programs so maybe I just don’t know what I’m missing?
I was impressed by my brief look at it! If I hadn’t already started on Adobe I’d go there first. If it ain’t broke don’t fix it.
Thank you for sharing! I’m a newbie at blogging & I’ve spent the last two days trying to figure out how to do this! So glad I came across your blog!
Thanks for the tutorial. I just downloaded Gimp, and I cannot for the life of me upload my pic using the Direct link from PhotoBucket. How do I upload a photo? It may be obvious, but I’ve tried a few things to no avail. Thanks!
Since Gimp is running on your computer (as opposed to using an online tool) you’re not uploading the image, you’re just opening the same file from your computer that you uploaded to PhotoBucket. Make sense?
I did it!!!!!!!!!!!!!!!!! Excuse the excitement but I am so excited because i have wanted to know how to do this forever. Check out my success on a Page I’m working on here:
http://www.thechildatheartblog.com/p/cheap-gift-ideas-for-all-occasions.html
Yes, thank you so much! I spent 3 days off and on trying to figure this out. Thank you!