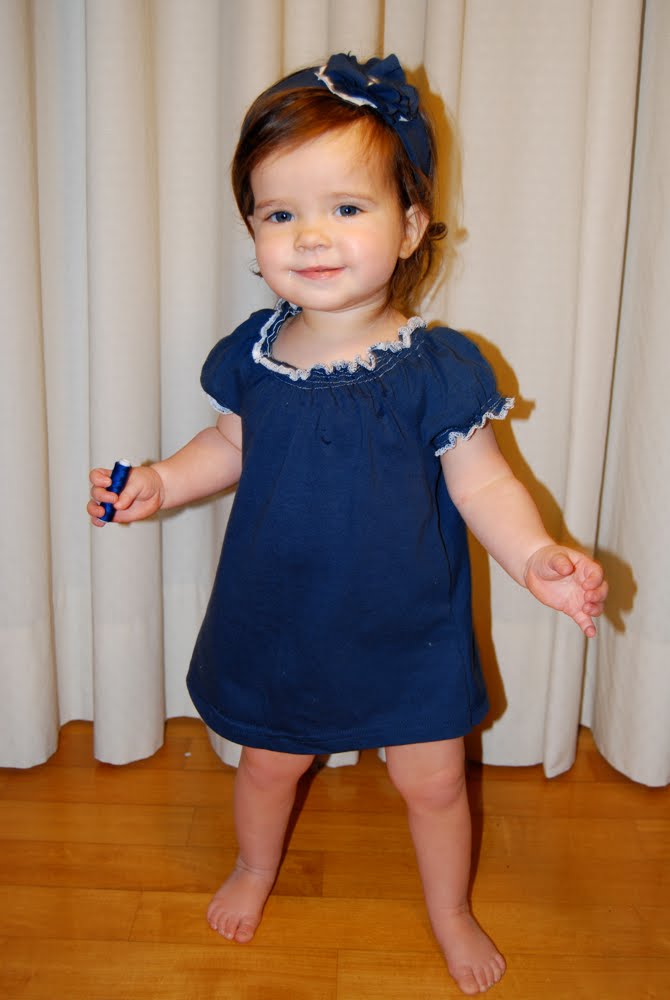
Here’s another idea: a toddler dress. I used this peasant blouse tutorial (yes, AGAIN! Don’t get sick of it, there’s even more on the way :)
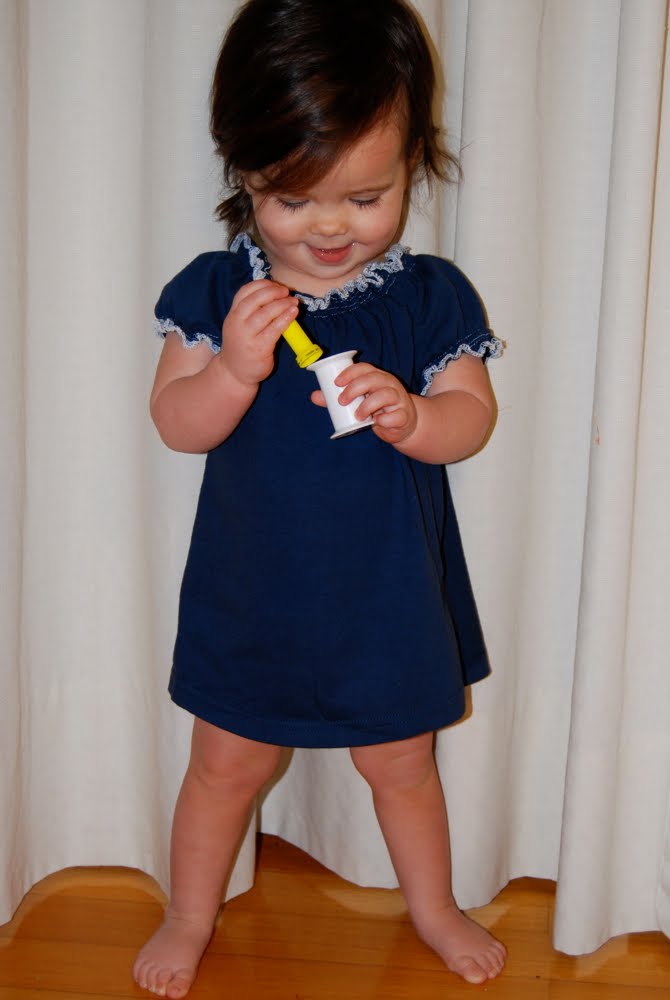
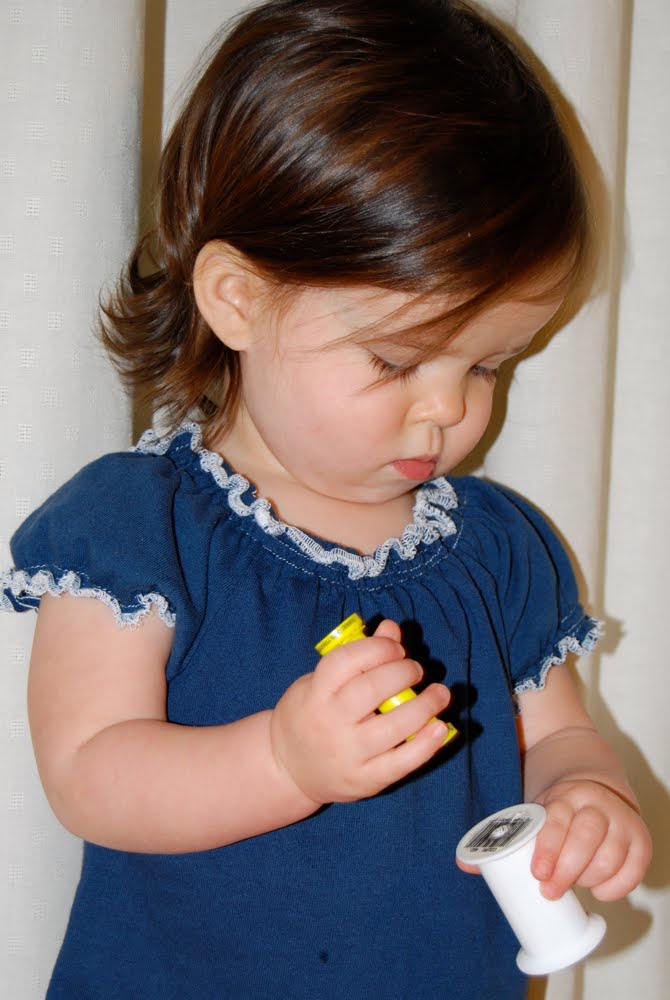
This dress was kind of an experiment for me because I wanted to try the “decorative edge stitch” function of my serger and I wanted to shirr for the 2nd time ever. I used both of these methods around the neck and sleeve hems with a contrasting thread.
Now for a little discussion about shirring. I had heard so much raving about how cute it was and above all, how easy it was. One tutorial even said it was easier than peeing your pants. Hm.
To make a really long, boring story short, shirring did not work for me. At all. I spent some time searching on the internet until I discovered you need to steam your stitches after you’re done. I’m sure you all know about this and are yelling it at your screen right now, but I had no idea. I got my iron out, deposited steam all over the neck and sleeves, and voila, they bunched right up! Like magic! I think the steaming step is more important on knits than wovens.
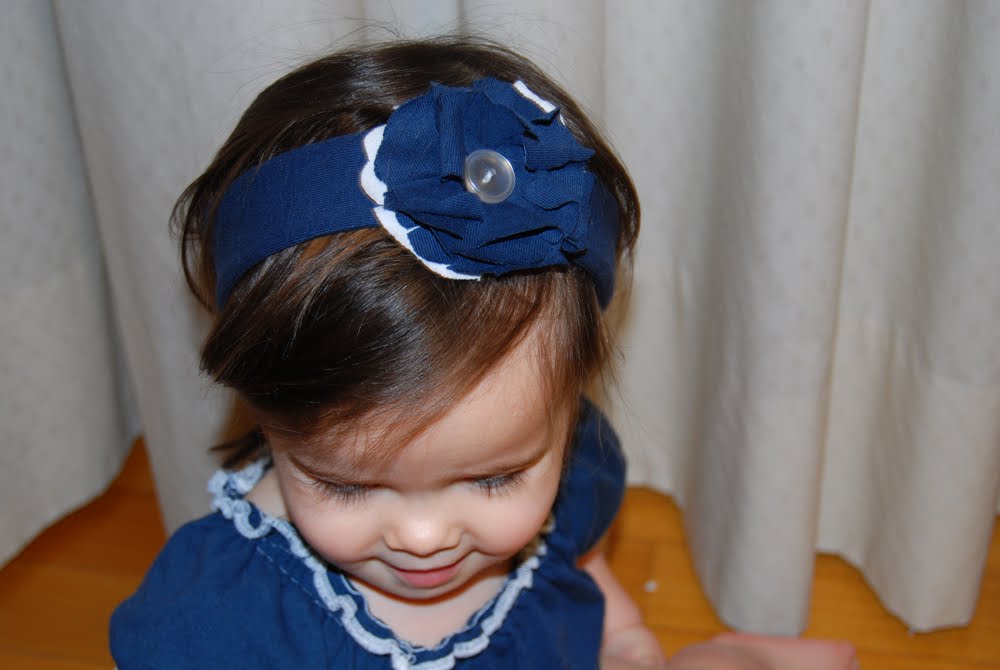
Then, as I was photographing P in her new dress, and stopping every 2 seconds to push her hair out of her face, I thought, Headband! Project #2:
This one’s super easy. There’s no possible way you could mess it up. So I won’t even mention how I initially made it 5 inches too short and sewed it inside-out. Here’s a better way:
Cut 3 strips, each 2.5 x your head circumference minus 3 inches. For example, my head was 21.5 inches, so I cut my strips 2.5 x 18.5 inches. Cut two out of your T-shirt, and one out of a non-stretch fabric or quilt batting. You’ll also need a length of elastic, about 5 inches, in any size you want. I used 1/4 inch. Attach a safety pin to one end of your elastic.
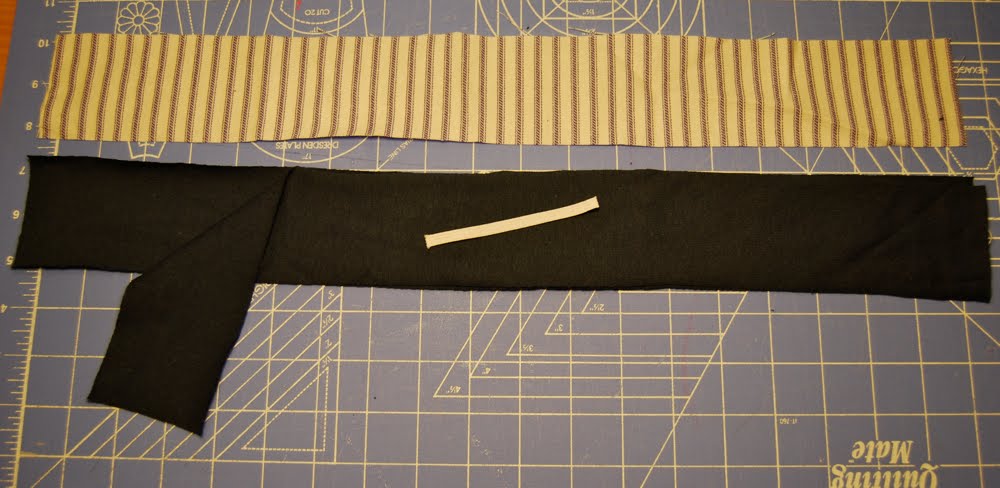
Make a sandwich in this order (to avoid the inside-out-sewing mess): First, your interior non-stretch fabric, then one knit piece face up, then the other knit piece face down. Insert your elastic on one end between the two knits so the safety pin is enclosed in your sandwich.
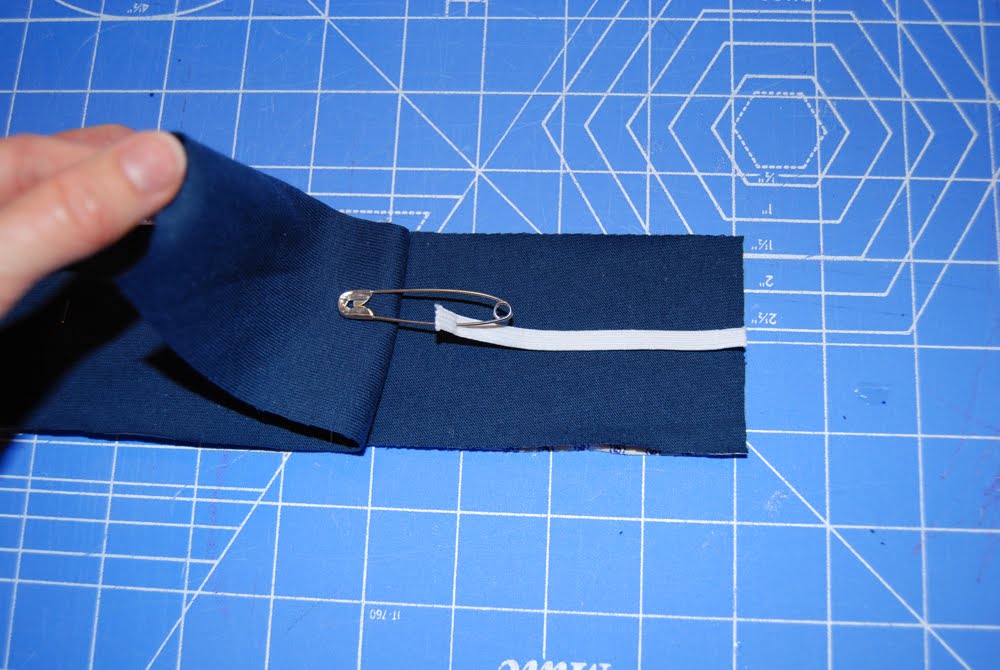
Sew around the perimeter but leave the non-elastic end open. Trim the seam allowances.
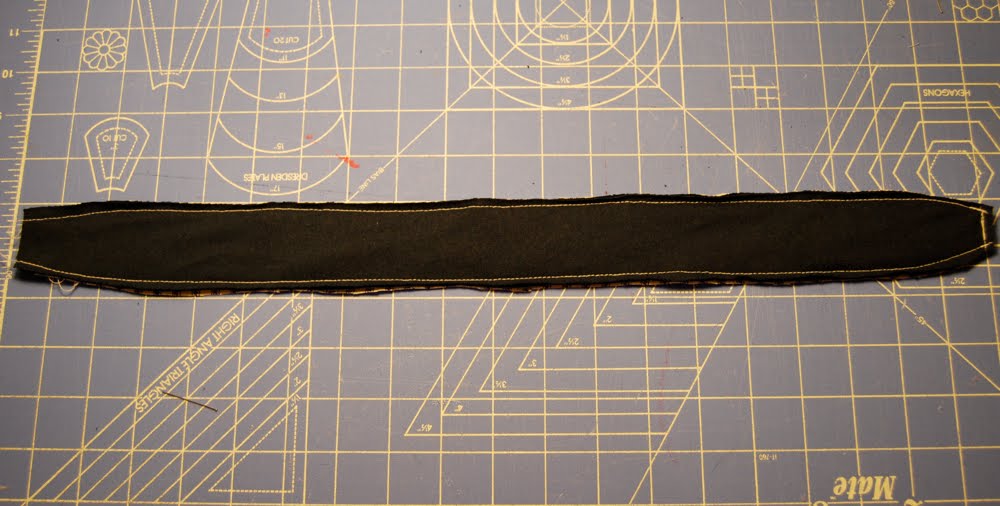
Use the safety pin to turn the whole thing right-side-out. Now wrap it around your head and measure how much elastic you’ll need to cut. Leave a seam allowance, and stick the elastic into the opposite end, turning the edges of the fabric down into the headband with it. Sew across the edge, enclosing the elastic and the raw edges.
Now your basic headband is done and you are ready for the fun part: embellishment! I made a simple flower out of the T-shirt and affixed it with a safety pin so I could change it out for other embellishments later.
What’s your favorite T-shirt refashion? Of course, there are tons of tutorials out there for altering a T-shirt to make it an even cuter T-shirt, but I had fun thinking of other things to make. I wanted to make something different for each member of our family, but so far I’ve got nothing for hubs. For now he’ll just keep wearing it as a T-shirt :)

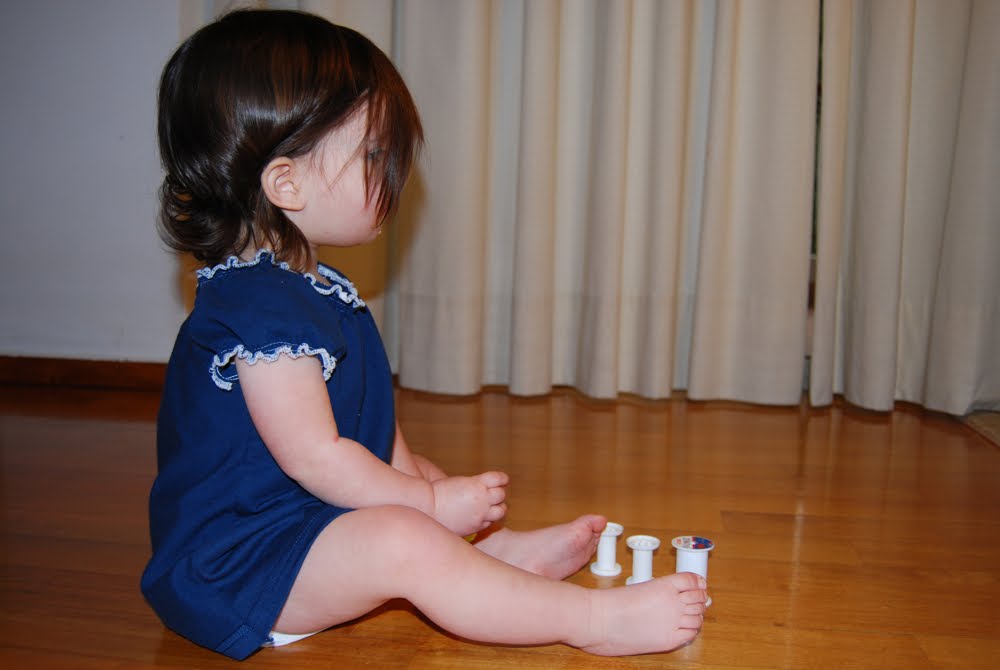
That is adorable. (I love the photo of her from the side, playing with the spools.) I bet she loves how comfy it is!
too cute – glad you found out to iron your shirring. it really does make ALL the difference and especially on knits/jersey-stretchy fabric. I have had some non-stretchy fabric shirr beautifully without the iron-after technique… it looks kinda fun :)
your doll is a DOLL in that dress :)
Awww, I am so happy I read this. I tried to make a headband the other night and I had such a hard time trying to turn it right side out after sewing. Thanks so much for the tutorial! (-;
I’ve turned tons of the hubs T’s into gauchos for me! Perfect for lounging around the house. I took a 6 pack of the mens Ts from Costco, and Tie-Dyed them pink. It’s basically the same as doing baby or toddler pants, just bigger!
Really cute, thanks for the peasant link. And um I really love your header! Who stitched it?
adorable!! I just love the A-line shape!
i’ve made peasant tops for myself from boxy t-shirts, without re-setting sleeves. two cuts, serge the edges, shirring, DONE. it’s a little addicting….. :o)
Just popped in to give you an award, thanks for the great posts. You can pick up your award here
http://maryjanesandgaloshes.blogspot.com/2010/01/my-first-blog-award.html
yes, yes… I know the blog is about the project and the dress and hairband are cute…. BUT… OH.MY.GOODNESS is Littl’ Miss P so big and SO cute!!! Miss you guys.
Your husband must be soooo proud of you and the many ways you save him money. What a godly wife you are!
Pattyjo
I love this and am very inspired. Thanks.
Awesome! So simple and still girly. Love her hair, and those squeezy cheeks!
Hello! This is adorable!! I am so not crafty or skilled in sewing in any way. I am looking for someone to “upcycled” my 18 month old daughter’s daycare tshirt for their spirit days at school. Would you be willing to alter a tshirt for us if I could send it to you? How much would this cost? (Fingers crossed you are interested…….)