Due to a few requests and questions, I thought I’d post a couple pictures to help you guys out if you want to make a cut-out on the back of your dress like this:
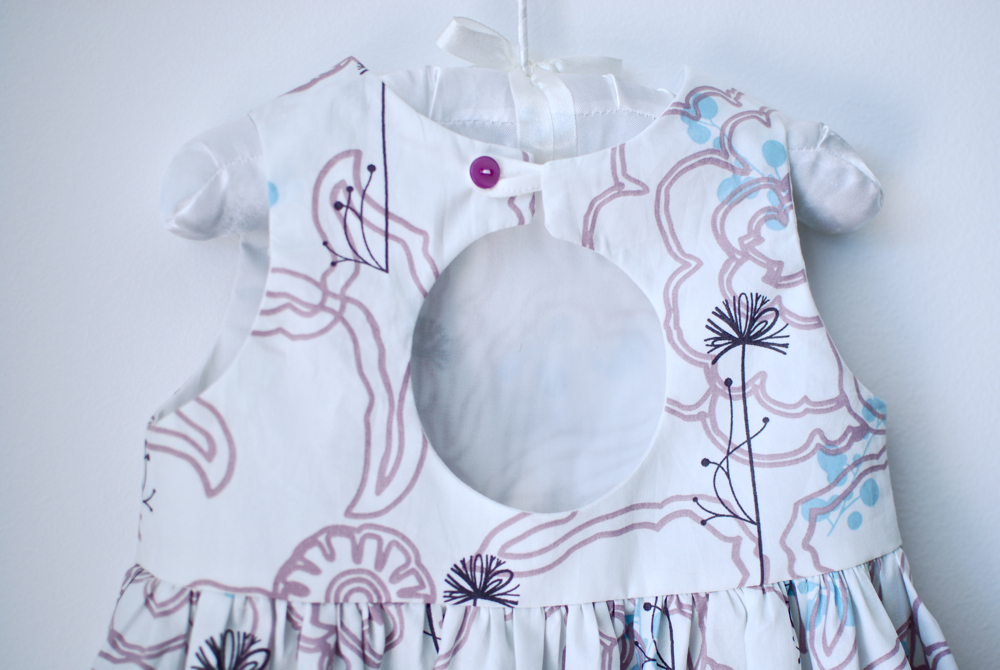
Or you can go way overboard like I did here:

And remember you’re not limited to a circle. You can do a tear drop, oval, heart, square, triangle, or kangaroo.
Just remember that if this is the sole opening in your dress, you need to make sure the bodice is wide enough to slide over your body. This generally works if your bust and waist measurement are the same, ie: if you are a child. Or me. Also, you’ll have to use this method of facing if your garment is sleeveless.
Or, you could make a keyhole in the back and then run a zipper down the side seam if you want to do this for an adult garment. In that case, you could use this tutorial for facing if your garment is sleeveless. Lots of options here! On with the tutorial already!
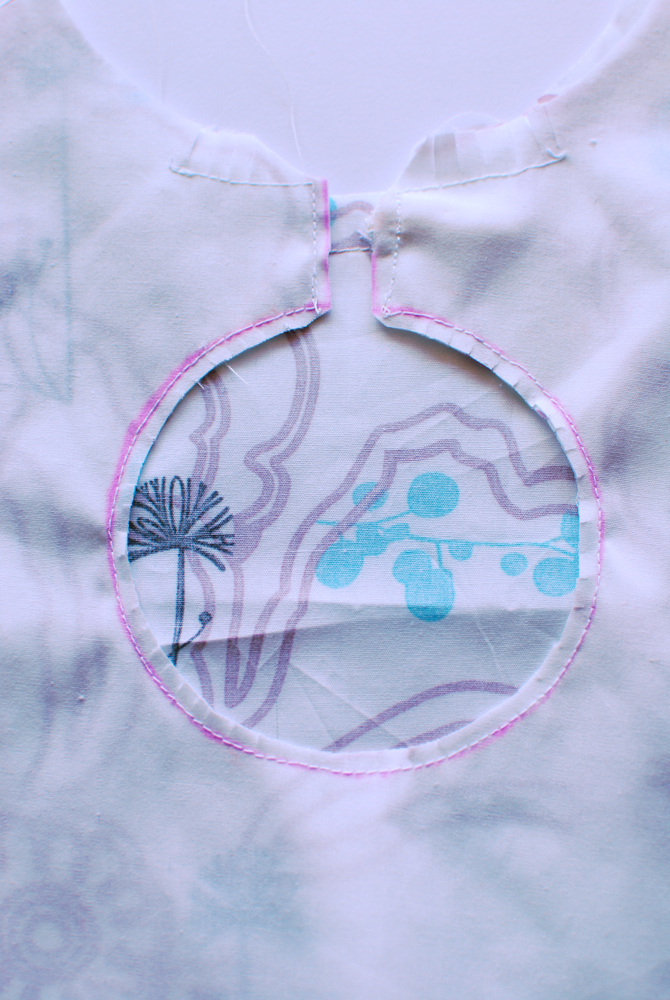
First assemble your bodice and bodice facing/lining. Put them right sides together. On the wrong side of the facing, draw a short line straight down from the neckline. It doesn’t have to be centered – this is another place where you can have fun with the design. The line just needs to be at least an inch to allow for seam allowances and loop insertion (for the button and loop closure at the top).
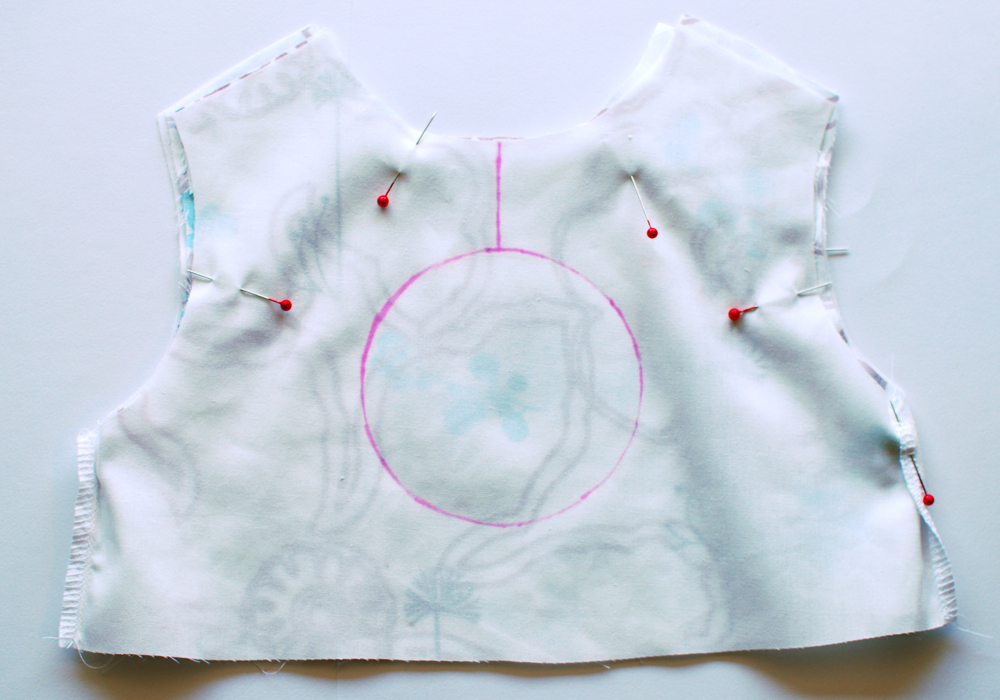
At the end of your short line, draw your shape. In this case, a circle made using a small bowl. If you want to do a big giant cut-out back, just make sure you stay at least an inch away from the bottom of the bodice and side seams to allow for seam allowances.
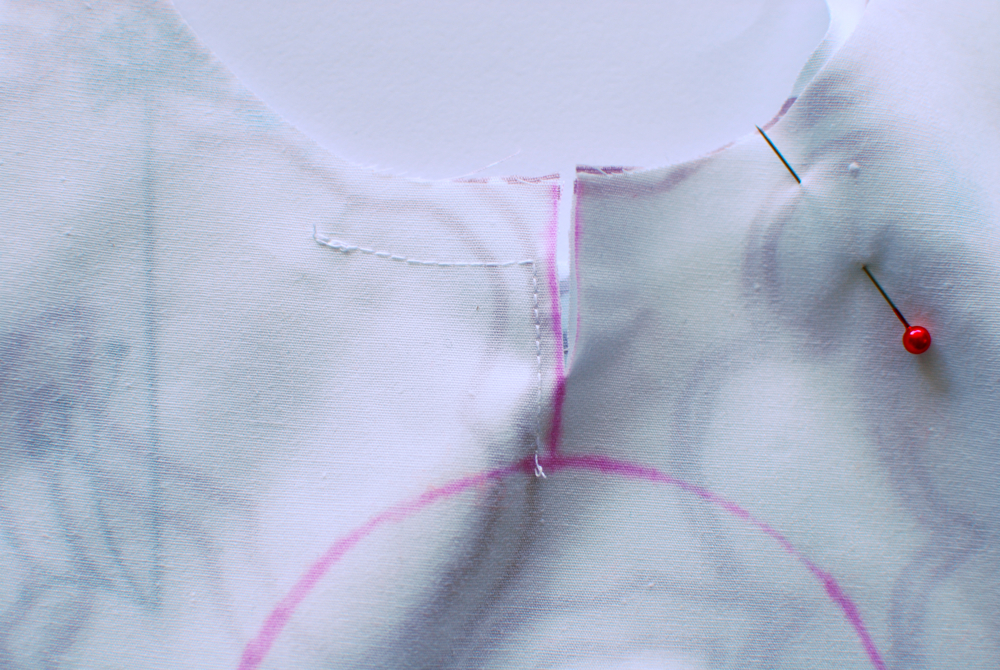
Then, as you are sewing around the neckline, sew down 1/4 inch from the line you drew. Sew all the way to the shape, and then sew directly over your shape.
Once you get back to the top, sew back up to the neckline 1/4 inch away from the line again, and make sure to insert your button loop between the bodice and lining as you go. (the loop goes between the fabric layers, the raw edges stick out.)

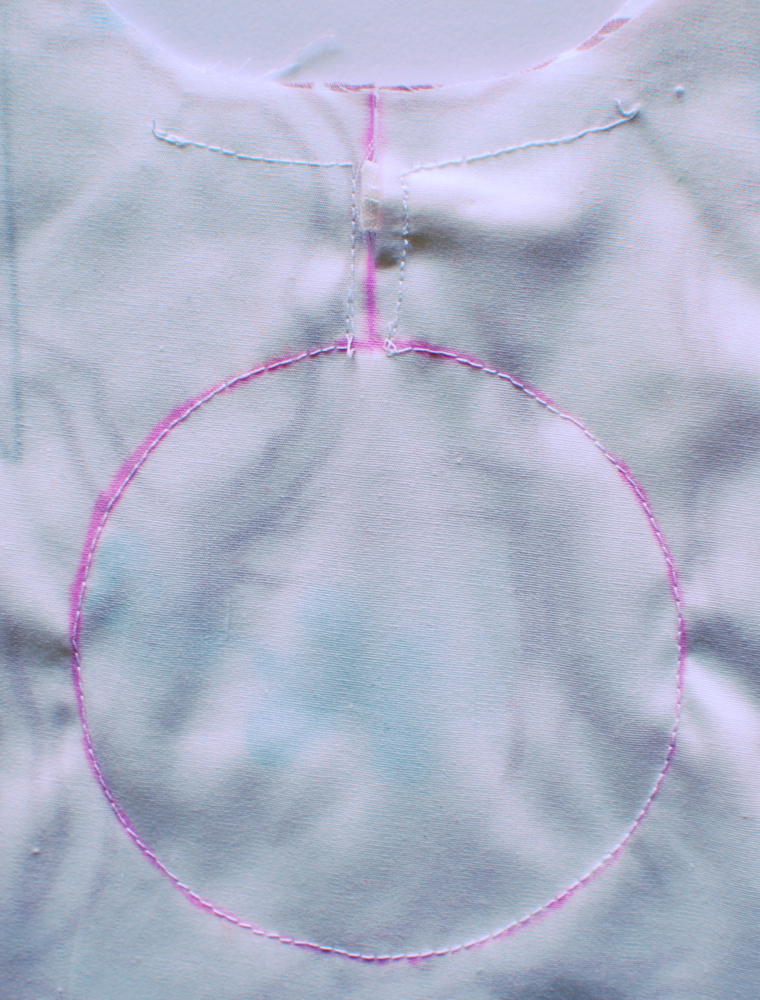
Then cut down on your line and within your shape. Stay about 1/4 inch away from your seam inside the shape. Clip any curves.
When you turn the whole thing right-side-out, you’ll have this. Add a button and then your keyhole and closure are done! Yay you.

I was hoping you would share :) Thank you!
Thanks for sharing, I’ve been dying to do this!!!!
What a timely post, I was trying to remember who had posted the open backed dress and had fired up my computer to find it. I love the idea of using different shapes! Thank you.
Wow! How clever! Thanks for illustrating how easy it really is to get a cut-out. My tiny little niece may be the next girl sporting a fabulous keyhole dress.
You absolutely did not go overboard with yours. It is adorable and I love it. There’s nothing mature about it. Girls wear halters and backless dresses all the time — they are little girls!
kangaroo…silly. a Koala would be much more sophisticated.
;)
Love it!
Very very cute! Great job and thanks for the tutorial!
Sorry I didn’t comment on your last post.. This is VERY cute. I really like it a lot.
What a great tutorial! And we are on the same page! I just bought a pattern with a cut out in the back from Fairytale Frocks and Lollipops! It may be my daughter’s Easter dress if I ever get on the stick and get going on it. If I get this one right I might try a zebra next, stripes and all… You did a good job Adrianna.
This is so awesome!! I linked to your tutorial on Craft Gossip Sewing:
http://sewing.craftgossip.com/tutorial-keyhole-cutout-bodice/2011/04/10/
–Anne
i love all of your ideas. I don’t get to use many of them as I have two little boys. Last spring I was nursing a baby instead of crating. So I saved your easter egg tshirt idea for this year. If you have a minute check out my boy version!
http://scrapbuddies.blogspot.com/2011/04/easter-shirts.html
thanks again!
Hi, I’ve linked to your tutorial: http://spiegelstiksels.blogspot.com/2011/04/experiment.html
This is amazing, I have just learned how to make bodices though I used a full button closure so I reckon I might try this next!! Lovely effect!!!
bello mi piace … lili
Thank u for this tutorial and the other on full bodice lining.
I was looking for this tutorial. Do you finish the shoulders as the last step? I mean after finishing the cutout. Thank you.